Content
-
1 Arrangement of the dining area
- 1.1 Preparing the loggia for joining
- 1.2 Interior design
-
2 Arrangement of the working area
- 2.1 Transfer of communications
- 2.2 The location of the stove
- 2.3 Exhaust equipment
- 3 conclusions
Among the many alterations of loggias and balconies, which consist in joining their space to living quarters, the arrangement of the kitchen will be perhaps the most radical way to expand the living space.

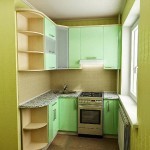
Self-alteration of the loggia into the kitchen
To decide to transfer the kitchen to the loggia, you should be guided by a sober calculation, since initially this space was not at all designed for such experiments.
But this does not mean at all that you cannot do this, on the contrary:
- By transferring some of the functions of the kitchen to the loggia, it will be possible to free up space for the working area;
- If it is technically possible to move communications to the loggia, you can equip a working area there, freeing up the kitchen space for the living room;
- Just increase the area of the room if your house is allowed to demolish the window sill area and dismantle the door threshold.

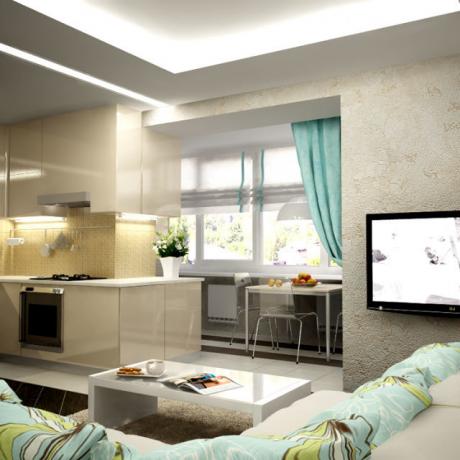
The converted loggia in the kitchen becomes a full-fledged part
A word of caution: In most homes built in the 70s, 80s and 90s, radical renovation measures are unacceptable. It is important, before drawing up a repair plan, to visit the office of the balance holder at home in order to agree on all technical issues, including taking the kitchen to the loggia.
Arrangement of the dining area
Consider the most technically simple interior of a kitchen with a loggia:
- The balcony block (window and door) is dismantled;
- The windowsill area is played out as a dining area or bar counter;
- The loggia itself is insulated and glazed;
- Its space is used as accommodation for households and guests during a meal;
- The end seats of the loggia are occupied by cabinets or shelves for storing kitchen utensils.

A kitchen with a loggia increases the area and creates space for dining and storage
This method is considered appropriate for most houses, where it is forbidden to dismantle the wall under the windowsill, since it is part of the supporting structure. The existing prohibitions may also include the threshold zone, which also cannot be demolished.
Advice: if the threshold cannot be touched, then it is necessary to raise the floor height on the loggia to make the use more comfortable. It is best to raise the floor using a timber frame that is being constructed, filled with expanded clay and sheathed with thick plywood.
Preparing the loggia for joining
Having decided to expand the usable area due to the loggia, it must be made comfortable and functional (see also the article on combining kitchen and loggia).
And for this you have to:
- Glaze the loggia using modern double-glazed windows;
- Insulate walls and floors;
- Equip the loggia with heating devices.

The process of glazing and insulation of the loggia
Depending on the reconstruction budget, you can choose 2 glazing options:
- To entrust the work to companies engaged in the manufacture and installation of window frames;
- Purchase ready-made window blocks in a hardware store, whose dimensions are close to technical measurements, and install them yourself.

When glazing a loggia, the construction of a retaining wall may be required
Advice: consider the glazing and insulation process as a single stage, since the installation of window blocks has its own characteristics. In particular, the construction of a retaining wall may be required, which will also play the role of an insulating element, so its location should be carefully verified.
On the issue of insulation, options are also possible:
- Use of foam and wooden lathing;
- Use of mineral wool and metal profiles.

Do-it-yourself insulation of a loggia with mineral wool
In the future, the foam is plastered, and the mineral wool is sewn up with moisture-resistant plasterboard.
The resulting surfaces are ready for the final coat:
- Wallpaper;
- Ceramic tiles;
- Paintwork;
- Sheathing with plastic panels, etc.
Interior design
This is the most creative stage of the entire reconstruction, which will determine how to make a kitchen from a loggia (Read also the article about kitchen combined with a balcony).
You can beat the windowsill area in different ways:
- Make it a work surface for cooking, for example, in the form of a common countertop;
- Use as a place for installing household appliances (microwave oven, electric kettle);
- Create a bar counter or a full-fledged dining area on its basis.

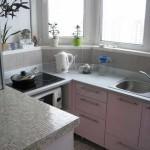
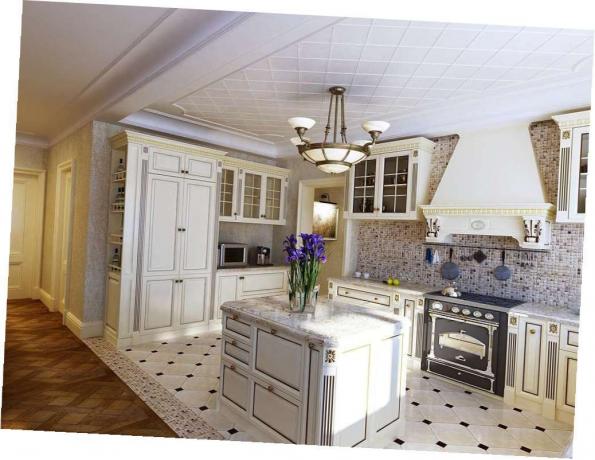
One of the options for how to convert a loggia into a kitchen
If the type of house allows you to completely dismantle the window sill area, then there are much more options for arranging the interiors:
- By expanding the passage in the kitchen, more lighting will be added;
- The attached part will visually enlarge the entire room;
- Finishing the loggia opening will allow you to zone the space;
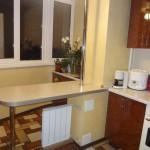
- A similar zoning method will give the arrangement of the floor on the loggia.

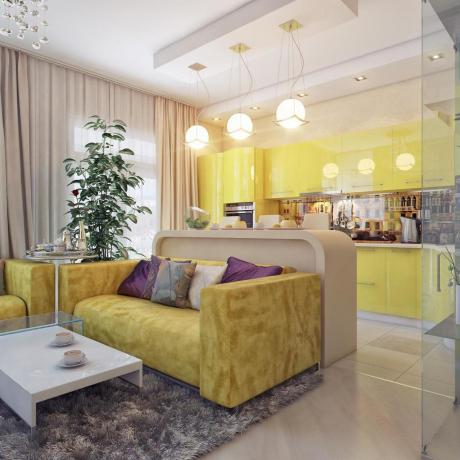
Removing the dining area to the loggia
Also, the transfer of household appliances influences the future interior, because:
- The washing area also includes the installation of a dish dryer;
- A gas stove implies proximity to the storage of semi-finished products (cereals, spices) and kitchen utensils (dishes and accessories);
- A refrigerator or freezer makes it possible to always have perishable food on hand.

Refrigerator on the loggia
Advice: when installing the refrigerator, follow the same rules as when using this device in a residential area.
Arrangement of the working area
The situation is more complicated with how to make a kitchen on a loggia, implying:
- removal of communications outside the premises;
- the location of the sink and hob on the loggia;
- arrangement of hoods and ventilation ducts above the stove.

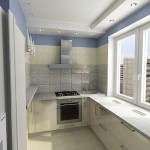
Photo of the implementation of a full-fledged kitchen project on the loggia
Transfer of communications
The most correct option for transferring communications is considered to be their location along the wall, similar to the previously existing option (see also article Kitchen on the balcony - reality or illusion).
In other words:
- The sewer pipe is carried out to the loggia by increasing its length with additional sections;
- With the help of metal-plastic pipes, hot and cold water is supplied to the installation site of the sink in the kitchen;
- When using a gas stove, it is best to provide for its connection using a flexible hose;
- When using an electric hob - lead the electric cable to the place of its installation and provide a grounding of the entire device to protect against electric shock.

Lining of communications to the loggia
Tip: Flexible hoses can be used to drain the drain under the sink. With their help, it is easy to choose the desired angle of inclination.
The location of the stove
The kitchen stove makes the highest demands on the reconstruction of the loggia.
The fact is that its location must comply with the rules of SNiP, namely:
- There must be a shut-off valve on the supply pipe;
- The stove itself must be equipped with a device to turn off the burners;
- In the area of its location, adjacent walls must be plastered;
- The distance of the gas burners from the window must be at least 30 cm (so that the gusts of wind do not extinguish the flame).

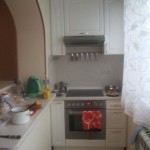
Installing a gas stove requires compliance with SNiP
For reference: the factory instructions will inform you about all the features of the gas stove. True, this applies only to those plates that were purchased recently.
Exhaust equipment
This stage of turning a loggia into a kitchen is mistakenly ignored by many homeowners. The reason for this is excessive self-confidence that the volume of the room increased due to the addition of the loggia will contribute to better air circulation.
In fact, this is not the case, because:
- The building materials of the walls and ceiling of the kitchen differ from the materials used for the reconstruction of the loggia insulation;
- They have different thermal conductivity and vapor permeability.
That is why it is necessary to equip the place above the hob with a modern hood.
Moreover, the price of the issue is low, it is enough only:
- Purchase a cooker hood;
- Bring the ventilation duct out into the street;
- Equip it with a protective dome to protect it from atmospheric precipitation.

The check valve will allow you to control the operation of the ventilation duct
Tip: a check valve on the hood, which prevents the uncontrolled flow of outside air, will also be appropriate.
conclusions
We hope that this article will help you understand the main stages of joining a loggia to the kitchen. It will also guide you on the sequence of actions for transferring communications and give a visual representation using the presented video material.
Gallery