Content
-
1 Fastening hinged elements of kitchen furniture
- 1.1 Fastening with canopies (ears)
- 1.2 How to install hooks under awnings for fixing in a concrete or brick wall
- 1.3 Fastening of lockers by means of the "hinge-mounting rail (rail)" mechanism
- 1.4 The principle of operation of the mechanism "hitch - mounting rail"
- 1.5 How to install a mounting rail
- 2 The final stage of hanging kitchen cabinets
- 3 So, to summarize the above
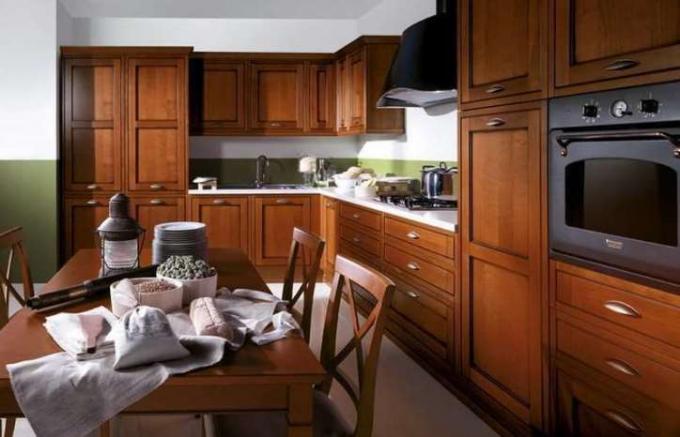
The interior of modern kitchens is impressive in its variety. Some housewives choose a strict, practical style, while others prefer to make the kitchen a place for culinary improvisation.
But when it comes to a headset, most kitchens are similar. Indeed, as a rule, in every kitchen there are such pieces of furniture as a table, cabinets and hanging cabinets. Here we will talk about the latter in this article, or rather, about how to properly hang kitchen cabinets.

Interior of modern kitchen rooms
Fastening hinged elements of kitchen furniture
Often, this element of a kitchen set acts as a small pantry. Various canned food, seasonings, cereals, etc. find their place in it. However
kitchen cabinets also great for storing various kitchen utensils, which are of considerable weight.Obviously, the fastening of this type of furniture is very important, because hardly anyone can be pleased with the pogrom from its fall. When choosing what to hang kitchen cabinets on, all possible options should be taken into account.
Fastening with canopies (ears)

Attachment canopies
The simplicity of this mounting method makes it possible to avoid serious investment. The awnings are attached to the cabinet with 3 self-tapping screws (the 4th hole, as a rule, is not used).
It is necessary to install a hook in the wall for each canopy. You can, of course, do with dowels with screws, but in this case, there is a possibility that the ears will simply jump off them.
How to install hooks under awnings for fixing in a concrete or brick wall
To carry out this action, we need an electric drill or a hammer drill (Learn about how to hang kitchen cabinets).
But even if you are “you” with these tools, the following tips will come in handy:
- so that the drill does not "walk", small holes should be made in the places for drilling (a hammer and a thick nail will help you with this);
- if the drill goes well, very tight, you can resort to the help of all the same hammer and nail, but you should not focus on them, because we are drilling, not punching (a couple of blows may be quite enough);
- if the wall crumbles during drilling, you can use a smaller drill. After the hole is drilled with the "auxiliary drill", you should drill again, but with a drill of the required diameter.
So, when we got acquainted with the nuances of working with a puncher, we can proceed directly to installing the hooks.
Here are the instructions for this step:
- we drill holes for dowels in the wall;
- insert the dowels (dowels with hooks are optimal);
- we screw in the hooks.
In contrast to the simplicity of this method, it is impractical. It happens that the dowels fly out of the holes (depending on the wall).
But the main disadvantage, perhaps, is the impossibility of adjusting the cabinets. If a hanging set includes several elements, then it is very difficult to achieve their ideally even position in relation to each other.
We have already determined that hooks need to be installed before hanging the kitchen cabinet on the wall, but how to do it correctly?
To begin with, draw a flat horizontal line on the wall. To do this, it is better to use the level, since if the floor or ceiling is taken as the zero point of reference for the distance to the line, the result can be upset. Unfortunately, the ceiling and floor are often uneven.

Draw a horizontal line
After the line is drawn, we proceed to measure the distance between the ears. To do this, you can use an ordinary ruler.
Useful advice! Instead of a ruler, you can use a strip of paper or tracing paper. It must be attached to the back of the cabinet and mark the edges and holes of the ears. Then the data marked on paper should be duplicated on the wall.
When the measurements are made and the hooks are installed, you can start installing the cabinets (shelves and facades must be removed). It is not easy to do this with your own hands, so installation wall cabinets for the kitchen it is best to exercise with an assistant. It is important that the top edge of each cabinet matches the horizontal line drawn on the wall.
Fastening of lockers by means of the "hinge-mounting rail (rail)" mechanism
This method of fastening is more practical than the previous one, but its price is an order of magnitude higher.
The advantages of this mounting method:
- the ability to adjust the position (left-right, up-down);
- resistance to heavy loads (the weight is distributed evenly along the entire length of the bar);
- the ability to fix the bar with the desired number of fasteners (the bus has a large number of mounting holes).
The principle of operation of the mechanism "hitch - mounting rail"

Hinge for mounting rail
As you can see in the photo, the hinge plate has a hook that "clings" to the mounting rail. The canopy is screwed to the inner side wall of the cabinet, and the hook comes out of the back wall (for this, you must first make a hole in it). Remember that the mounting rail is located below the edge of the cabinet to avoid any unpleasant surprises.
With this method of installation, the question of how to evenly hang the kitchen cabinets will not arise, since the ability to adjust their position allows you to eliminate all minor flaws.
How to install a mounting rail
First of all, you need to draw a flat horizontal line (the level will help you with this). The mounting rail will be attached along this line. Next, you should attach the rail to the wall (horizontal line - top of the rail) and mark the places for drilling holes.
In the next step, we drill holes and attach the bus to the wall.

Mounting rail for attaching the add-on modules
Useful advice! In order to save money, you can attach the mounting rail in pieces of 10 cm (only where the hinges are located), but only if the wall is strong enough.
Now that everything is ready, you can mount the cabinets on the rail (it is better to remove the shelves and facades). At the final stage, it is necessary to align all the modules (again, you cannot do without a level). This can be done with awnings.
The final stage of hanging kitchen cabinets
When the modules are already hanging, they should be connected together with furniture screws (the method of suspension does not matter). To do this, it is necessary to pre-drill holes in them (an electric drill is ideal for this action). For a tighter joint of the walls, during the connection, you can use various clamps.
And finally, we fasten the decorative cornice (if there is one), insert the shelves and install the facades.
Note! Before you hang the cabinets in the kitchen, you need to determine the height of their location. As a rule, the optimal distance from the worktop to the hanging set is 60 cm.
During installation, this distance should be maintained (it is enough for using household appliances), but it is also not worth fixing the cabinets too high. The main thing in this matter is, perhaps, practicality. Mount the headset at a height so that you can reach everything you need from the top shelf without using foreign objects.
So, to summarize the above
Once again, let's go through all the points of the list of necessary actions:

The question of how to properly hang cabinets in the kitchen will no longer bother you, because now you are fully aware of this.
- Determine the location of the hanging headset;
- We determine the optimal height;
- We install mounts on the wall and cabinets;
- We remove shelves and facades;
- We fix and adjust (if possible) lockers;
- We connect all the elements of the hanging set together;
- We attach a decorative cornice (if there is one);
- We install the shelves and facades in place.
If you have any questions, you can find answers to them in the video related to this topic and posted just below on the page. Having theoretical knowledge and seeing their practical application, you will undoubtedly cope with the work of installing a pendant headset with your own hands.