Content
- 1 Features of corner structures
-
2 Cabinet shape
- 2.1 L-shaped pedestals
- 2.2 Attached structures
- 2.3 Trapezoidal analogs
-
3 Preparatory stage of assembly
- 3.1 Product planning
- 3.2 Tools and materials
-
4 How to make a corner module yourself
- 4.1 Assembling the curbstone
- 4.2 Assembling boxes
- 4.3 Installation of modules and sink insert
- 4.4 Fastening countertops and doors
- 5 Conclusion
If the kitchen does not have a very large area, you have to pay especially close attention to the functionality and optimization of the space of this room.
Corner kitchen cabinets, in this case, are the best furniture option, because make it possible to maximize the use of every centimeter of its external and internal space.
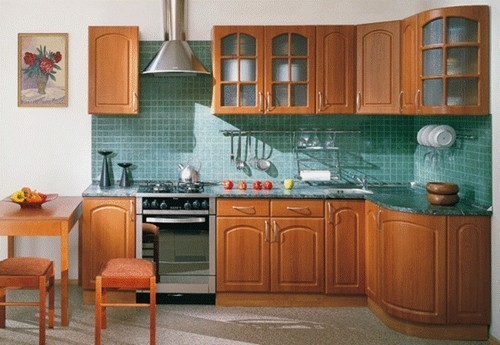
Corner cabinets are the perfect solution for a small kitchen.
Features of corner structures
The standard usually used in the manufacture of kitchen furniture depends on parameters that affect the height of the cabinet already assembled.
The most important indicators of the lower corner cabinets are as follows.
- Base width. It is traditionally equal to 10/12 cm. It doesn't matter whether the piece of furniture is equipped with legs or a solid stand, this parameter hardly changes.
- Normal height most kitchen cabinet is 70 cm. But when assembling it yourself, you should take into account the peculiarities of using the kitchen corner. So, when you plan to put a sink in it, its height must be made slightly lower than that of the pedestals intended for the working area. This will make it easier to wash the dishes.
- Tabletop height spread - from 2 to 4 cm. The final figure depends on the materials used and their structure.
- As a result, the average height of the finished product, in most cases, is 84/85 cm.
- The most common side length of such a cabinet is 90 × 90 cm. The width depends on the same parameter of other headset modules.
Note!
The optimal distance between the lower and upper pieces of furniture is 60 cm.
The standard height that a wall-mounted corner cabinet for the kitchen has is 70 cm, it is most convenient for people of average height.
Cabinet shape
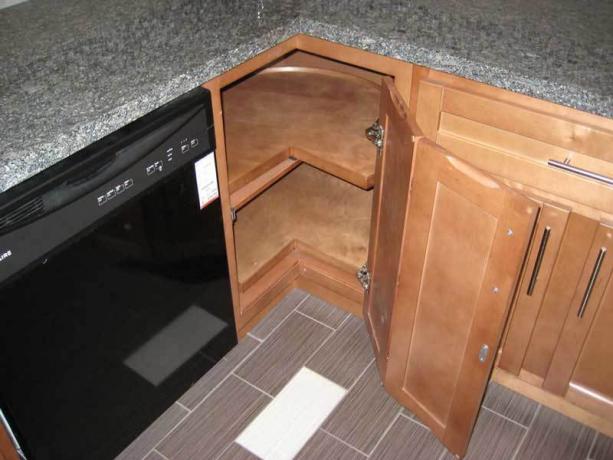
L-shaped wardrobe.
After you decide on the dimensions of the product, you will need to select its configuration. The most common are three of them.
L-shaped pedestals
This design is very popular because comfortable.
- Thanks to the use of "trolleybus" doors, the space inside such a bollard is clearly visible and convenient to use. This piece of furniture is best equipped not with ordinary shelves, but with a carousel with a maximum rotation angle.
- The L-shaped corner cabinet in the kitchen significantly saves its space.
- Such a cabinet is perfect for placing a sink in it. Why this is important - in almost all apartments built in Soviet times, water and sewer communications are in the corner. Therefore, in order not to lengthen pipelines, etc., it is best to place the sink in this place.
Attached structures
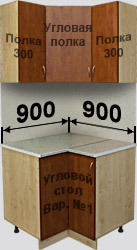
Attached corner modules.
With this configuration, another cabinet is added to the blind cabinet located in the corner, which has a door at an angle of 90 °. This is not very convenient, since you will only have access to the inner space of the cabinet with a door.
Such a corner cabinet for a sink in the kitchen can also be used. Then it is best to place the plumbing in a blind module, and in the accessible part to mount drawers or carousels for kitchen utensils, detergents, etc.
Note!
This option has a significant disadvantage - the difficulty of accessing the wilderness.
When a breakdown occurs, it will be difficult for the plumber to repair the plumbing or sewerage system.
If the sink is placed in an accessible part, then the closed module will be empty.
Based on this, it is best to install the sink in a different place in the kitchen, and use the cabinet for something else. You can put a cutting board, microwave oven on it or equip an area for preparing food.
The interior space can be equipped with a carousel with a small degree of rotation or pull-out baskets.
Trapezoidal analogs
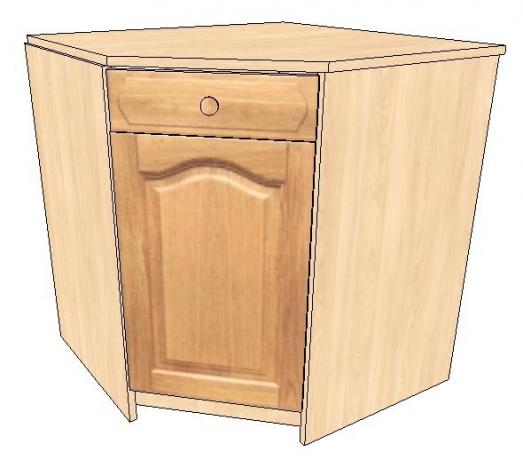
Trapezoidal bedside table.
This design of the corner cabinet has a geometric shape of a trapezoid and has one door. On both sides, other kitchen units can be docked to the cabinet. Trapezoidal cabinet for kitchen looks original and stylish (especially in large rooms).
However, its use is not entirely rational.
- First, the straight door makes it difficult to access the area near the wall. Therefore, the best option for using such a cabinet is to install a microwave oven or other kitchen appliances on it.
- Second, by installing the carousel inside the cabinet and the sink on top of it, you increase the possibility of frequent plumbing repairs. A round carousel made of strong steel will damage it due to constant friction.
Preparatory stage of assembly
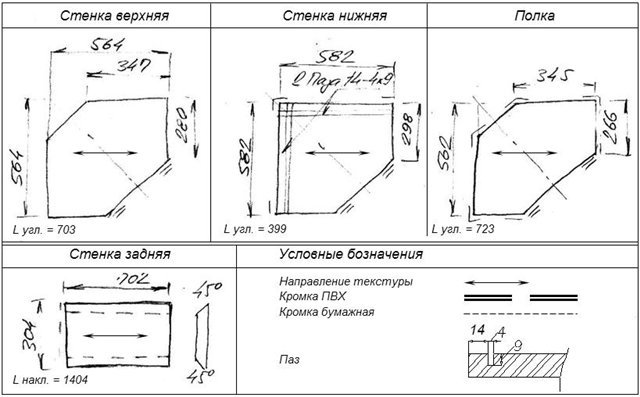
An example of a drawing of a cabinet.
Before you make a corner cabinet in the kitchen, you need to design it.
Product planning
- Determine for what purpose the piece of furniture will serve - as a base for a sink, an area for preparing food or placing kitchen appliances.
- Calculate the overall dimensions of the cabinet, as well as the similar parameters of its individual elements.
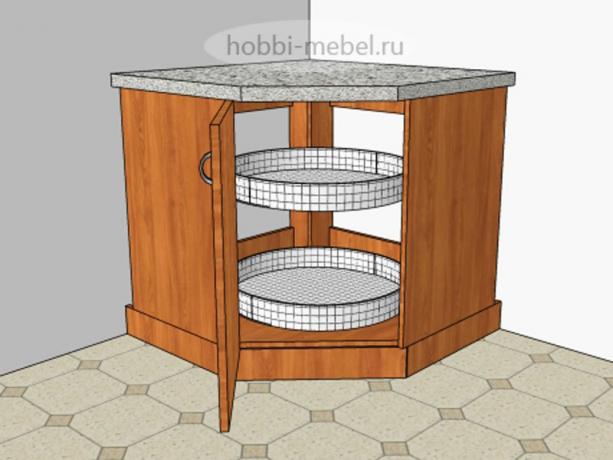
Carousel shelves.
- Select the type of cabinet filling. They can be ordinary shelves, drawers or baskets, a rotating carousel. Decide on the number of shelves and the distance between them.
- Think over the design of the product and choose its color.
- Next, plan what material to make the cabinet from.
Note!
The best option is to use laminated chipboard (chipboard), 16 or 18 mm thick.
They are moisture resistant, easy to wash, have aesthetics, and their price is not so high.
- Based on the results of the design, make a drawing or, as the furniture makers say - detailing, pedestals.
Tools and materials
To work you will need:
- laminated chipboard sheets;
- edging material for the visible ends of the curbstone, it is best to use "front" PVC, 2 mm thick;
- euro screws (confirmations) having dimensions of 40 × 4.5 and 50 × 7 mm;
- self-tapping screws;
- dowels;
- suspensions;
- furniture screed;
- sealant;
- fittings - handles, hinges, drawers, etc .;
- emery cloth;
- drill and drills for wood, with a diameter of 4.5, 7 and 8 mm;
- hex wrench;
- roulette;
- level.
How to make a corner module yourself
Now you can start making parts of the described piece of furniture. It is clear that they will need to be cut from a whole chipboard slab. It should be noted that it is quite difficult to do such work with high quality at home.
The fact is that if you cut sheets with a hand-held power tool, it will chip off the laminate. In addition, the device will vibrate in your hand and you will not be able to make your cuts perfectly straight.
Note!
Therefore, before you make a corner cabinet for the kitchen, order the sawing of its parts according to the drawing made in a specialized company.
There you can also trim the cabinet elements.
Further instructions for installing the product.
Assembling the curbstone
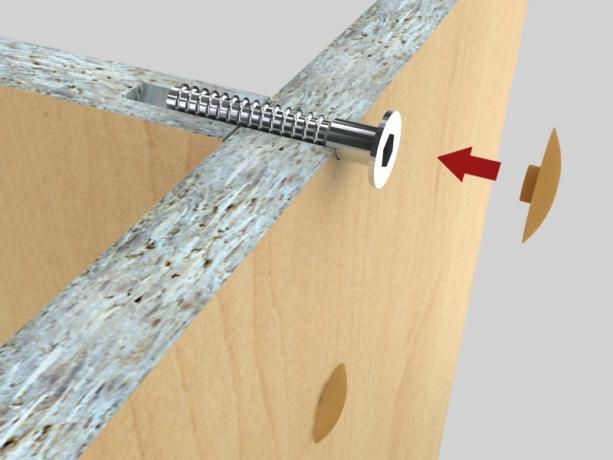
So the parts are fastened together with Euro screws.
- Insert dowels into the pre-made blind holes to pre-fasten the pedestal. They will make it possible to make the frame smoother and increase the strength of the product. Pre-grease the chopiki with glue.
- Having inserted the dowel into the hole of one part, thread its end into the hole of the adjacent element, then firmly squeeze these parts of the cabinet together.
- Further, before you finally assemble the corner kitchen cabinet, make sure that all its parts are mounted exactly.
- Then screw the confirmates with a hexagon into the location of the dowels.
- After that, if legs were provided for the cabinet, screw them into place and adjust in height.
- Then screw the cross-shaped fasteners for the doors to the sides of the cabinet with two self-tapping screws, pre-drilled holes.
- Secure the rails under the drawers to the side walls.
- After the frame is assembled, nail a sheet of fiberboard onto its back wall.
- If you are making a corner kitchen hanging cabinet, you need to fix the hardware on it for fastening to the walls. Best of all, if these are adjustable suspenders.
Assembling boxes
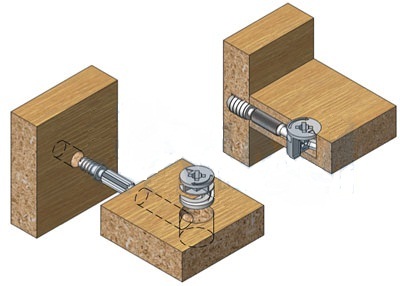
In the photo, fastening with eccentric couplers.
- Fasten the sides of the drawers with screws. After collecting three walls, insert pieces of fiberboard cut to size into their bottom.
- Next, secure the drawer fronts. Use eccentric ties for this purpose. First, screw their screws into the facade, then insert the side with the head into the bushings on the sides of the boxes. Before that, make nests in them. Insert the bushings into the holes and turn them so that they grip the screw heads.
- Further, making a corner cabinet in the kitchen with your own hands, screw roller guides onto the lower corners of the drawers.
If you are assembling an oven, then the above step is not necessary, because this item has no boxes.
Installation of modules and sink insert
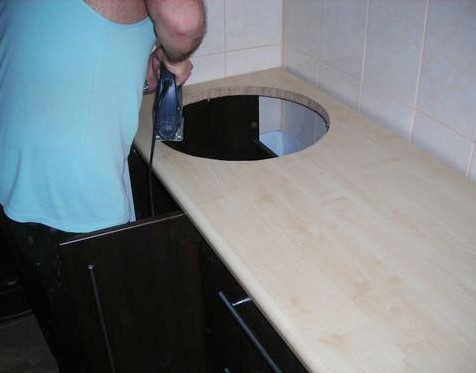
Cut the hole for the sink carefully.
Now you can place the piece in the corner. If the lower module is attached, first install the cabinet with the sink, remembering to make a hole in it for pipes. Next, put a cabinet with a door.
Then the lockers must be tied together with furniture inter-sectional ties. For this, four fasteners are enough.
If you are placing a corner kitchen cabinet under the sink, you will need to make a hole in the countertop for the sink. Place it on the upper plane of the curbstone and mark it. Then drill a hole on the line large enough for the jigsaw file to enter.
After that, cut out the socket for the sink, insert it into the countertop and screw it with the special fasteners that come with it. Then seal the cut line with sealant.
Fastening countertops and doors
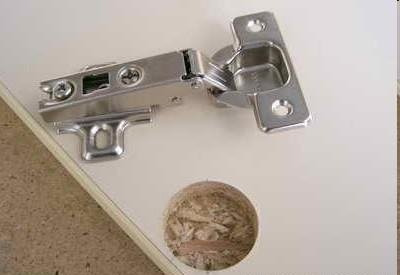
Hang the doors on such hinges.
- Carry out the markup kitchen countertops, not forgetting to add a 1/2 mm overlap from the edges. If the walls are uneven and a gap remains between them and the curbstone, it can be hidden with a baseboard.
- Saw off the countertop with the jigsaw to the marked dimensions.
- To secure, set it in front with an allowance of about 3 cm, so that the edges are at the same level. Fix it from below with self-tapping screws.
- When the corner cabinets for the kitchen are assembled, the joints of their upper surfaces with other furniture modules are closed with special metal strips. Screw them onto the ends of the countertops with small screws.
When a corner kitchen cabinet is mounted, its assembly ends by hanging the doors.
- Place them on the cruciform plates that were screwed on at the beginning of the work. Then tighten the bolts.
- After closing the doors, check their position. If necessary, adjust the position of the blades vertically and horizontally using two bolts.
Conclusion
As you can see, assembling a bottom or top corner kitchen cabinet is not so difficult. The main thing is to do everything neatly and take accurate measurements. If you are not sure of the correctness of your actions, do not hesitate to consult with knowledgeable people and look at our site.
In the video presented in this article, you will find additional information on this topic.
