Content
- 1 Preparatory stage
-
2 Furniture assembly
- 2.1 We collect kitchen cabinets
- 2.2 We collect pull-out cabinets
- 2.3 Wall cabinet
-
3 We install furniture
- 3.1 Installation of hanging modules
- 3.2 Bottom assembly
Installing a kitchen set with your own hands will not only significantly reduce the cost of re-equipping the kitchen, but will also make it possible to ensure the quality of work we need. That is why, when purchasing a kitchen, many of us refuse the services of assemblers and prefer to do all the work ourselves.
In our article we will describe in detail all the nuances of assembling the main elements of the headset, and tell you how to install it correctly.
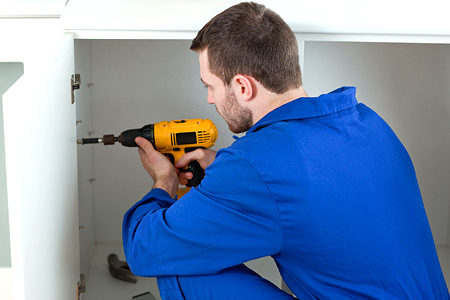
It's easy to assemble kitchen furniture, the main thing is to know how to do it correctly!
Preparatory stage
Before installing a kitchen set, you must carefully prepare and stock up on all the necessary tools and materials:

Assembly tools
- First, we check the complete set of the headset so that at the time of installation we do not accidentally find a lack of any part or fastener element. If something is missing, you either need to buy this item, or contact the company from which we purchased the furniture.
- Next, you need to prepare the entire tool that we will use when assembling and installing the headset. Be sure to check the performance of the power tool, and if we use cordless screwdrivers or screwdrivers, then we make sure that the batteries are fully charged.
- We check the performance of the sockets to which we will connect the power tool.
- We clean the place for assembly from construction debris, take out from the kitchen all items that may be damaged.
Advice! When assembling furniture, there is a risk of damage to the floor covering, so cover it with thick polyethylene, tarpaulin or non-woven fabric.
You should also prepare all the communications required to connect to the headset. First of all, these are water supply pipes, which will be hidden under the sink, as well as a ventilation pipe for connecting to the hood.
When everything is ready, you can unpack the headset and start assembling and installing it.
Read also about how to assemble a corner kitchen set in a small apartment.
Furniture assembly
We collect kitchen cabinets
Installation of kitchen sets is carried out in the following sequence:
- First, we collect all the details of the headset.
- Then - we apply markings on the walls for the installation of hinged modules.
- We hang the upper cabinets.
- We assemble the lower part by connecting the pedestals with the table top.
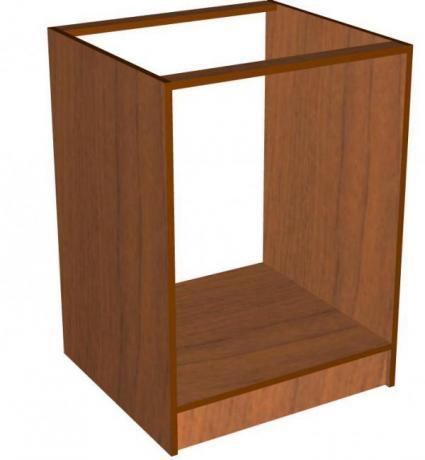
Cabinet body
It is in this order that our instruction will describe all these operations.
We start assembly from the lower pedestals:
- First, using the Euro screws included in the kit, we connect the bottom to the side walls.
- We install the upper planks on which the tabletop will then lie. Checking the diagonals of the curbstone using a tape measure. If the length of the diagonals differs by no more than 1.5-3 mm, proceed to the next operation.
- We fasten the back wall made of a fairly thin fiberboard using small nails or a construction stapler. To ensure the reliability of fastening, the step between the brackets should be no more than 8-10 mm.
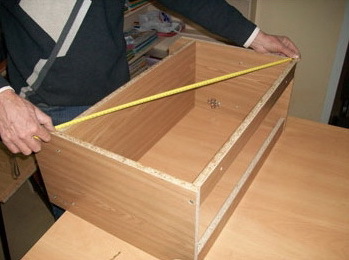
Measuring diagonals
- We install legs on the lower part of the curbstone, securing them with self-tapping screws.
- We install hinges into the previously made nests and fix them with self-tapping screws, after which we attach the lower facades to the hinges.
- Having installed the cabinet in a vertical position, we align the doors using the adjusting screws on the hinges.
The final stage of assembly is the installation of the handles.
Find out also what is best for the kitchen - MDF or chipboard.
We collect pull-out cabinets
The drawer assembly technology is slightly different:
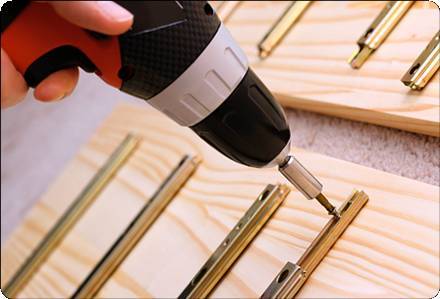
Installing the guides
- First, we apply markings on the side walls for the installation of metal guides.
- According to the markings, we strengthen the guides themselves, after which we connect the side walls to the bottom and upper slats.
- We collect pull-out elements by installing mechanisms on their side surfaces.
Note! The weak point of such boxes is the bottom. It must be fastened with a construction stapler, hammering in the staples in steps of 5 - 8 mm.
- Install handles on the front of the box.
It is better to assemble the cabinet body and pull-out elements not immediately, but only after installing the entire headset. This will greatly facilitate all the manipulations for you.
Wall cabinet
This element is easiest to assemble:
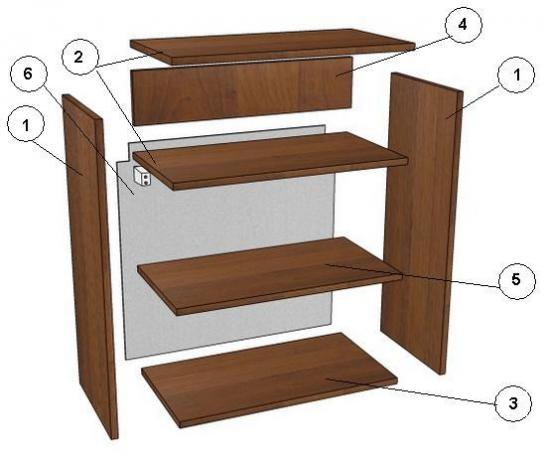
Wall cabinet assembly diagram
- First, we assemble the "cabinet box" by connecting the bottom, top and side walls with Euro screws.
- Then we attach the back wall to nails or staples.
- When the base of the cabinet is assembled, we install hinges into the nests and fix them with self-tapping screws. At this stage, it is better not to hang the doors, as they will complicate the installation of the cabinets on the wall.
- The final stage of assembly is attaching the hangers. When we have coped with this, you can start installing our furniture.
Note! The assembly procedure for all parts is clearly shown in the video, in addition, the sequence of all operations should be indicated in the instructions that come with the headset.
We install furniture
Installation of hanging modules
We start assembling the furniture with the installation of its upper part, since the assembled lower module with the installed tabletop can interfere with the installation of hinged elements.
To begin with, we apply markings on the wall for fastening wall cabinets:
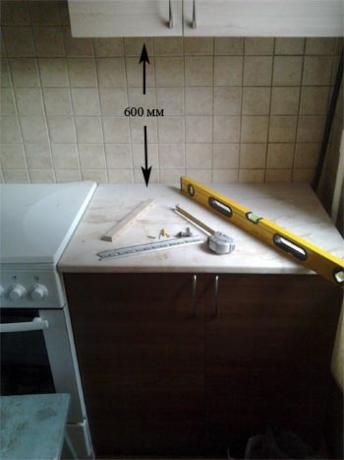
Distance from table top to cabinet
- We measure the height of the countertop and add from 50 to 60 cm to the resulting figure, depending on our height. This will be the height of the lower edge of the hinged modules.
- From the line obtained in this way, we postpone the distance to the attachment point of the hanging cabinet and draw another line. It is on it that we will fix the fasteners.
Advice! If the kit includes a corner cabinet, start assembling the upper segment from it, and only after leveling it, start installing all the other parts.
After marking, we proceed to installing the fasteners:
- If we hang the cabinets on hinge fasteners, then we drill holes with a diameter of 8 mm in the wall, into which we drive plastic dowels.
- We tighten the locking screws with hooks at the ends into the dowels, after which we hang the cabinets.
- An alternative way is to hang the modules on a special metal rail. To do this, attachments of a special shape are attached to the cabinet itself, which cling to a metal profile fixed on the wall (see. Photo).

Mounting the module on the bus
- The fastening on the tire is considered more reliable, so if possible, use this method, especially since the price of the tire itself and the fasteners is low.
When the installation of the modules is completed, we hang the facades and align them with adjusting screws.
Bottom assembly
The floor part is assembled somewhat easier:
- At the first stage, using a jigsaw or a hacksaw with a thin blade, we saw holes in the rear walls of the pedestals for the passage of communications. We treat the edges of the cuts with a silicone-based sealant, protecting the furniture from getting wet and deformation.
- We install the curbstone in the place allotted to it, set it according to the level, after which we connect it with furniture ties with neighboring curbstones.
When all the cabinets are in place, the table top must be installed:
- If necessary, we trim the countertop panel to the size of our kitchen, after which we install the protective end plate.
Note! When installing the countertop, there must be a gap of at least 5 mm between it and the kitchen wall to prevent deformation.
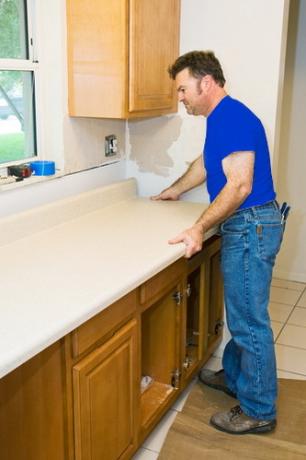
Installing the countertop
- We attach the countertop to the curbstones, and mark the installation location of the sink on its lower surface.
- After removing the countertop and placing it on a table or workbench, we make a "genzdo" for washing. The easiest way to do this is by drilling several holes with a drill and connecting them with a jigsaw.
- We install and fix the sink on the countertop, treating the joint with silicone sealant.

Sink sealing
- We put the countertop with the fixed sink on the kitchen cabinets, level it horizontally and flat, and then fix it on the kitchen modules. To do this, you can use special fasteners, or you can simply drive the spikes on the tabletop into the nests drilled in the walls of the cabinets.
- We mask the junction of the countertop and the wall with a special skirting board.
This completes the assembly of all furniture. You can connect the sink to the water supply and sewerage system, install household appliances and start operating the kitchen as usual.
If you carefully study all the above recommendations, then you should not have any questions about how to properly install the kitchen set. And this means that you will cope with this work without asking for help from the masters - and thus provide yourself with not only a legitimate reason for pride, but also significant savings!
Read also how to choose a ready-made kitchen set.
