Content
-
1 Stages of the renovation process in the kitchen
- 1.1 Preparation
- 1.2 Dismantling of finishing and communication systems
- 1.3 Surface leveling and utility wiring
- 1.4 We solve the furniture issue
- 1.5 Lighting issue
- 2 Generalization on the topic
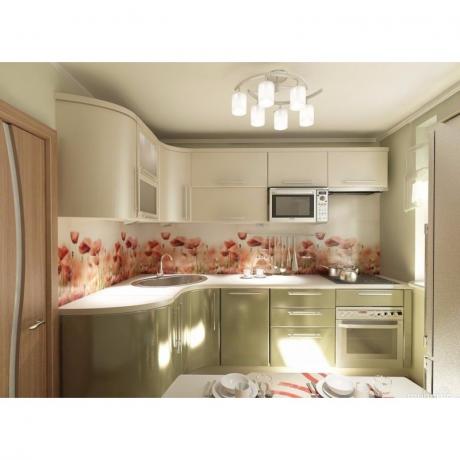
I would like to dwell on such an issue as the renovation of a kitchen of 10 square meters. The area is not very large, but still it is not six squares. It is necessary to touch upon such a moment, which concerns the question of what kind of repairs to carry out in this room. That is, there are two main options: cosmetic repairs or major.

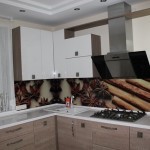
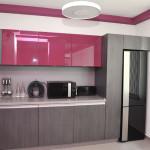
Repair of a ten-meter kitchen - the final result
Advice! The room is small, the environment in the kitchen is aggressive, so you shouldn't spray on trifles. If you make repairs, then major with the complete removal of the old finish. There will be costs, but they are justified. Such repairs will be enough for you for ten years, no less.
In addition, it becomes possible to carry out redevelopment, connecting the kitchen with other rooms. For example, with a living room or balcony. But this is too expensive, and the topic of our article suggests that you can carry out this process without investing large funds, and at the same time achieve a good final result (find out also,
where is the best place to start renovating a kitchen).
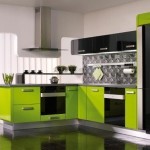
Kitchen renovation school 12 meters - new technologies and materials
Stages of the renovation process in the kitchen
First, let's start with what we decide for ourselves - we will carry out the repairs ourselves. This is the first sign of savings. Many may say that cosmetic repairs can still be carried out on their own, but capital repairs will be much more difficult. That's right, this is a more difficult job, but, as the people say, the eyes are afraid, but the hands are doing.
Preparation
Let's start developing a design project. Our advice to you is to invite a professional for this. The designer will lay out everything on the shelves, he will accurately select not only the color scheme, furniture and accessories, but also the necessary materials. He has been working in this field for a long time and is well-versed in the building materials market. Plus his 10 meter kitchen renovation school will do you good.

A design project is being created
Agree with him so that he selects such materials that will correspond to the optimal price-quality ratio. After that, you go to the market and buy everything you need from one wholesaler, who will definitely give you a discount for a large batch of purchased goods. Plus, you load it all onto one car and bring it home. The same good savings (see also the selection materials on the topic "School of kitchen renovation").
Dismantling of finishing and communication systems
Now you have to remove everything from the kitchen that comes under your hands:
- Take out the furniture;
- Remove curtain rods and baseboards;
- Raise the floors;
- Fight off ceramic tiles;
- Wash off paint or wallpaper.

Complete dismantling of finishing
That is, you have to get to the concrete structures. Your kitchen should be left bare.
Surface leveling and utility wiring
- First of all, we advise you to decide on the type of water supply and sewerage wiring. Will it be hidden or open. If the first option is accepted, then you will have to work with a puncher, grooving the walls. If there is no such need (the pipes will close the kitchen set), then it will be cheaper.
- The second stage is the floor screed. The best and cheapest option for the kitchen is a cement-sand screed.
- In the design project, you have already decided on the ceiling, what material it will be faced with. We recommend plastic panels. Today it is the cheapest ceiling decoration material. In addition, it has excellent physical, technical and operational characteristics.
- But there are more problems with the walls. For an apron, of course, you need ceramic tiles. This is the most correct option. The rest of the surfaces can be simply painted using water-based paint (very cheap). You can stick washable wallpaper - also a good option, however, more fuss.
- But we recommend laying linoleum on the floor. Today the market offers excellent types of this material that will last ten to fifteen years. They cost a little more than ordinary linoleum, but their quality is up to the mark.

Pour the screed onto the floor
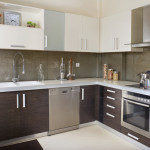
We solve the furniture issue
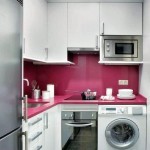
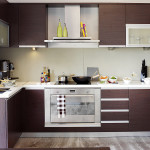
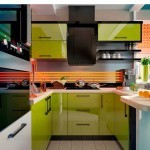
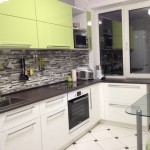
Now for the furniture. There is only one recommendation - it should be functional and convenient. Choose a kitchen set in accordance with the filling of functional volumes (drawers, shelves and niches), and the obligatory correct orientation of the working triangle (refrigerator - sink - cooking plate). This is not difficult to do in a ten-meter kitchen.
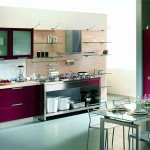
And one more tip that concerns the dining area. The area of the room allows you to install a soft corner (photo below). Don't give up on it. This furniture is, firstly, comfortable, and secondly, functional (there are boxes under the seats).

Choosing furniture
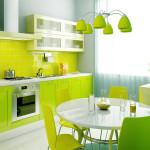
Lighting issue
The best option is to use multiple fixtures. One is the main one in the form of a chandelier suspended in the center of the room. The second is a few spotlights above the working area. The third is a sconce on the wall near the dining table.
Generalization on the topic
As you can see, you can get by with inexpensive means to make a major overhaul in the kitchen. Of course, this will take some time, you may have to sacrifice your vacation for this, but if you want to get an economical option, then you simply have no other choice.
By the way, the repair of a 12 sq m kitchen is carried out using the same technology. All the same stages and the same materials, the difference in area is small. To help you on this page of the site, we have posted a video. Let it be a kind of instruction for carrying out repair work of an economical category (read other articles on the topic "How to make repairs in the kitchen yourself").
Gallery