Content
- 1 The main difficulties
-
2 Preparation
- 2.1 Measurement and planning
- 2.2 Surface cleaning
-
3 The main stages of work
- 3.1 Ceiling
- 3.2 Walls
- 3.3 Floor
- 3.4 Skirting boards
- 4 Conclusion
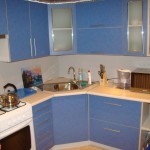
As statistics show, most of our compatriots are owners of small apartments. In particular, these are the familiar "Khrushchevs" who do not pamper their residents with space. Therefore, the question remains quite relevant, how to repair a small kitchen 6 meters.

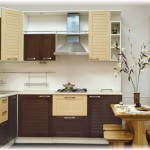
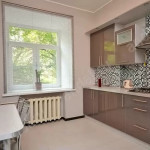
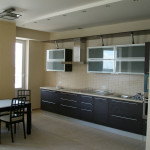
Even when space is scarce, attractive interiors can be created
The main difficulties
According to the laws of the genre, people should be warned about what awaits them.
So, the main difficulties can arise in connection with the following factors:
- High humidity and temperature. This fact burdens the master to acquire materials with a certain set of performance characteristics. According to the specialists of the transfer school of repair, the kitchen must be treated with antiseptics without fail.
- Aggressive environment. During the cooking process, a huge amount of spray, burning and smoke comes out. This, of course, negatively affects the finishing of the premises, reducing its operational period.
- Ventilation. All because of the same gas stove, a person has to spend a lot of time, effort and money on laying ventilation.
- Small footprint and ceiling height also make work difficult. If you are going to do it yourself, then be prepared for discomfort. Try to use more compact tools.

Looking at this photo, you can make sure that even in Khrushchev houses there is an opportunity to painlessly install a suspended ceiling
Preparation
Of course, not a single construction and repair operation can do without preparatory manipulations. According to many experts, it is this stage that is decisive (see also the article on kitchen renovation).
Measurement and planning
Before making repairs in a small kitchen, the following measurements are required:
- Width Length height;
- Windows and doors. It is necessary to find out the dimensions of the openings, as well as the distance from the ceiling, walls and floor;
- Sewerage outlet and water supply - distance from walls and floor;
- The location of the gas riser and ventilation;
Important! The maximum possible measurement error should be no more than 5 mm. Otherwise, there is a great risk of making a fatal mistake.
After carrying out the above operations, you should receive a floor plan that will help solve your housing problem. It is better to choose kitchen furniture in advance and put it on the plan. This will make your job much easier.
Data should be applied to the diagram in this order:
- Communications;
- Equipment;
- Furniture;
Surface cleaning
Repair for a small kitchen begins with cleaning the surface (see also the article on kitchen renovation in Khrushchev). Do not forget that fatty formations appear over the years, which must be removed. The cleaning procedure includes three stages: roughing, washing and impregnation.
You need to do everything in the following sequence:

To remove wallpaper, arm yourself with a well-sharpened spatula
- The walls are abundantly sprayed with water from a spray bottle.
- They are allowed to stand behind closed doors for several hours.
- Until the surface is completely dry, remove the coating with a spatula or abrasive mesh.
Tip: if you did not have time to do everything before it dries completely, then the procedure must be repeated.
This recommendation is based on the fact that your small kitchen is finished with wallpaper, decorative plaster or paint. If there were tiles or panels on the walls, they must first be removed.
After peeling, it is necessary to thoroughly rinse the surface with a special compound, since without this the plaster will not “lie down” well or will begin to flake off over time. To prepare the solution, you need to mix warm water with a detergent in a ratio of 1:20 and add a few tablespoons of 5% table vinegar there.
At the end of the wall, you need to treat it with a primer containing biocidal additives. It is important to remember that the presence of thiuram and its derivatives (arazone, fernazone or tiram) is unacceptable in the primer.
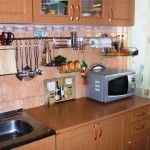
The main stages of work
It is worth saying that the laying of communications should be entrusted to a professional. The price for such a service will not be high, but its importance cannot be underestimated. The slightest mistakes can lead to disastrous consequences.

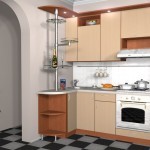
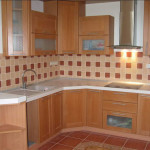
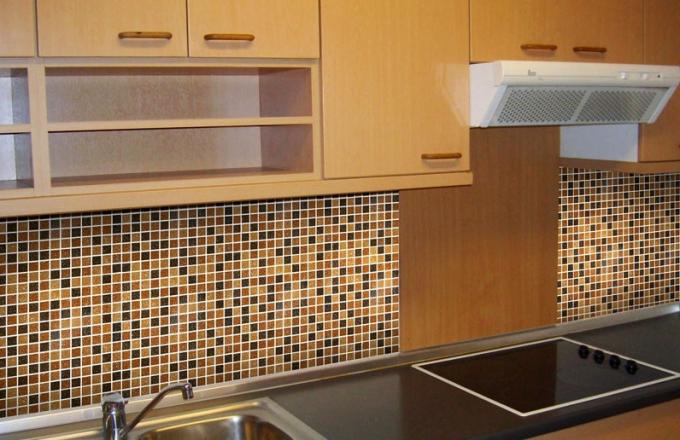
If the tile serves as an apron, it can be left on, but further finishing can be done around it
Ceiling
So, when all the communication lines have been laid, you can start finishing, starting from the ceiling.
We recommend using ceiling tiles when renovating a small kitchen of 6 sq m, because:
- It is easy to install and, if necessary, dismantle (even a child can handle this). The only thing worth focusing on is the need to degrease the surface using special tools. Without this procedure, the tile will begin to peel off rather quickly.
- In small apartments, it is extremely difficult to install a suspended ceiling.
- Plaster and wallpaper will turn yellow rather quickly due to the abundance of burning and high temperatures.

You can arrange the tiles in different ways.
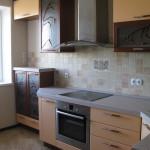
Walls
After gluing the ceiling tiles, you can start decorating the walls. Contrary to popular belief, tile is not the most hygienic option, as dirt accumulates between its seams. Of course, this problem can be solved by applying water-polymer compositions, but this is extra labor costs.
Tip: it is better to dismantle the tiles with a hammer and chisel. Applying smooth blows, you will need to upholster the tile from the base.
Therefore, we recommend using washable plastic wallpaper. They are made of foam that does not absorb odors at all. Of course, most of us know how to glue wallpaper, but to achieve the best result, we recommend watching the training videos presented on our portal.
Floor
The installation of a tile is an extremely complicated and time-consuming procedure, so it is better to refuse to use it. The best option is marmoleum.
This is due to the wide range of its performance characteristics:
- Elasticity. Dishes that fall to the floor are unlikely to break.
- Harmless to humans.
- Simplicity of care.
- Low cost.
- Non-flammability (even a dropped cigarette will smolder on it without any consequences).
- Wear resistance.
The flooring of this material is made like a simple linoleum:
- We unfold the roll and let it lie in the room for two days.
- Using sharp construction scissors, we adjust the material to the size of the room, not forgetting to leave a gap of about 5 mm between the linoleum and the wall.
- After carefully smoothing the sheets, you need to glue them to the floor (glue should be selected when buying marmoleum).

When using cold welding, remember to stick the mounting tape to avoid material damage
- Then join the pieces using "cold welding" (special glue).
Skirting boards
Renovation of small kitchens should end with skirting boards. It should be noted that this procedure is not only aesthetic in nature. The fact is that the molding insulates the grooves from fumes.
It is better to use silicone glue or liquid nails for mounting skirting boards. If streaks appear, they must be removed immediately (when using silicone - with table vinegar, nails - with a solvent). The ceiling molding must be reinforced with small nails (for laminate flooring) or self-tapping screws up to 3 mm.
Conclusion
This article examined in detail how to make repairs in a small kitchen. Of course, having information is not all that is required from the master (read also the article Kitchen renovation school).
Therefore, try to make every effort and endurance and only then you will achieve the desired result.
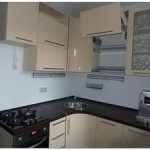
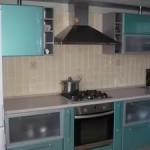
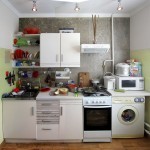
Gallery