Content
- 1 Appointment
-
2 Installation
- 2.1 Device selection
- 2.2 Assembly
- 2.3 Mounting
- 2.4 Tool
- 3 Conclusion
The organization of water supply and sewerage in the kitchen is significantly different from the installation of the same systems throughout the house. This is due to the fact that in addition to the usual washing, household appliances are often installed in this room, which also require connection to communication systems.
Moreover, if there are usually no problems with connecting water, then the question of how to install a siphon in the kitchen is sometimes associated with various kinds of problems.

A typical model of a siphon for a kitchen with an indication of the dimensions typical for this device
Appointment
This device serves as a link between appliances or a sink and the sewage system. It implements the technology of creating a kind of water valve, which, with the help of liquid residues, blocks the penetration of air from the sewer into the room.
This is necessary in order to prevent the appearance of unnecessary odors and noise that constantly arise in this system.

Implementation of the water seal system
Installation
This process is quite simple, but it consists of several stages, on the observance of which the performance of not only the sewage system itself, but also household appliances depends. That is why the installation of a siphon in the kitchen requires increased attention and strict adherence to instructions.
Device selection
- The choice of this device is one of the most important procedures. Moreover, it is associated not only with the definition of quality, but also with a specific model.
- First you need to decide how many devices will be connected. Previously, if it was necessary to connect a washing machine or a dishwasher to the siphon, then the masters took such a model that should be installed on a bathtub, and an additional connection was organized through a sleeve overflow. That is why the question of how to change the siphon in the kitchen is currently very popular, since special devices designed for these purposes have appeared on sale.
- It is best to choose the design that has as many leads as the equipment will connect. However, some experts recommend installing siphons with two branches, and if there is more equipment, then you need to use splitters.
- Special attention should be paid to the quality of the material from which the device is made.

Typical connection diagram to the kitchen siphon of the washing machine
- All elements must have the correct shape, not contain chips and cracks, and also not be damaged in threaded connections.
- Rubber gaskets are checked for integrity and dimensional accuracy.
- Separately, it should be noted that these devices are sold as separate parts. That is why the question of how to disassemble the siphon in the kitchen will not cause great difficulties, and instructions are usually included in the kit for correct assembly.
Advice! Before making a purchase, you need to check the presence of all elements of the device. The fact is that situations are often encountered that even in a sealed package, some details may be missing.

Siphon with a large number of entries
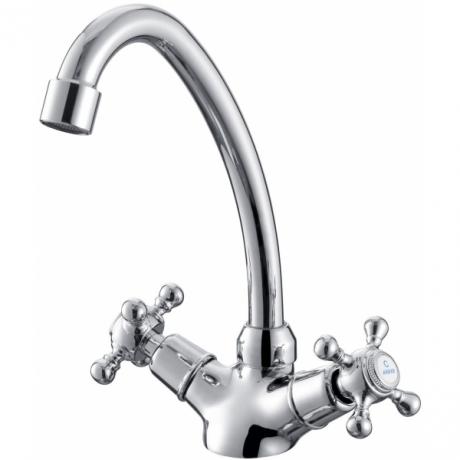
Read also the article on installing a faucet in the kitchen.
Assembly
- This stage is very important. The service life and its quality depend on it.
- If the device was sold assembled, then it will have to be disassembled. This is due to the fact that you need to check the presence of all the necessary gaskets and personally verify the tightening and fastening force of all elements.
- It should be noted that kitchen siphons are assembled exclusively by hand. This is necessary in order not to damage the device itself and to control the clamping force.
- When assembling, do not use too much force, as such assembly may crush the rubber gasket or strip threads on plastic parts.
- It makes no sense to tell exactly how the siphon is assembled, since there are various models that differ in their design. That is why each device must be accompanied by an instruction, which indicates how to do it.
Advice! All elements must be perfectly clean and dry during assembly. Dirt and especially sand on rubber gaskets or threads can cause leaks.

Assembly diagram of one of the typical models
Mounting
- Initially, it is necessary to prepare the sewer pipe. If an old cast iron is used, then the whole process consists in cleaning it from dirt and installing an appropriate rubber gasket. When plastic is used, you must first bring the tip to a certain level (no higher than 40 cm from the floor), and then install a special adapter on it, which is purchased in advance.

Organization of drainage without the use of a corrugated pipe, but with maintaining all the necessary parameters for good water flow
- Next, you need to dismantle the old kitchen siphon. This is done with a screwdriver, which is used to unscrew the fastening screw on the trap grille.
- Then you should well clean the seat on the sink from grease and rust.
- Then you need to install a part of the mixer with a trap on the sink and fix it with a screw.
- At the next stage, they attach the main part to the pipe under the sink, also tightening all the elements by hand.
- Many instructions on how to replace a siphon in the kitchen recommend immediately connecting additional appliances. However, it is best to connect the device to the sewer system and carry out an initial check. In this case, you need to use special plugs for additional inputs, which must be included in the kit.

Correct organization of the drain angle from the siphon to the sewer pipe, made using a corrugated hose
- If no leaks were found after checking, then you can connect household appliances. Typically, the drain hoses from the dishwasher and washing machine are simply pushed onto the inlet brush, but for greater reliability, you can secure them with clamps. This is done so that when the pressure is generated, which is typical for drain systems in kitchen appliances, the hose does not fly off the seat.
- If the installation is done by hand, then it should be remembered that the drain hose coming out of the siphon should not bend or form sharp turns. Its location should be such that water can drain unhindered by normal gravity. The same applies to hoses from household appliances.
- It is recommended to use the connection tips that are attached to the equipment itself or the generally accepted rules that are displayed in the photo.
Advice! Installation must be done in such a way that the height from the floor of the siphon outlet is an order of magnitude greater than the height to the inlet in the sewer pipe. This will form a certain slope, which creates favorable conditions for water flow.

Siphon installation scheme with a large number of branches, designed for a specific device model
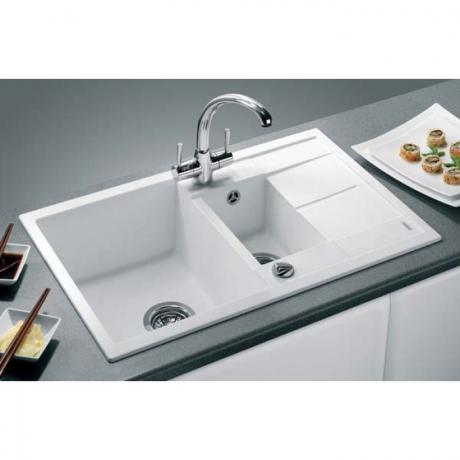
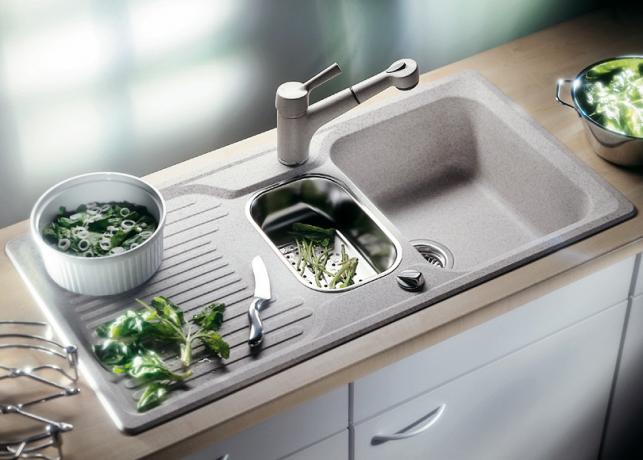
How to install a sink in the kitchen - see here.
Tool
This work requires a minimum amount of tools, the price of which will allow you to purchase it even for one installation.
Required:
- pliers;
- assembly knife;
- screwdriver.

An example of organizing an entrance to the sewer without using a special rubber gasket on a cast-iron pipe
Conclusion
Thus, the attached video material reveals all the features of such a device as a kitchen siphon. It also becomes clear that his selection and installation can be made by almost any bang, having basic skills and following the instructions of the instructions.
At the same time, for this work, a tool is used that every real business executive has at home.
How to change the faucet in the kitchen - see here.