Content
- 1 A bit of history
-
2 Step-by-step decoupage master class
- 2.1 Required material
- 2.2 Step 1: preparing the surface
- 2.3 Step 2: preparing the drawing
- 2.4 Step 3: apply glue
- 2.5 Step 4: varnish
- 3 Tips from skilled craftswomen
- 4 Finally
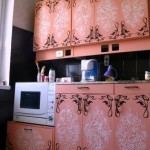
Old furniture is not at all pleasing to the eye? Are you dreaming of a beautiful and unique cuisine? Do-it-yourself decoupage of kitchen furniture will give used items a new life!
Dilapidated stools, kitchen cabinets and tables - all these are already old and nondescript things that you need to either put up with or put a little effort into and give them an original look. The decoupage technique will add a touch of sophistication to the kitchen interior! All that is needed for this is just a little imagination and time.

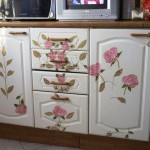
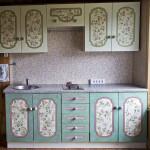
Decoupage of Provence style furniture
Note!
Of course, having purchased new furniture for the kitchen, you should not do this with it.
After all, it already meets all your preferences and wishes.
Do-it-yourself decoupage is more suitable for already aged furniture.
A bit of history
Decoupage (decoupaqe - cut) is one of the unusual decorative techniques. Its essence lies in cutting all kinds of images from various materials (paper, cloth, napkins, leather, etc.) and sticking them on the surface to be decorated (wood, glass, dishes, etc.).
For safety and durability, all this beauty is covered with acrylic varnish in several layers.
The origins of decoupage lie in the Middle Ages. It was first recognized as an art form in Germany in the 15th century, where carved images were used to decorate furniture.

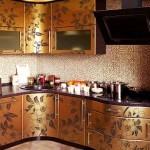
Fascinating decoupage of cabinets using crackle technique
Decoupage became especially popular in the 17th century in magical Venice. Then furniture decorated with inlays (patterns of colored stones, wood, marble, metal, etc.) in Japanese and Chinese styles came into fashion. Venetian craftsmen skillfully carved pictures and decorated furniture with them - in this way they imitated expensive oriental inlays. The price of such products was much cheaper, and the demand was very high.
Closer to the middle of the 19th century, decoupage fell in love with the peoples of almost all countries, but in Russia interest in it arose only at the beginning of the 21st century. Nowadays, a variety of materials and computer innovations have been added to traditional technology, which has opened up an endless scope for creativity.
Step-by-step decoupage master class
Having made a short excursion into the past, we understood the essence of this technique and are now ready for creative experiments.
It must be said that decoupage is a rather painstaking exercise that requires perseverance and the ability to mentally form an image of what is created and then brought to life. But at the same time it is very exciting and allows you to have a pleasant and useful time.
Required material

Everything for decoupage
To carry out decoupage on kitchen furniture, we need:
- Filler (in the event that there are cracks on the furniture);
- Fine sandpaper (for cleaning the surface);
- Decoupage glue or PVA glue;
- Not too hard, flat brush (for applying glue);
- A can of acrylic varnish (matte or glossy, for woodwork or plastic);
- Scissors
- Clippings from newspapers or magazines, beautiful decoupage napkins, pictures or photographs printed on a printer - it all depends on your taste and imagination.

Napkins for decoupage
Step 1: preparing the surface
Whether it is decoupage of a kitchen set or decoupage of kitchen cabinets, first of all it is necessary to properly prepare the surface.
This is done very simply:
- If there are small cracks, we get rid of them with a filler.
Important!
For more serious defects, putty should be used.
- After the previous step, you must wait until the filler is dry. Then we protect the furniture surface with fine sandpaper.
- It is also advisable to apply a primer, giving it time to dry. This is done in order to level the surface so that the drawing fits perfectly.
Note!
If you are going to decoupage an old kitchen set, or rather its glass doors, then you must first degrease the glass using a detergent and wait until it dries.
Step 2: preparing the drawing
Now is the time to start preparing the image. Everything is individual here: we cut out the top layer of napkins for decoupage, or text / picture from a magazine / newspaper / wallpaper, or an image pre-printed on a printer.
Advice!
If the image you have chosen for decoupage is quite large, use a print on large format printer - this will avoid seams, which would otherwise look very ugly.
Step 3: apply glue
First, we apply glue to the drawing itself (the paper or napkin should be well saturated with glue). Then we gently smear the surface itself with glue, relying on the size of the cut pattern. We put the drawing on the place to be decorated and, using the same brush or roller, smooth out small folds and air bubbles (if any).
Important!
If decoupage on a kitchen set or on other kitchen furniture involves the use of napkins, then PVA glue is perfect.
But if thicker paper is used, you will need to stock up on special glue for this decorating technique.
Step 4: varnish
Allow the surface to dry after the previous step. Then we cover the furniture with acrylic varnish in several layers (usually 3-4 layers). Coats of varnish are applied at intervals of one hour. It is imperative to do this work in order to protect the jewelry from all kinds of damage.
This concludes the work under decoupage, and the result is an updated and unique kitchen furniture design!

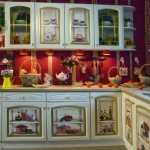
Kitchen set after decoupage

Beautiful decoupage of the dining table and stools
Tips from skilled craftswomen
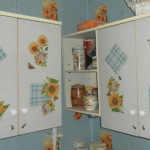
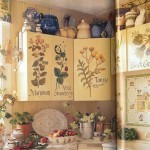
- When making do-it-yourself decoupage of a kitchen table for an ethno, country or Provence style kitchen, it is recommended to select matching pictures: wildflowers, butterflies, cats, dogs, vegetables, fruits, intricate patterns, compositions on rustic motives.

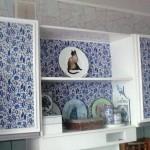
Decoupage of country-style wall cabinets

Kitchen table with butterflies

Dining area decorated with drawings of vegetables
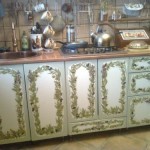
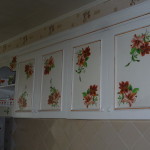
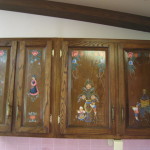
- For classic style kitchens more suitable drawings with luxurious painting, bouquets of garden flowers, vines, angels. In addition to decoupage, here you can apply the technique of brushing, gilding, crackle and shabby.

Stunning decoupage stools for a classic interior

The kitchen cabinet doors are decorated with images of angels
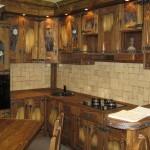
And decoupage of kitchen cabinets or the headset as a whole can be done in this way: paste over furniture with paper soaked in coffee. To do this, sprinkle sheets of paper with water, sprinkle with instant coffee on them, rub lightly and let the paper dry. Voila! The result is very original and "tasty" furniture.

Applying instant coffee
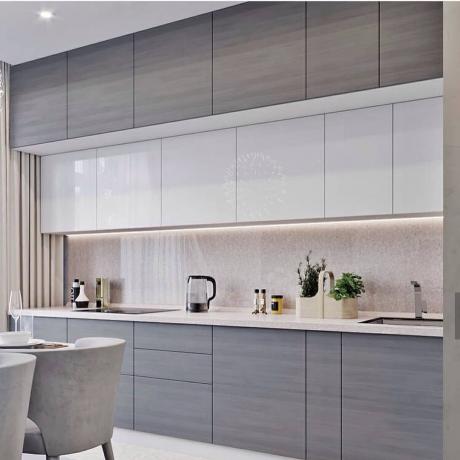
- As for decoupage in modern kitchen design, then newspapers, various inscriptions, bright clippings from magazines, black and white photos, with stylish objects or cities depicted on them, geometric shapes, zebra colors and leopard.

Modern decoupage

Fashionable decoupage headset

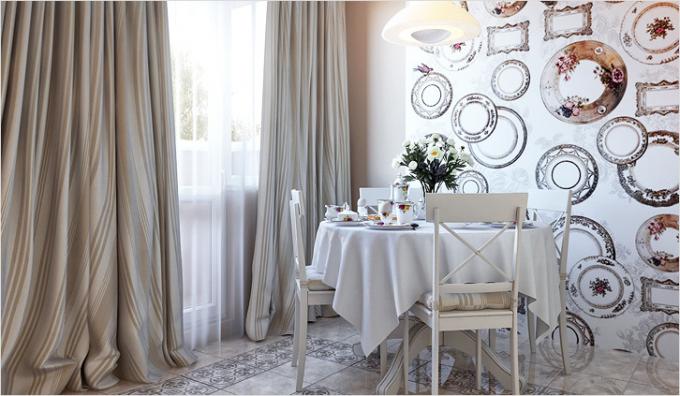
Dining table decorated with magazine clippings
Finally
Decoupage is an unusual activity! And, despite the worldwide popularity, few people apply this decoration technique in practice. This makes decoupage a real boon for every housewife!
In addition, today, probably, there is no simpler and more inexpensive method of updating old things. Therefore, especially for connoisseurs of everything beautiful and unusual, we have prepared this article, and in addition to it, an interesting video lesson. Enjoy your creativity!