Content
- 1 Kitchen from scratch
-
2 Stage 1. Design
- 2.1 Concept work
- 2.2 What to consider
- 2.3 We carry out measurements
- 2.4 Cutting chart
- 3 Stage 2. Purchase of materials
-
4 Stage 3. Assembling the headset
- 4.1 Assembling the main cabinets
- 4.2 Assembly of drawers
- 4.3 Sink attachment
- 5 Stage 4. Finishing worktop installation
- 6 Finally
After visiting the store and looking at the "sky-high" prices for kitchen furniture, have you thought about creating a headset with your own hands? Do not rush to claim that this is an impossible task. In this article I will try to prove not only the benefits of self-made kitchens, but also tell you in detail how to make them.

Making a kitchen with your own hands is not only interesting, but also financially beneficial
Kitchen from scratch
So why did I decide to assemble the typeface from my own sketch?
There are several reasons:

The price of a headset assembled from scratch will be much lower than the finished version
- You will have the opportunity to create a set that is ideal for the size and configuration of the kitchen, taking into account all its features.
- You will receive a truly exclusive furniture with a unique design.

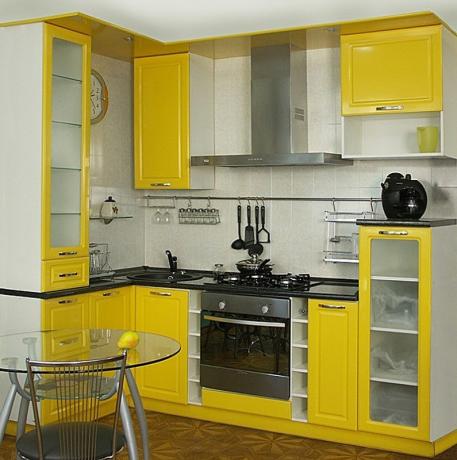
The headset design will be unique and exactly the way you want it to be

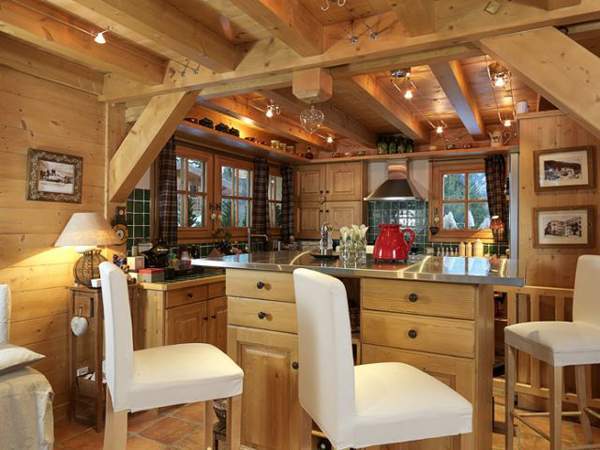
Another interesting design option
- Such a headset will allow you to use every centimeter for maximum benefit.
- And last but not least, the reason is that on such a construction you can save up to 50% of the cost of furniture.
As you can see, there are enough reasons for creating a kitchen. Do you think that the installation process will require expensive tools or special skills? I hasten to assure you that you can assemble the headset if you have straight hands and tools. How to calculate the kitchen yourself, without having any special skills, read below.

Self-assembled kitchens have more advantages than disadvantages
Stage 1. Design
With some large-scale work, it is sometimes difficult to understand what to grab and where to start. And you need to start with the manifestation of your imagination to the maximum, which must be used in the design process.
Concept work
First, decide on the appearance of your future kitchen. Imagine clearly how you want to see it, where to put a cabinet of one type or another, a stove, what materials to use.

Not everyone has a sleeping Dali, but this is not a problem
Next, you need to sketch out a sketch of the headset. No special artistic skills are required for this, you can (moreover, I highly recommend) use special programs for 3D modeling. The PRO 100 is quite simple and convenient.

3D modeling programs will help you clearly imagine the future look
Before creating a sketch, carefully measure every centimeter of the room and simulate according to the obtained data.
What to consider
A colored three-dimensional scheme of a corner kitchen should contain all the necessary elements.
So you need to remember about:
- corner sink and cabinet under it;
- at least two pedestals to the right and left of the sink. They can serve as cupboards for storing kitchen utensils, and become a niche for a washing machine, oven or dishwasher;
- upper sections (minimum 2 units);
- place for stationary equipment (refrigerator, for example).
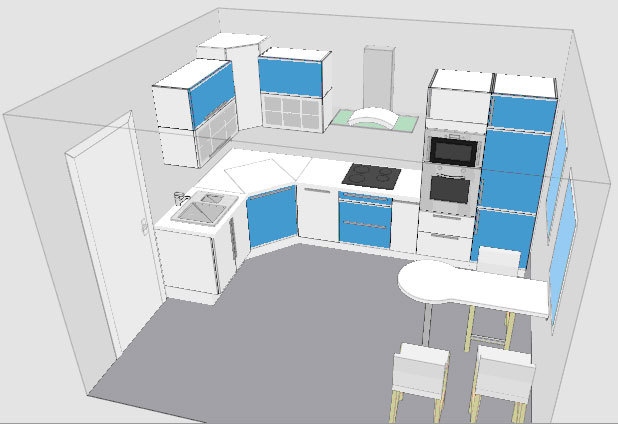
Do not forget to include all details in the project
Regardless of the size of the kitchen, remember that according to the ergonomic requirements of the space, the length of the countertop should not be less than 50 cm. The corner module for the sink is best done trapezoidal (pentagonal) with an angle of 45 degrees.
In order to avoid embarrassment in the future, do not forget about the designation on the sketch of the places for installing the hood and gas pipe.
We carry out measurements
No drawing will be accurate without correct measurements.
To create a full-fledged layout and size of cabinets, you need to measure:

For greater accuracy, it is better to take measurements several times.
- the length of the walls along which the headset will be located;
- the height of the walls;
- distance from window to wall;
- distance from door to wall.
Next, it is worth calculating the size of the lockers.
Standard sizes are:
- 85 cm - for height;
- 45-50 cm - in depth;
- 30-80 cm - for width.
If drawing a corner kitchen with dimensions and detailing is an overwhelming task for you, there is an elegant and simple solution. Download a ready-made plan online, choosing an option that fits the size of your kitchen. Below you will find several popular schemes.

One of the most popular kitchen schemes
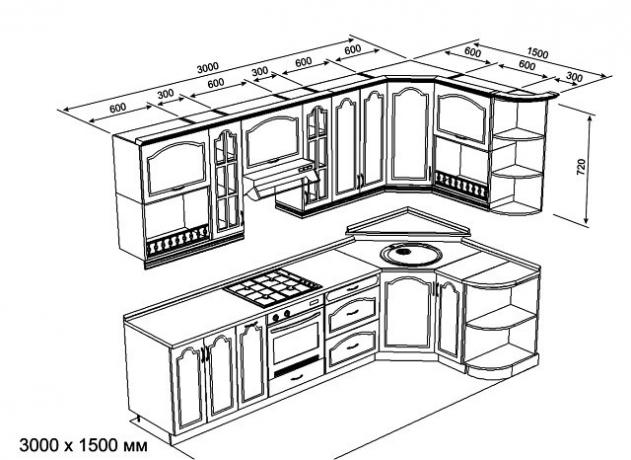
Another popular option for corner planning

Scheme for small spaces
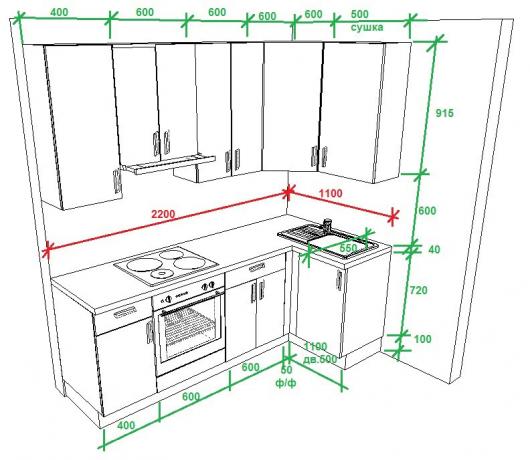
Do not know how a kitchen is designed with your own hands - drawings + dimensions to help you
Cutting chart
When the most detailed drawing is ready, it is worth taking care of drawing up a material cutting map. This is a documentation that reflects the number, type and size of elements required to cut a chipboard sheet.

One example of a headset cutting pattern
You can make a cutting plan yourself or using the program.
In it, you will need to determine the dimensions of each cabinet, consisting of:
- top and bottom;
- two side walls;
- back wall made of lightweight but durable chipboard sheet;
- edges;
- shelves;
- facade.
Also, do not forget about the countertop and kitchen backsplash.
Stage 2. Purchase of materials
When all the preliminary work has been done, you can safely go to a specialized store for the necessary materials. They can also order a service for sawing chipboard or MDF. You can do it yourself, but isn't it better to entrust the process to specialists with the necessary equipment?

Specialists can cut the selected material according to the specified cut map
In addition to the base for the headset, do not forget about the suitable fittings.
You will need:
- neat handles;
- loops;
- retractable mechanisms.
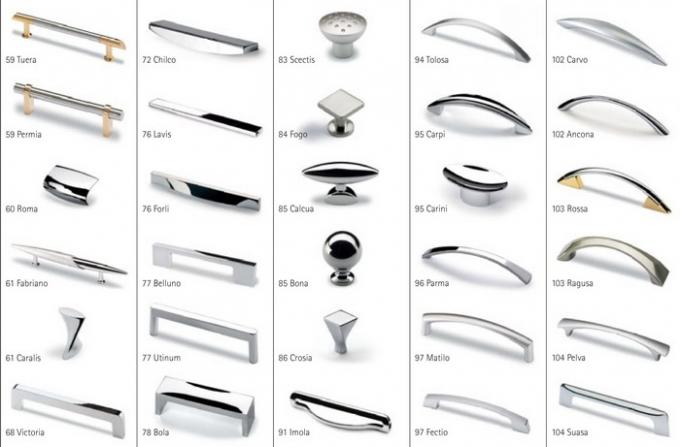
Do not forget about the important elements of kitchen fittings
Stage 3. Assembling the headset
When all the drawings are ready, and the materials are purchased, you can safely proceed to the most important stage - the installation of the headset.
To successfully carry it out, you need to acquire the necessary tools, we need:

Assembly is impossible without proper tools
- screwdriver - almost any model will do;
- hammer drill with a set of different drills and an adapter for a drill with a drill for wood;
- hexagon for connecting elements of lockers;
- ruler-square;
- building level;
- hammer and pliers;
- awl;
- self-tapping screws 3x16, 3x30 or confirmations 50x7.
Also prepare an iron to smooth the edge of the countertop.
Assembling the main cabinets
If you do not have any experience in assembling a headset, it should be done slowly and following all the recommendations. If you screw the part in the wrong place, it will have to be disassembled, which is fraught with a decrease in the fastening strength indicator.
The installation instructions for kitchen cabinets are as follows:
- First of all, put the side shelf upside down and make 3 blind holes in it at the top and bottom for wooden staples. One is located exactly in the center, the other two - at a distance of 40 mm from the edge.

All holes made must be identical to each other
- Attach the cross-shaped door mount to the side boards (this will not be so convenient later). Measure two marks at the bottom and top, make small holes in them and install the mount using self-tapping screws.
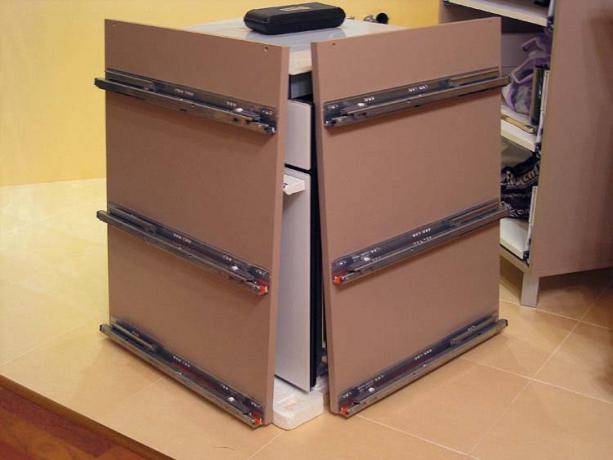
Fasteners for doors or a sliding mechanism should be installed before the final assembly of the cabinet
- If you plan to create a cabinet with a sliding mechanism, then the rails for it should be fixed at this stage..
- In the blind holes made earlier, place wooden chops (they are also dowels) on glue, which will help to make a smoother and more durable frame. With the holes made in the bottom, place the board on the dowels and squeeze the boards together at right angles. In total, you should have an L-shaped structure.

Wooden chopiks will strengthen the structure
- In the same way we attach the second side wall and the top panels under the countertop.
- Check the resulting box for symmetry. Measure both of its diagonals, the difference between them should not exceed a couple of millimeters.
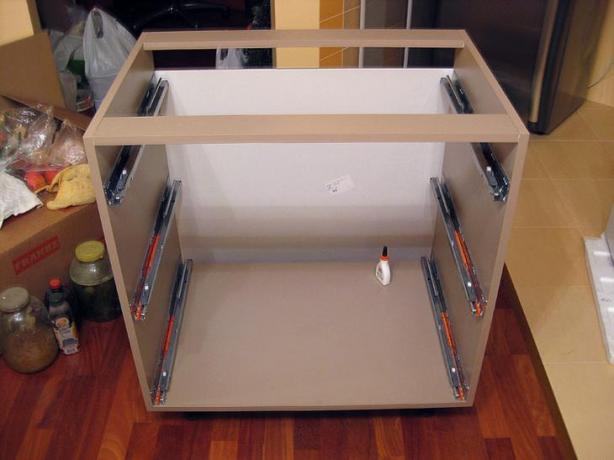
The base of the cabinet must be symmetrical
- Use a hexagon to screw in furniture screws near the joints to strengthen the structure. Put plastic plugs on top of them to match the furniture.
- Screw the legs to the bottom with screws and adjust their height.

Fixing the legs is easy
- It remains to use small nails or a construction stapler to pin the back cover of the cabinet in 7 cm increments. The back wall is not attached to the sink cabinet.
For wall cabinets, remember to fix the hardware for wall mounting.
Assembly of drawers
There are several ways to assemble drawers.
I will suggest the simplest one:
- The first thing to do is to drill holes for the mountings. This is done with a drill of 4 and 10 mm. The first is used for through holes, the second is for deepening the caps of self-tapping screws.

You will need two different sized drills
- To connect all the components as smoothly as possible, carry out a preliminary marking. On one side of the drawer, use a pencil to draw a strip equal to the thickness of the chipboard. How to do this can be seen in the photo.

The drawn line will help to make even depressions.
- Use a thin drill to make 2 through holes on both sides of the plank. Perform the same procedure with the rest of the planks.

The hole should be made exactly between the edge of the plank and the marked line
- Connect the two parts of the box together and screw in the screws strictly perpendicularly.

The installation of self-tapping screws must be strictly perpendicular
- When the case is ready, you need to check its diagonal. If everything is in order, proceed with fixing the bottom of the box. This is done with nails 20-25 mm long.

The bottom of the drawer is secured with small nails
- It remains only to fix the guides. They are installed with self-tapping screws through the factory holes.

Drill through existing holes
- Finally, attach the handle to the drawer.
Sink attachment
After you get your hand on the installation of cabinets and drawers, you can proceed to fixing the built-in sink:
- Take complete measurements of the sink, draw a drawing according to them on the countertop.

If the pattern went with the sink, then you need to draw on it
- Drill an impressive hole in the countertop, then use a jigsaw to bring it to the desired size and shape. It is better to cut a hole with a widow - someone must hold the tabletop so that after the cut piece falls off, it does not damage the coating.

Cut the hole carefully and slowly
- The saw cut contour, as well as the lower joints of the sink, treat with a sealant.
- The sink is fastened with the clamps included in the kit.
Stage 4. Finishing worktop installation
Are all parts of the headset assembled, installed in their places and adjusted to the building level?
It's time to start installing the tabletop.

When the cabinets are in place, it's time to grab the countertop.

Check headset height
- Mark the countertop and saw off along the indicated lines with a fine-toothed jigsaw.
- Lay the countertop on lockers, leaving a gap of 3-5 mm between it and the wall. Do not be afraid, then it will be easy to close it with a baseboard.
- The tabletop is mounted with special fasteners, which are driven into the surface from below, passing through the top panel of the floor cabinet.

An example of fixing a tabletop
- The joining of the countertop in the corner is due to a special metal strip that closes the gap between the two surfaces.
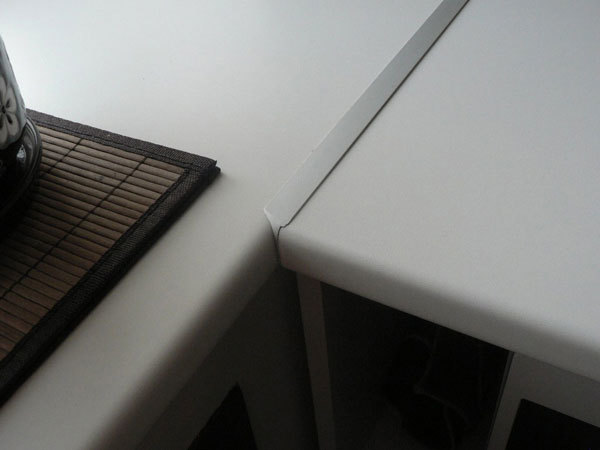
The gap between the two halves of the tabletop is hidden by a metal strip
- Finally, use an iron or a hairdryer to glue a decorative furniture edge to the cut.
Finally
As you understand, creating a kitchen from scratch according to your own project is a completely doable task. By adhering to these instructions, you can not only assemble your own headset, but also significantly save on buying a new one. If you are still not clear about some of the nuances of the process, the video in this article will definitely help.
If you still have any questions, I am waiting for them in the comments.
