Content
- 1 Mute history
- 2 Tips for choosing corner components
-
3 We make ourselves
- 3.1 The first module is a long sofa
- 3.2 Second module - short sofa
- 3.3 Third module - connecting angle
- 4 Finally
Tedious trips to furniture showrooms unsuccessful? Have you ever come across a dining group with a suitable design / quality / price ratio? And do not want to make a kitchen corner with your own hands - will the drawings be presented in this article? After all, this opens up unique opportunities for you - you can experiment with design, material, and it will come out much cheaper.
In the article you will find a complete selection of diagrams and drawings for self-assembly of a kitchen corner, but first ...

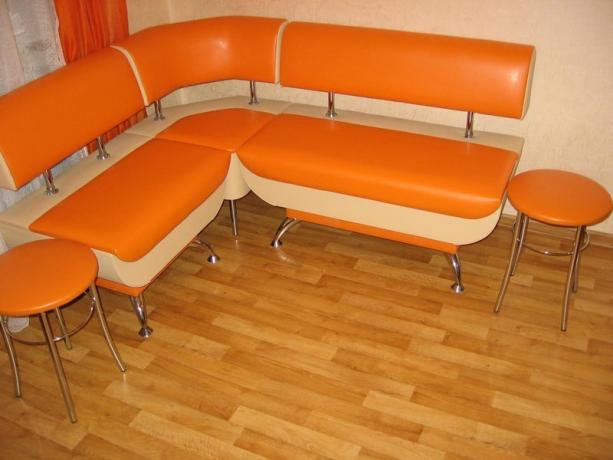
Standard couch for the kitchen
Mute history
The ancestors of small kitchen corners are corner sofas that appeared in the era of postmodernism and firmly in vogue as an indispensable space-saving and easy-to-use item furniture.
A little later, in Europe and the USA, small canapes and sofas for kitchens began to be sold, over time, improved under the corners. And soon, similar products appear in the post-Soviet space - far from the trends of exquisite design. For example, if in the West the corners were already decorated in the Art Nouveau style, and the material for their assembly was natural wood, then we have - it was chipboard, painted with paint and upholstered in red fabric (read also about
features of choosing a soft corner for the kitchen).But, it should be noted, despite such a "poor" design, domestic products were very practical and functional. In the same European corners, it was far from always possible to find such a convenient element as built-in drawers for storing kitchen utensils.

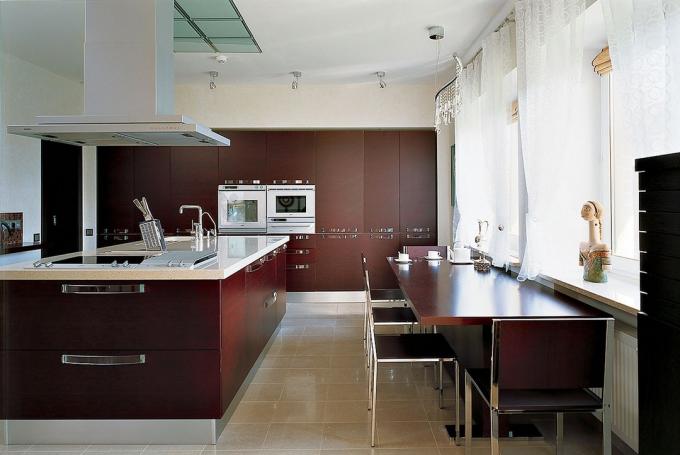
Modern kitchen group with laconic design and decoration
In principle, modern corner products for the kitchen do not differ much - the use of innovative reliable materials (chrome-plated metal, plastic, etc.), a wide selection of designs and upholstery. The design itself remains the same.
Tips for choosing corner components
Before you start making a corner in the kitchen with your own hands, you need to decide on some important issues. Here are some helpful tips that we hope will help you with this:
- When choosing a corner configuration, correctly determine the direction of the corner: these kitchen products can be either right-handed or left-handed.
- You also need to take care in advance of purchasing all the necessary material: laminated and sanded chipboard, furniture metal corners, piano hinges, dowels, confirmations, self-tapping screws, fabric for upholstery, foam rubber for seats, glue, stapler with staples.

Laminated chipboard

Sanded chipboard

Metal furniture corner

Piano hinges

Dowels

Confirmates - furniture screws
- As for the upholstery, it is better to give preference to synthetic materials, leather or leatherette - they retain their original appearance longer and are easy to clean.
- Soft foam seats are suitable for a house or apartment, hard ones for open verandas and summer kitchens (also learn about the benefits a small kitchen sofa with a sleeping place).
We make ourselves
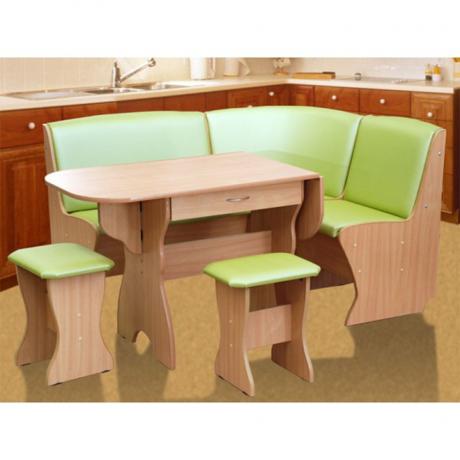
As a rule, a standard kitchen corner with an “empty” corner consists of 3 separate modules: two sofas (one long, one short) and a connecting corner. The dining area can be supplemented with a table, chairs, stools, ottomans and hanging shelves. But this is not the point now.
Before you learn how to make kitchen corners with your own hands, do the following:
- Decide on the width and length of the future product. Better to draw the configuration diagram on paper. Please note that the corner should fit the floor, wall and all appliances in the kitchen.
- Find the optimal height for all family members. To do this, you can measure any comfortable chair and make the height of the corner (from floor to seat) the same.
- Prepare a comfortable place to work, the necessary materials and tools.
So, let's go directly to manufacturing. For convenience, we have broken down all the stages of work, drawings, parameters and advice in parts (modules).
The first module is a long sofa

Long sofa

Back view
We took the following dimensions:
- Height - 80 cm;
- Length - 100 cm;
- Depth - 40 cm.

Assembly diagram

Assembly diagram, rear view

Detailing with edge indication

Fittings
Step by step assembly instructions:
- The sides are the main bearing parts. First of all, you need to mark the parts for milling.
The required set of parts for milling (in the photo, red dots indicate the mating points of the radii when passing curved lines):
- Internal - radius 300 mm;
- Outside - radius 30 mm;
- Outside - radius 600 mm;
- Internal - radius 150 mm;
- Internal - radius 30 mm.

Radius mates

Detailed marking of the sidewall for assembly holes
All these templates (parts) can be made without any problems on one piece of plywood measuring 650 × 400 mm.
- The sides are milled from laminated chipboard and pasted along the contour with an ABS edge of 2 mm. Furniture pads 4 × 30 mm are screwed onto the lower ends using self-tapping screws (find out also about all the intricacies of the kitchen corner).

ABS edging

Furniture pads
- The front of the niche. The material used is 16 mm laminated chipboard (thickness). Front tilt = 10 °. This part of the corner can also be pasted over with a regular paper edge, since the loads on the edge during operation are almost zero. Everything else can be seen in the drawing.

The front of the niche
- Niche bottom. The material used is polished chipboard 16 mm. A drawing is also attached.

Niche bottom
- Niche walls. The material used is polished chipboard 16 mm.

Niche walls
- Seat bar. The material used is 16 mm laminated chipboard. Required to secure the lift seat using the piano loop. This part is held by dowels.

Seat strip
- Backrest support bar. The material used is polished chipboard 16 mm.

Backrest support strip
- Back. The material is the same as in the previous paragraph. This part is subsequently covered with foam rubber and fabric, therefore its size (length) is reduced by a couple of millimeters. As a rule, the backrest is clamped on dowels between the sidewalls, and is also fixed with corners to the thrust and upper bar. The corners themselves are attached to screws 4 × 16 mm.

Back
Advice! For fixing, it is preferable to use metal corners rather than plastic ones. First, it is much more reliable. And, secondly, the backrest is located at a slight slope of 5 ° and the metal corner is easily at the desired angle, which cannot be done with a plastic one.
- Upper bar. We use laminated chipboard 16 mm. This part is a tightening element for the upper part and additional fixation and rigidity of the back of a long sofa.

Upper bar

Backrest assembled
Covering the module.
Here's a detailed instruction:
- Two pieces of foam are cut to fit the seat and back. For the seat, the foam is rolled onto the front end (+ 2 centimeters to the width of the material). But on the sides it is better not to make turns - excessive thickness will interfere with opening and closing the seat. On the back, the twist is done at the top and bottom.

Sticking foam rubber on the seat
Advice! For a kitchen corner, foam rubber with a density of 38 kg / m³ is ideal - it is usually pinkish, elastic and lasts much longer than standard foam rubber. Important! Cutting the foam rubber exactly is very difficult (especially if its thickness is more than 5 cm). A heated nichrome thread will help to cut off thick material ideally evenly. Thin or medium-thick foam rubber can be easily cut out with an ordinary sharpened boot knife.
- Foam rubber is glued to the details on "88" glue. This procedure is necessary in order to avoid constant slipping of the foam rubber during wrapping with a cloth and knocking down during use.
- Next, you need to cut the blanks of the upholstery fabric. Since the design of the corner and the shape of its soft parts is quite simple, no special preparation of the upholstery fabric is required. It simply wraps around the part, the corners are bent, and the whole thing is fixed with staples with a stapler in steps of a couple of centimeters.

Ways to hem the fabric at the corners
Second module - short sofa

Short sofa
We took the following dimensions:
- Height - 80 cm;
- Length - 60 cm;
- Depth 40 cm.
The principle and assembly method is exactly the same as for the first module. The only difference is the length of the sofa. All necessary diagrams and drawings are attached.
The front of the niche
Niche bottom
Niche walls
Seat strip
Backrest support strip
Back
Upper bar
Third module - connecting angle

Connecting corner, rear view - we will make this, only without the box
We took the following dimensions:
- Height - 80 cm;
- Length 45 cm.
- Two backrest strips. The material used is polished chipboard 16 mm. These are two of the three parts that shape the product. Please note that the far corner is cut off on the details so that the kitchen sofa can fit more tightly against the wall. Planks can be cut to size with a jigsaw. How these parts are attached, you can see in the figures below.

Thrust bar
- Seat. The material is still the same.

Seat
- Split back, center piece. This part has a trapezoidal shape, which is due to its inclination.

Center back
- Split back, side parts. The pictures show how to make them correctly.
All backrest elements are clamped on dowels between the sidewalls and additionally fixed with metal corners to the stop strips.
- The upholstery of the connecting corner is done according to the principle you already know.
Finally
Now you know how to independently design such comfortable and functional furniture products, and you also know how to update the upholstery if necessary. For “dessert” we suggest watching a thematic video.