Content
-
1 Recipes from the maestro
- 1.1 Getting started
-
2 Other solutions to a painful problem
- 2.1 Brickwork
- 2.2 Decorative finishing as an option
- 2.3 We close "whatever"
- 3 Summarize
If you are the lucky owner of a Khrushchev house in a house built in the best years of the Soviet regime, then you probably have a window between the kitchen and the bathroom, which was mounted for some reason. And you certainly wondered how to close the window between the bathroom and the kitchen and not spoil the current state of affairs.
After all, the window frame is unlikely to be in harmony with the overall furnishings of the kitchen and bathroom.

Interior window
Recipes from the maestro
If you are not an architecturally sophisticated person, then you can close up the window between the kitchen and the bathroom using M-400 or M-500 cement (you will need no more than 7-8 kg for work).
Do not forget about sand and about water (we take sand in a ratio of 3: 1). You will also need a metal mesh in the amount of 2 pcs. (in this case, we mean the material already cut to the size of the window).

Cement grade M-500
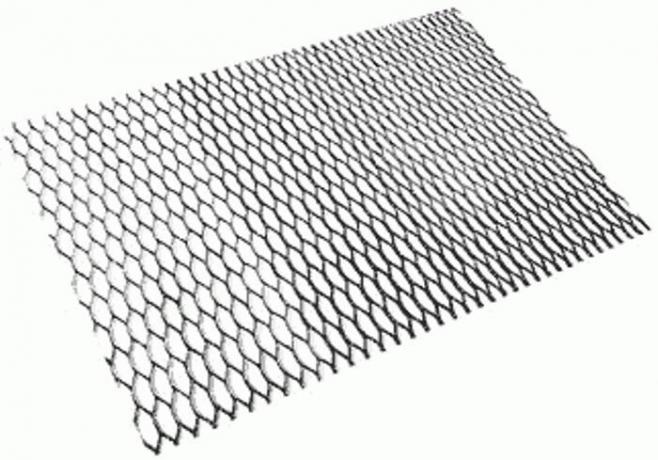
Metal grid
Getting started
So, the window will have to be closed in several stages, which we will now consider:
-
The first thing to do is dismantle. It is recommended to remove the glass carefully in order to avoid cuts. So, after you have managed to remove the glass, you should think carefully about whether to remove the frame from the opening or leave it in place.
If the wall between the bathroom and the kitchen is thin, then it is not recommended to remove the frame with your own hands, since it is not known to which all this can lead to the consequences (if it spoils your mood so much, then just get rid of the platbands);

We disassemble the window
-
After you have coped with the dismantling, we proceed to the installation of the crate. It must be fixed in the remaining window frame with nails or self-tapping screws.
As a lathing, you can also use chipboard (from the kitchen side), which is also attached to self-tapping screws;

Pay attention to the chipboard crate
- The next step is to cover the window with mortar. In order for the solution not to simply flow out of the prepared frame, it is necessary to replace it so that it is thick.
Attention!
Place some kind of fabric or film under the opening to protect your floor from the cement dust and dirt that comes with cement finishing.
Advice!
To make the solution harden faster, builders recommend adding a little ordinary gypsum to it.
- The window from the bathroom to the kitchen must be thrown with a solution in five six stages - this has to be done due to the fact that a thick layer of liquid solution will simply fall out of the opening.

We throw in the cement, after inserting the mesh
-
The last step is leveling the wall. After the solution has dried a little, go over it with a float (special tool for leveling the surface).
After mixing the slurry (watery mass), spray it onto the work surface and rub the surface thoroughly with a float again.

Result
At the exit, you should have a perfectly smooth cement surface, indistinguishable from a regular plastered wall.
Advice!
From the side of the bathroom, you can treat the resulting surface with a moisture-proof solution or perform a full waterproofing.
The price of the issue with this method will be about 500-600 rubles (taking into account that you have to buy only the material).
Other solutions to a painful problem
Due to the fact that there was no Internet in the country in the mid-90s, and there was a window in the bathroom to the kitchen, people came up with many ways to solve this problem. Let's take a look at each of them separately.
Brickwork

Kiln brick is ideal
If you have a dozen bricks lying around in your garage, then you can repair the annoying window with their help.
To do this, you need the following tool and material:
- Bricklayer Trowel (use medium);
- Cement of the M-400 or M-500 brands;
- Sand;
- Pickaxe (a hammer is also suitable);
- Metal fine mesh;
- Wire (any);
- Grater, wide spatula and narrow spatula.
Now we will try to understand this method in more detail:
- We proceed to dismantle the glass and window frame. In this case, you will have to remove all wooden structural elements, up to the mortgages;
- If the edges of the window opening crumbled after dismantling the frame, they should be carefully restored with a thick solution;
- When everything is ready to go, mix a small amount of mortar and start making brickwork.
Advice!
If the width of the brick is slightly larger than the width of the opening, that's okay! Place the brick on its edge. Thus, you will be able to save on material.
- In the event that you have finished laying solid bricks, and 5-7 cm was not enough to the top, do not despair. You can push a small brick fight into the gap and rub it with cement (on both sides);
- After finishing the work of a bricklayer, we proceed to plastering. This issue can be solved using the same cement.
If this option does not suit you, then purchase gypsum plaster, with which you can make the surface smoother and smoother.
Decorative finishing as an option

Stunning interior window solution
If you do not have the time and desire to do the work of sealing the window opening between the bathroom and the kitchen, then decorative glass can be ordered as an alternative solution. It can be patterned or wavy, have a rough structure or be tinted. The most important thing is that nothing can be seen through it.
When you are thinking of closing up a window at the renovation stage, there is another interesting way to recommend.
We close "whatever"
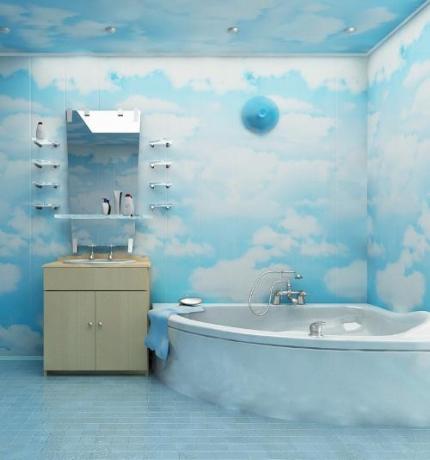
Finishing the bathroom with PVC panels - the interior window is perfectly hidden behind the material
In the case of finishing the bathroom with PVC panels, you can simply close the window with this material (after removing the glass and platbands). Use insulation as an intermediate material, which can be glued to liquid nails from the kitchen side.
What about the kitchen? When you use MDF wall panels for kitchen, then the insulation is closed with them, and when the wallpaper is, then there is a slightly different solution. To begin with, fix a metal mesh over the insulation and seal up the opening with plaster.
Next, you should align the wall (see. See also article on wall design in the kitchen) and that's it! A perfectly flat wall is ready, and no one will even remember about your window opening.
Summarize
If it seemed to you that it was difficult to get rid of the window between the bathroom and the kitchen, you were wrong. Why? You will be convinced of this clearly, because on our website there is a detailed photo and video instruction in which the masters clearly show and tell everything.
Do not be afraid of radical changes in your kitchen interior design - everything can be done beautifully and without the help of calling professionals, it is enough to believe in yourself and do the work yourself.
