Content
-
1 Solving the problem - available ways
- 1.1 The advantages of a combined kitchen with a living room
- 1.2 Disadvantages of a combined living room and kitchen
-
2 We do renovations: we combine the living room and the kitchen
- 2.1 Tools and materials
- 3 Room preparation
- 4 Finishing work
- 5 Features of the workflow
- 6 Conclusion
According to statistics, on average a person spends about 2 hours a day in the kitchen, not taking into account the fact that many women are housewives. Now let's move to a tiny kitchenette (6-7 m2) and try to fit all families there and spend at least half an hour there.
Obviously this is simply not possible. There is only one way out - to combine the living room and kitchen, thereby increasing the space.

The kitchen does not look at all superfluous in this room, but, on the contrary, complements the living room
Solving the problem - available ways
It is clear that all actions must be supported by official permitting papers, because the redevelopment of the kitchen-living room includes the demolition of the interior walls.
Therefore, the repair process begins with the collection of the following documents:
- Residential property ownership. Certified copies may be used.
- Application for redevelopment.

This is what a redevelopment application looks like
- Technical passport of the premises.
- The project of the future premises.
Note!
If your apartment is located in a building of any historical value, you must agree with the authorities for the protection of cultural heritage.
Otherwise, no matter how hard you try, no one will give you a permit for restructuring.
As for the project itself, it should be drawn up based on all kinds of options, available materials and fashion trends. Price is far from the last indicator that you have to pay attention to.
The advantages of a combined kitchen with a living room
- Visual increase in space. From two small spaces, you get one more.
- Availability and capacity. You can forget how cramped it was on 6 square meters, and calmly sit on a large, comfortable area.
- Practicality. The use of combined interior items: one dining table, bar counter as a partition, lamps, TV.
- The layout of the living room with kitchen allows you to remain in sight at all times: if guests come to you, if you have small children. Now you can safely cook without interrupting your other activities.
Disadvantages of a combined living room and kitchen
The combined layout of the living room-kitchen creates not only positive qualities, but also negative points appear that you should be aware of before starting a repair:
- The smell of food in the living room. Everything that you cook will certainly be felt in front of the TV. The only option that will help solve this problem is increased ventilation and installation of a kitchen hood.
- We'll have to keep the kitchen always clean, no piles of dishes can be erected, since all this will be in plain sight.
- The sounds of cooking and various household appliances will be heard throughout the room.
Important! Partial delimitation, for example with a glass partition, reduces the amount of background noise.
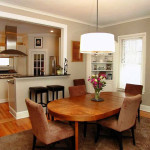
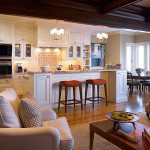
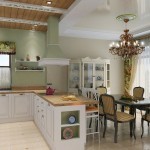
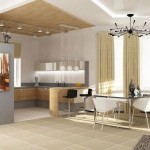
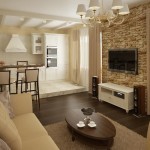
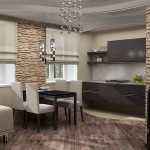
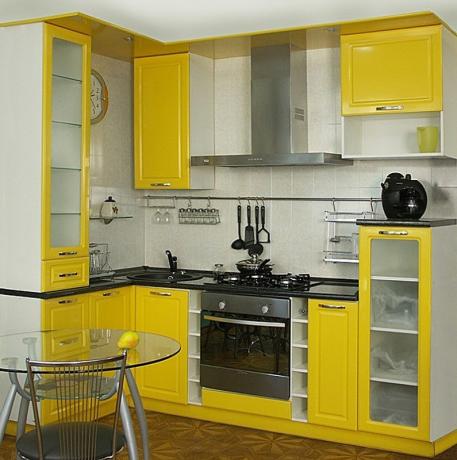
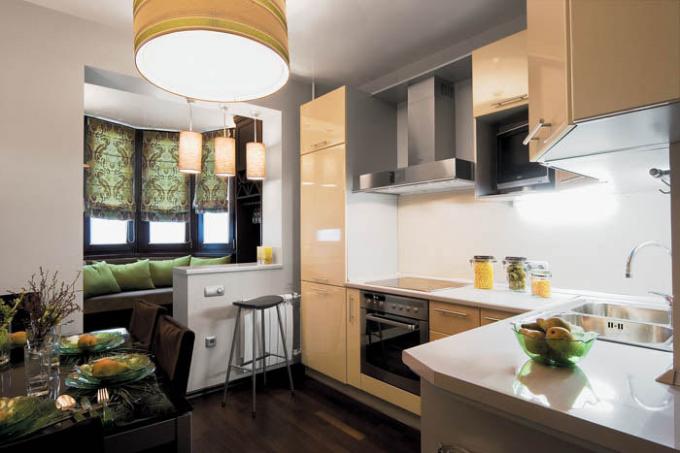
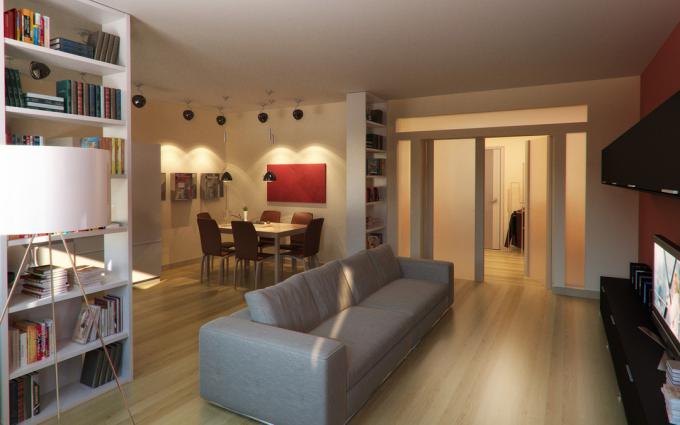
In the photo you can look at the ready-made options for a combined kitchen with a living room.

Note how the two rooms are distinguished: the bar counter and the flooring

In such kitchens, everything is at hand: both the TV remote control and the stove

An important point is the harmonious combination of color
We do renovations: we combine the living room and the kitchen
If everything suits you, then you can start repair work. Redeveloping a kitchen living room with your own hands can take a lot of time and effort, but it will certainly save a lot of money. Therefore, if you are ready to independently make your apartment more comfortable and cozy, then you should start immediately:
Tools and materials
To begin with, let's decide what we need for work:
- Perforator. Be sure to stock up on a set of drills that will be required to demolish the walls.
- Drill.
- Screwdriver. Required for finishing work.
- Sledgehammer and hammer.
- Brush and roller.
- Building level.
- Bulgarian.
Advice! Stock up on a sufficient set of discs, they will come in handy for the strobe.
Building materials will require:
- Cement-sand mortar.
- Plaster, putty and primer.
- GKL and metal profile - if you plan to build gypsum plasterboard structures: walls and ceiling.
- Laminate and underlayment is a cheap and practical option for living room flooring.
- Tiles are the best option for your kitchen floor.
- Wallpaper and glue - wall decoration.
- Paint.
- Linoleum.
Note! Please note that you may not need any of the listed items. Choose for yourself everything you need and get to work.
Room preparation
The instructions for construction work are described below:
- The first step is to clean both rooms of furniture and other utensils.

Something like this looks like the room in which repair work is underway
- After the living room and kitchen are vacated, it is necessary to deal with the old finishing materials. If there is a laminate on the floor, then it should be removed, the tiles in the kitchen may remain, but if you put a new one, it is better to prepare the surface in advance.
- The next stage is the demolition of the walls. To do this, use a hammer drill with a large drill: drill out small squares around the perimeter, then hit them with a sledgehammer. A fairly quick and effective method if you decide to redevelop an apartment on your own.

After the walls are destroyed, you can build practical partitions in the form of cabinets.
Note! Brick can be "knocked out" without using a hammer drill. And in some houses, partitions can be made of wood.
- Now you can remove all construction waste and clean up the room for the next work.
Finishing work
According to your project, you need to do the finishing of the premises.
- Initially, they begin to install ceilings if they decide to erect a suspended or tension structure. Or just paint or whitewash the surface.
- The next step is laying the flooring. If you use linoleum, then preliminary work is reduced, only to cleaning the floor. You will have to tinker with the laminate, it requires a flat surface.
Important! Using a cement-sand mortar for the screed, align it with the beacons installed on the level. Also, the surface of the cement should be covered with a laminate underlay.
- The walls are finished last. If you are gluing wallpaper or tiles, it is advisable to level the surface. Otherwise, for drywall and decorative plaster, a flat surface does not matter. Visually, the curvature of the walls will not be noticeable.
Features of the workflow
The layouts of the kitchen-living room, like any other construction stage, have many nuances that not everyone knows about.
We have prepared some of them so that during the repair process you will not have any difficulties:
- Remember, renovations always reflect on your neighbors: constant noise and dust. Therefore, in order to avoid excesses, take breaks between noisy work, as well as at lunchtime.
- Do not store garbage in the entrance, this will lead to the fact that the tenants will be outraged and may demand a fine from you for dirt.
- Strictly follow the sequence of the above instructions.
- When working with adhesives and other mixtures, protect yourself, use safety glasses, a mask and gloves.
- Reliable fasteners are the foundation of the design. It is best to use stainless steel hardware that is not affected by moisture.
- When working with wallpaper or paint, do not create drafts or disturb the room temperature. Otherwise, all finishing work will have to be done anew.
- Try to give preference to more natural materials to make the room more comfortable for living.

The smaller the dining area, the larger the living area
Conclusion
Remember that repairs that you do yourself can take a long time, and even more so it will be protracted if you have never done finishing before. But, in any case, this option will save a lot of money on the services of workers.
As for additional ideas for a combined living room and kitchen (see. also living room-kitchen design in a private house), then they can be gleaned from the video attached to the article: how to plan a kitchen living room. We wish you success in all your endeavors!