Content
- 1 Advantages of the kitchenette
- 2 Buy or do it yourself
-
3 Making a corner for the kitchen
- 3.1 Putting together a long sofa module
- 4 Conclusion
The kitchen corner gained particular popularity back in the Soviet years. In small apartments, he was practically irreplaceable. However, even with the advent of housing with large and comfortable kitchens, the demand for corner kitchen furniture did not fall.
On the contrary, the wide range of kitchen corners offered by modern manufacturers speaks volumes about the demand for this cozy piece of furniture.

It is always cozy to sit in the corner, especially in the evening, drinking hot tea
Advantages of the kitchenette
Corner sofa in the kitchen - just a find. It sits compactly in the corner of your kitchen without taking up extra space. At the same time, it is a cozy, favorite place for home gatherings.
Plus, almost all kitchen nooks have built-in internal drawers to store the countless little things we need in the kitchen. The sofa seats are both storage lids and decorative items. In addition, this is furniture - transformer.
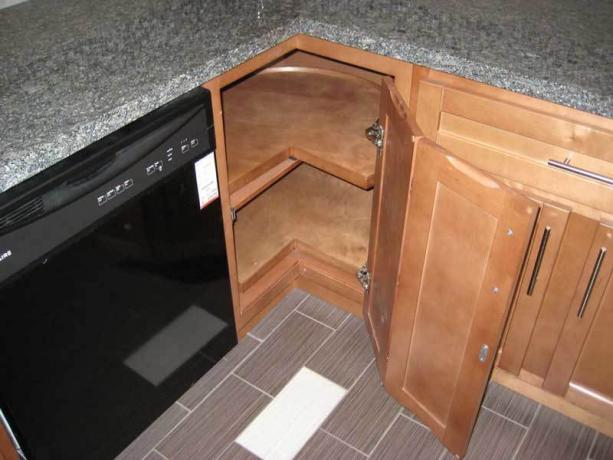
As you can see in the photo, the kitchenette consists of three sections:

The three sections are interconnected by means of intersection ties
- Long sofa.
- Short sofa.
- Corner sofa.
By varying the arrangement of parts of the sofa, it can be made left-sided, right-sided, or, if necessary, placed along the wall in one line. This makes the corner mobile when cleaning and moving.
Buy or do it yourself
Along with a large selection of ready-made furniture, almost every store is always ready to offer you an individual solution to a problem. However, try making your own kitchenette. This is not only an opportunity to save money, but rather, it is a chance for the flight of your imagination, the implementation of your own design ideas.
Your corner can be with hard backs and seats. These, as a rule, are made from natural wood, so if you have never encountered such work, start with a simpler option. For example, a sofa made of chipboard with seats and backs upholstered with fabric, leather or leather.
And the price of fiberboard is significantly different from the cost of wooden blanks. In addition to the creative component of this process, a less exciting, but absolutely necessary development of a new furniture project awaits you. As a basis, you can take the drawings of a simple kitchen corner, presented in the figure below, and modify them taking into account your individual measurements and wishes.

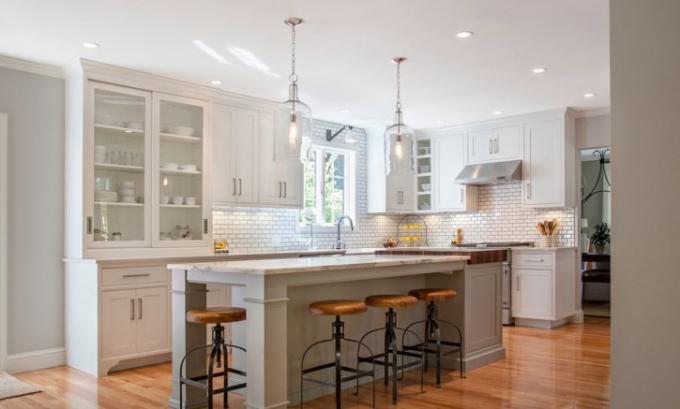
Several options for a homemade piece of furniture
Making a corner for the kitchen
You will need the following materials:
- Laminated particle board 16 mm thick for facade details.
- Chipboard boards, sanded without coating, 16 mm thick.
- 2 mm thick ABS edging for facing end faces.
- Foam rubber for seat and backrest device 20-50 mm thick.
- The upholstery material is at your discretion.
- Fasteners (piano hinges, metal corners, furniture screws).
Note!
Now in any hardware store you can buy chipboard boards with a coating of all possible colors and textures, as well as the necessary accessories and fasteners.
There you can also order the sawing of the chipboard you like, pasting the ends of the front parts, choose the upholstery fabric for the seats and the back of the sofa.
In general, save on working time.
Below is a detailed instruction on how to make a kitchen corner yourself.
We start building our sofa:
- We make the necessary measurements, decide on the design of the corner.
Advice!
Since you have already undertaken to create your own corner sofa, make it as comfortable as possible for your family in height from floor to seat.
- We supplement the standard drawings, if necessary.
- We do the purchase of materials.
- If you didn't cut and trim the fiberboard at the building store, do it yourself. To do this, use either a building hair dryer or a regular iron.

After the melamine edge heats up, it is advisable to press it properly against the part using a felt bar
- Get yourself a comfortable workspace and tools.
Putting together a long sofa module
So, all the parts are cut out, the front ones are pasted over along the end of the contour with an ABS edge, we proceed directly to the assembly of the kitchen corner:
- Corner sides - the main bearing face parts. They are made of laminated fiberboard. Before assembling, screw 4x30 mm thrust bearings to the bottom ends of the sidewalls using 4x16 mm self-tapping screws.
- Collecting a niche. The front part is made of laminated fiberboard, the rest of the parts are made of polished fiberboard (bottom, back wall, seat - cover). The strip for fixing the cover - the lifting seat with a piano loop is made of laminated fiberboard. The main hardware is the Euro screw (confirmation).
- Backrest and upper corner strip cut from laminated fiberboard. These parts are attached to the sidewalls and fixed with metal corners. We fasten the corners with self-tapping screws.

Analogue of metal corners - plastic hidden, not allowing to see the screw cap
- Backrest and folding seat covered with foam rubber and fabric (leather, leatherette). To do this, it is better to use a furniture stapler than a hammer and nails.
Let's take a closer look at how to make the kitchen corner soft yourself. You will need two pieces of foam for the seat and backrest.
They need to be cut to the size of the corresponding parts with a twist allowance:
- For a seat on the front end - 2 cm. On the sides, turns should not be done - they will interfere with opening and closing.
- For the backrest at the top and bottom ends 2 + 2 cm.
Important!
In order to avoid slipping of the foam rubber during the wrapping process and displacement during use, it should be placed on the glue in several places.

It is better to use regular PVA, it is cheap and dries quickly
We complete the process by wrapping the foam pads with the selected material using a stapler with a step of 2-2.5 cm. Short and corner kitchen modules are assembled using the same technology.
Conclusion
As you can see, there were no difficulties in making the corner, everything is done with an improvised tool that almost every man has. In any case, everything you need can be rented from a hardware store.
In the video presented in this article, you will find additional information on this topic.