Content
-
1 Choosing a time-tested method
- 1.1 Wood
- 1.2 MDF
- 1.3 Chipboard
- 1.4 A rock
- 1.5 Concrete
-
2 Operating procedure
- 2.1 Project
- 2.2 Calculation of materials
- 2.3 Purchase of raw materials
- 2.4 Frame fabrication
- 2.5 Formwork
- 2.6 Reinforcement
- 2.7 Solution
- 2.8 Laying mortar and leveling the surface
- 2.9 Laying tiles
- 2.10 End finishing
- 2.11 Frame sheathing
- 3 Tool
- 4 Conclusion
The countertop is the alpha and omega of any kitchen, the battlefield and the work of every housewife. All culinary experiments and daily routines take place here, so the countertop takes the brunt of the load. Naturally, the requirements for its quality are increased.

Ceramic tiles will help create any original style.
However, it is not so easy to buy beautiful, durable, comfortable and stable kitchen furniture today, because the prices for such materials are simply exorbitant. There is only one thing left: to make a kitchen countertop with your own hands.
Choosing a time-tested method

The tiles can be matched to the walls.
There are many ways to make countertops. All have their advantages and disadvantages:
- Solid wood worktop;
- from MDF;
- from laminated chipboard;
- from laminated chipboard and tiles;
- from natural stone;
- made of artificial stone;
- concrete countertop, polished to look like granite or marble;
- concrete countertop covered with ceramic tiles or porcelain stoneware.
Read also the article on the site What are kitchen countertops - base material.
Wood
The use of solid wood for the kitchen does not seem preferable to us, since wood absorbs moisture, fats, odors, etc. It is also easily scratched and cut, burns and deteriorates, changes color, is soaked in fruit and vegetable juices, blood and spices.
Article Wooden countertop for the kitchen: imitation or natural wood? contains details on this matter.
MDF
MDF is also afraid of moisture, in addition, it swells from water and changes shape. Even if it is covered with a film or postforming, if this coating is damaged, water will penetrate into the body of the slab. Considering that the countertop is a high-risk area, constantly exposed to hot, sharp and heavy objects, MDF does not seem to be a suitable candidate for the role of a hard-wearing coating.
Chipboard
Chipboard has the same weaknesses as MDF, only its quality is even lower, and over time it delaminates and becomes unusable. The film, which is covered with chipboard, is afraid of high temperatures and a knife, and if damaged, it cannot be repaired.
A rock
You cannot make a natural and artificial stone with your own hands, so we will not consider these options.
Concrete
Concrete remains. Concrete polishing and coloring requires certain skills, so consider the most traditional, but but a time-tested and simple way - making kitchen countertops from concrete covered with ceramic tiles.
Important! Speaking of ceramic tiles, we do not limit you to a certain type of coating: you can use floor tiles, wall tiles, porcelain stoneware, mosaics and other similar coatings.

Porcelain stoneware perfectly imitates natural stone.
Operating procedure

When buying a tile, you can choose accessories for finishing the ends.
The production of concrete kitchen worktops includes the following sequence of works:
- Creation of a project with a drawing;
- Calculation of the amount of all materials;
- Purchase of raw materials;
- Making a frame for a tabletop;
- Formwork manufacturing;
- Reinforced mesh installation;
- Solution preparation;
- Pouring concrete;
- Surface leveling;
- 10. Gluing tiles;
- End finishing;
- Frame sheathing.

Even simple tiles can create a sophisticated interior.
Project
Any production activity should begin with design. Since you yourself will be the implementer of your project, it is enough that the drawing is clear to you. You must know all the dimensions of the future product.
Calculation of materials
Having a drawing with dimensions, you can easily calculate how much material you need. By multiplying the area of the countertop by its height / thickness, you get the volume of the product. This is the volume of solution you will need.
Calculate for concrete grade M150 and cement grade 400, at the rate of 265 kg of cement per cube of concrete. However, you do not need such an accurate calculation, just buy one bag of cement, a bag of sand and a bag of fine gravel.
The number of trees will have to be calculated independently, based on specific sizes. You will need a 100 × 100 or 150 × 150 timber, clapboard or tongue-and-groove board, you may want to do doors or drawers, shelves, etc. You're only limited by fantasy and willingness experiment.
Advice! When calculating, immediately add about 10% on top of the received amount in reserve and in case of rejection during cutting and installation. Scraps and whole leftovers will come in handy on the farm and in the case of countertop repairs.
Purchase of raw materials
This point should not cause any difficulties, since our trade is developed quite normally. The volumes of materials in our case are small, so it is better not to save money and choose high-quality raw materials, the final price will not change much when buying such an amount.
Advice! In large supermarkets, you can immediately cut the material to your size. Often this service is a bonus, so check with the sellers.

Cutting kitchen countertops can be done right in the supermarket.
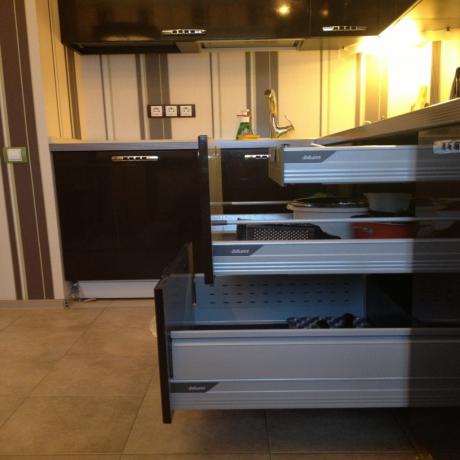
Frame fabrication
There are two ways to make kitchen countertops:
- The table top is made entirely from scratch;
- The old table top is used, we only change the top.
If you are making a countertop from scratch, you will need to make a frame on which it will stand. To do this, it is better to use a beam with a section of 100 or 150 mm, you can use a board of 150 × 50 mm, since the concrete product is quite massive.
The legs of the frame can be fixed to the floor with metal corners and dowels. Along the perimeter of the junction of the countertop to the wall, we fasten the timber with dowels and anchor screws. You can also use a metal frame:

For strength, you can use a metal structure.
Next, we connect the legs with bars so that these bars are on the same level with those that are nailed to the wall. We check with a building or water level. We attach a sheet of plywood to these bars with self-tapping screws.
We select the thickness of the plywood so that it can withstand the mass of the solution without bending. You can use MDF or chipboard. It is better to place jumpers under the plywood, which will not allow it to bend and strengthen the frame.

Concrete countertop frame with plank drawers.
If you are using an old countertop, make sure it is strong enough and well secured. Also check the strength of the frame underneath. Next, it must be cleaned, check the horizontal position of its position using a level.
Formwork

The formwork consists of a board fixed along the perimeter of the table top to the ends.
Along the perimeter of the future tabletop, we fasten the formwork from a board of 150 × 50 mm or MDF, cut into strips. We pull the boards to the end bars with self-tapping screws, we also tighten them together.
If holes for a sink, sink or hob are supposed to be inside the worktop, we make molds from plastic or sheet metal and fasten them inside the formwork with self-tapping screws.
Since we will use a fairly liquid solution, we will lay a construction plastic film inside, as shown in the photo. We make the height of the formwork equal to the thickness of the table top, the upper surface of the boards must be set at a level.
Reinforcement
After the formwork is installed, we lay the reinforcement mesh. For the countertop, a wire mesh with a thickness of 6 - 10 mm and a mesh size of 50 mm is sufficient.
The mesh is placed on plastic or metal supports with a height of 20 mm or more. The distance to the edges should not be less than 1 cm. The metal must be covered from all sides with at least a centimeter layer of concrete.

The reinforcement must not lie at the bottom of the formwork.
Solution
For concreting, mix 1 part of grade 400 cement with two parts of sand and two parts of crushed stone. Add water while stirring until it becomes liquid sour cream. You can knead in a bucket using an electric drill and a mixer, you should mix at low speeds.

It is convenient to use a drill and mixer for mixing.
A self-leveling floor screed mixture is also suitable for our purposes. We knead it according to the rules that the manufacturer's instructions offer.
Laying mortar and leveling the surface
Pour the solution into the formwork to the brim and level it with the rule, using the formwork boards as beacons. The solution should settle well, there should be no voids or bubbles left in it. You can use a vibration tool of low power, this will improve the quality of the concrete.
At the end, you can finally level the surface with a spatula, but this is not necessary, since we will be laying tiles.
Laying tiles
After pouring the concrete, after 2 - 3 days we dismantle the formwork. Now you can lay tiles.

After dismantling the formwork.
We have a flat horizontal surface, so there should be no problems with styling. Use a notched glue trowel, apply the desired layer and lay the tiles. We use crosses for the gaps.

We put the tiles very carefully.
When the surface is dry, rub the seams. For joints, it is better to use epoxy grout, it will best protect against moisture and aggressive chemicals.
End finishing
To decorate the ends, you can use accessories made of ceramics or metal and plastic profiles. When working with ceramics, we use "liquid nails", with the help of them we glue the end elements:

We glue the ends.
Frame sheathing
You have clearly seen how to make your own kitchen countertop. There remained a mere trifle - the frame sheathing. To do this, you can use plywood, siding or clapboard. You can also make doors and panels from kitchen facades, which are sold in abundance in hardware stores.
Tool
To perform the listed works, you will need:
- A hammer;
- Electric drill;
- Hacksaw;
- Electric saw;
- Electric jigsaw;
- Drill mixer;
- Vibrating frame;
- Building level;
- Laser level;
- 10. Screwdriver;
- Construction knife;
- Notched trowel;
- Rule;
- 14. Bucket;
- Master OK;
- 16. Crowbar;
- Pliers;
- 18. Nippers;
- 19. Bulgarian;
- 20.Scissors for metal;
- Roulette;
- 22. Ruler;
- 23. Pencil;
- 24. Marker;
- 25. Calculator;
- Sealant;
- 27. Rubber spatula;
- 28. Putty spatula;
- 29. Rag;
- 30. Safety glasses;
- Gloves.
Conclusion
The cost of a good stone countertop in a store starts at 10,000 rubles. Concrete production does not cost more than $ 150, more often about $ 100.
Read also the article DIY kitchen countertop from tiles: step-by-step instructions.
If you are ready to do a little work, then you will get an original, inexpensive and high-quality countertop that will serve you for a very long time. And to understand in more detail with all the nuances of the manufacturing process, the video posted below will help.