Content
-
1 What is this patina
- 1.1 Find out, apply
- 1.2 We started
- 1.3 What we want
- 1.4 Finally
Retro style will always be in demand. At the same time, the effect of aging furniture can be recreated both on a natural wooden facade and on a more modern and cheaper substitute for MDF. Facades for a kitchen with patina - is it a tribute to fashion or a popular design move?
Patina for the kitchen - is it possible? With this we will try to figure it out today.

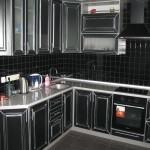
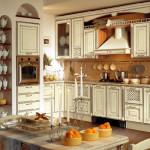
The effect of an aged facade can be seen in this design solution.
What is this patina
Patina and the effect created with its help have been known for a long time. The patina itself is a film that forms on the surface of products made of copper or bronze, and later brass. A peculiar oxide accompaniment made it possible to bring deeper color solutions to a metal product. Such products were valued much higher..
Later this term was applied to the aging of wood and porcelain (the appearance of a mesh of irregular furrows - "wrinkles"). In the east, a sacred meaning was put into patinated porcelain, wood and metal.
Patination is an artificial aging of a completely new surface, which gives the product exclusivity and nobility. Wood and metals were aged in a similar way, and materials later created using modern technologies, such as MDF, were subjected to aging.

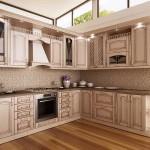
MDF board with patina effect, difficult to distinguish from wood.
Find out, apply
At first glance, the patination effect is very difficult, and it is almost impossible to use it in home production. Now there are whole courses and master classes that teach these techniques to everyone. In fact, the technology of applying patina itself is not difficult, and the skills acquired during the application process will remain with you for a long time.
And the first object on which artificial aging can be reproduced will be the kitchen. And the material that we will age is MDF.

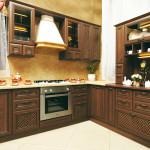
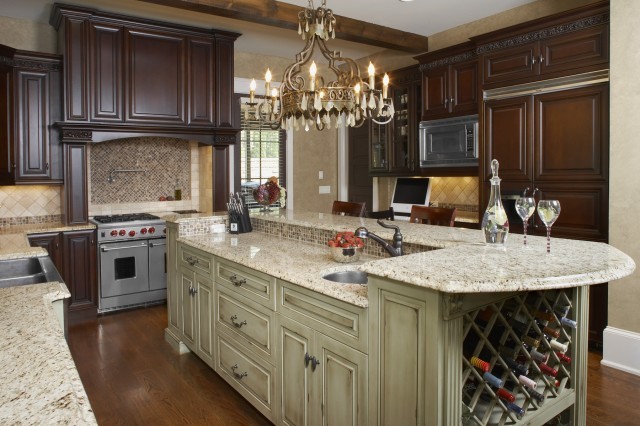
Italian style of patinated facades.
If you have ready-made MDF facades for the kitchen, patina is not the only material that we need.
So, let's pick up consumables and tools.
- MDF facades laminated on one side, which will be internal and open from the ends and on the other side of the slab - naked MDF structure;
- Spray gun, brushes, metal mesh for dishes;
- Insulator, aka barrier-soil;
- Colorless polyurethane primer;
- Patina or as it is also called, paintwork for special effects;
- Varnish for finishing the product.
Note!
If desired, you can also patinate the inner surface of the MDF board.
But, the price of consumables is not quite low.
The inner part of the slab is not visible and, in fact, its additional coating is not economically justified.
We started
Below is an instruction with a step-by-step surface treatment process. Using it, you can give the visual effect of antiquity to your panels with your own hands (see. also restoration of kitchen facades).
That will save a fairly round amount of money.

Effect recreated with patina.
- The first step is to apply an insulator. Features of the application of this material is that the barrier-primer is applied, exclusively, in a thin layer, evenly. This can only be achieved by using a spray bottle;
Note!
When choosing a barrier primer, only select an insulator for laminated surfaces. This is due to the adhesion properties of the primers.
- The second step is to apply a layer of colorless polyurethane primer;
Note!
Colorless primer for MDF dries very quickly, so the next stage is carried out in half an hour.
- Third - grinding the second layer of soil;
- The fourth step is to apply the patina directly. There are several techniques here. The next step also depends on how the patina is applied.
- Fifth - processing and polishing the patina. As mentioned above, this step depends on the desired effect and, accordingly, on the method of patina treatment.
Note!
For a clear presentation of the material and to prevent confusion, methods of direct patination are outlined in a separate chapter.
- The finishing step is varnishing. We fix the resulting patination effect and protect it from external kitchen influences.
The effect you want to get: shiny or matte patinated kitchen facades depends on the type of varnish chosen.
What we want
We want to receive aged, exclusive furniture from MDF.

This is the kind. For example.
This can be achieved in the following simplest way.
-
After applying a layer of patina, it must be sanded. The layer is sanded with a kitchen mesh. At the same time, the more intensively the grinding process takes place, the brighter the effect we will get at the output.
Can I use sandpaper for this step? It is possible, only its use presupposes certain skills. Therefore, we suggest not to risk it.
Note!
To achieve the desired effect, the patina is chosen either lighter or darker than the background of the base. This difference will create the visual phenomenon that we expect.

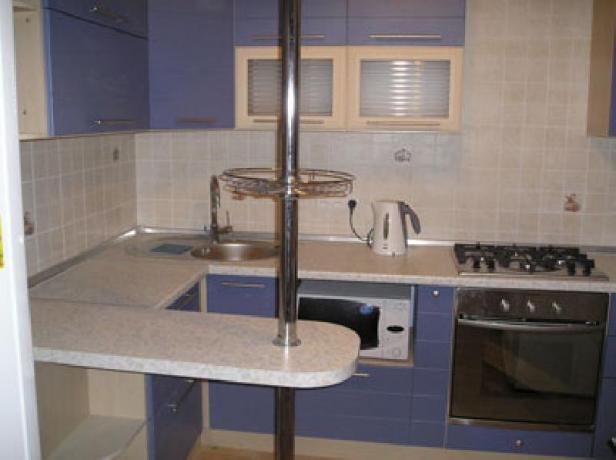
Contrasting patination.
-
The next method involves highlighting individual parts or details with a contrasting color.kitchen facade. Appearance in the photo above. A similar effect is achieved by gilding, or silvering the joints; it is possible to use ordinary darkening with special patinating compounds.
These compounds are applied with a brush, sponge, the excess is removed, and the entire surface of the product is covered with a patina, the processing of which is carried out in the same way as described in the general instructions.
Note!
When applying the effects of gilding and silvering, the finishing is carried out with a matte varnish. The gloss on the gold frame would be out of place.

Crackle effect - "noble" mesh.
-
There is also a third way to apply a patina with a crackle effect - imitation of cracks in the paintwork.. The whole trick lies in the fact that processing with special craquelure varnishes is carried out before the patina is applied.
And only after drying is the patina applied and everything that is attached to it according to the technology. And this type of coating is also possible with the first method of applying patina and with gilding.
Attention! Layers of craquelure varnishes are applied one on top of the other. Moreover, the thicker the layers, the more expressive the effect.
-
The second layer of varnish is applied to the first one in half an hour, after applying the first. For its accelerated drying, the use of an industrial hair dryer is allowed.
After drying, rubbing of golden powder into the formed cracks is allowed, coloring the border with a contrasting, patinating composition.
And after all, a general patination of the product is carried out. A layer of varnish for craquelure is applied with a brush or spray gun. The whole difference will manifest itself only in what we expect: uniform cracks around the entire perimeter - a spray gun, more complex non-repeating patterns - a brush or a roller.
Note!
The craquelure effect is not persistent, so after applying the varnish and drying it must be fixed. Intermediate fixation is possible with a top coat of varnish.
Finally
The aging effect, indeed, visually looks very bright. Using our recommendations, you can always recreate this miracle at home (see. also how to update the facade of the kitchen with your own hands). And our video report will help you see all this. Retro style will always be fashionable and in demand.