Content
-
1 We decide on materials and sizes
- 1.1 Tools
- 1.2 Materials
- 2 We mark and drill
- 3 Assembling the pencil case
- 4 Conclusion
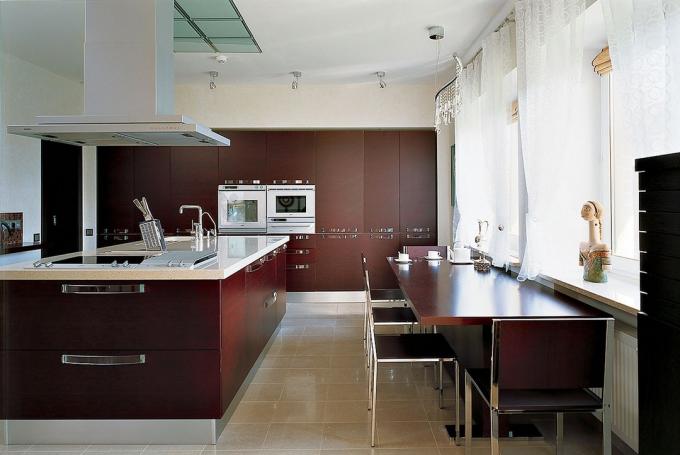
There is always not enough space in the kitchen, no matter how many wall and floor pedestals you install. You can solve this problem with the help of a spacious pencil case, made by yourself, at home. You do not know what is required for this - we will help you.
The main thing is to read our article, and everything will fall into place.

A pencil case in the kitchen is always needed, there is definitely something to put in it
We decide on materials and sizes
Initially, where you need to start the entire workflow is to prepare all the tools that are required. If you have any difficulties, you can rent power tools from a hardware store, most large organizations offer this service. If not, you will have to ask neighbors or acquaintances.
Tools
- Drill. It will require various drills, in particular: 6 mm, 8 mm and 5 mm.
- Screwdriver. Also purchase nozzles: cross, hex (for Euro screws) and countersink. So that the screws are flush with the surface of the material.
- Roulette.
- Construction square.
- Level.
- A hammer.
Note!
You can do with a set of screwdrivers, but this will make the workflow too slow.
When you assemble with your own hands, you want to speed up the work, it's better not to regret a couple of thousand and use a professional tool.
Materials
Now let's pick up the materials we need.
- First of all, we order a frame from a furniture company. Most often it is made from chipboard, so it is practical and reliable.
Most likely, your kitchen is made of chipboard. Find similar colors and sizes. We clarify that it is possible to order drilling with a frame from the organization, but to save money, agree only to the edge sticker. You can drill yourself.
Note!
It is better if the kitchen cabinet-pencil case has a single top point with the top of the wall cabinets. So the composition will look like "native".
- Now we decide on kitchen facades. If your kitchen is old, you will hardly be able to find something suitable, so look at what you like.
If the kitchen is modern, was installed 3-5 years ago, then most likely the material for fronts for the kitchen it will turn out to pick up a single color. It will be either MDF, plastic, or natural wood. - The back wall of the DVPO, it should also be ordered from a furniture organization.
Important!
If you have not ordered accessories, that is, all the components for your pencil case, then you will have to look for a hardware store where all this is sold.
You will need: hinges for swing doors, Euro screws, nails, screws 4x16 mm, handles and shelf holders.
As you can see, nothing complicated. You can buy everything, and assemble it yourself. Moreover, the price for such a service will be much lower than if you order both manufacturing and assembly in an organization.
We mark and drill
The first step is to start by marking the sidewalls:

The drilling process goes something like this
- If the product will stand on the floor, then the lower shelf is marked with an indent of 50-60 mm. From the edges, a pitch of 50 mm is usually used.
- The top shelf is marked with an offset of 8 mm. Depends on the density of the material, if 16 mm, then the middle is 8 mm, if more, then, accordingly, the center shifts.
- The rest of the shelves are laid out in a chaotic manner, that is, as you need. Except for the center shelf, it is required for rigidity.
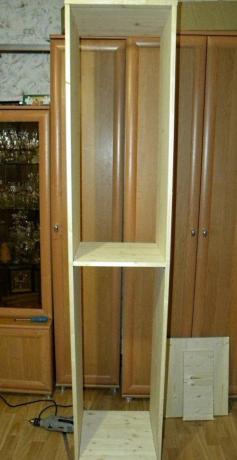
Note that the center shelf is rigid, the rest are removable for ease of use
Note!
It is best to order a few more stiffeners for reliability, which are attached along the back wall. Through them, you can pull the pencil case to the wall.
- All marks for rigid shelves are drilled with an 8 mm drill. On the side from where the euro screws will be screwed in, it is necessary to go through a countersink.
- Use a 5mm drill bit for removable shelves. The depth should be no more than 10 mm, since the shelf support itself is recessed into the material by 6 mm.

Various types of shelf supports
We drill rigid shelves and stiffeners with an offset of 8 mm and 50 mm with a 6 mm drill.
Interesting!
If you don't want to drill a lot of holes, then it is better to use plastic or metal corners and fix them with self-tapping screws.
This is another way to do without a power tool, but not as aesthetically pleasing.
Assembling the pencil case
Now we move on to the most crucial moment, after which it will be possible to draw a conclusion - whether we have got a pencil case for the kitchen or not.
- Let's start by clearing the work area.
- Now we take the side piece and fasten all the hard shelves to it. It's better to do this on the floor, it's easier and faster. However, if you have planned a closet to the ceiling, then you will have to assemble while standing, in this case it is better to find yourself an assistant.
- Then we fasten the second sidewall and punch the back wall with nails.
- We raise the pencil case and push it to the place where it should stand.
- Using intersectional ties, we fix it with a kitchen set: hanging and floor pedestals. If there is nothing in the vicinity, then through the rigidity we fix the product to the wall.
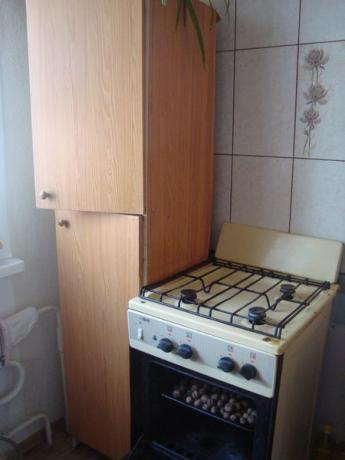
Such pencil cases must be fixed to the wall so that they do not accidentally fall on you.
- We screw the hinges on the doors, try to do it evenly, otherwise the mechanism can quickly wear out.
- Holding the facade to the canopy, we twist the self-tapping screws into the middle of the holes on the loop ear, so that there is room for adjustment. Look at the photo how to do this.
- It remains to drill and screw the handles.

The distance between the hinge and the end of the door should not exceed 5 mm
The final touch is the alignment of the facades. Here, be guided not by the level, but by how the pencil case is visually perceived. In some cases, it happens that cabinets, pencil cases for the kitchen are not installed according to the level, then it makes no sense to measure an angle of 90 degrees and look for a vertical and horizontal plane.
Conclusion
The above instructions should help all those who decided to make their own dresserusing the tool at hand. To help, we have attached a video to the article: kitchen cabinets pencil cases at home, where all stages of this simple process are described in detail and visually.
