Content
-
1 Traditional ways of decoration
- 1.1 Facade painting
- 1.2 Self-adhesive gluing
- 2 Decoupage
- 3 Conclusion
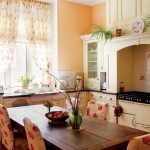
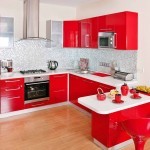
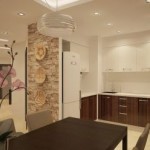
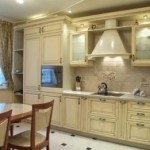
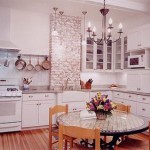
Everyone wants to make their kitchen beautiful, cozy and original. But not everyone has this opportunity. And it's not always just a lack of funds. Living with parents or in a rented apartment, waiting for the completion of the construction of mortgaged housing, you do not want to spend money on new expensive furniture. But then you can transform the existing one with your own hands.
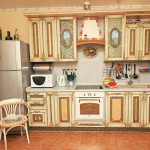
Of course, you can leave all the lockers in place and change only the facades. But they are just the most expensive elements of a headset. Therefore, we arm ourselves with simple tools, buy the most common materials and update our kitchen ourselves.

An old headset will look completely different if you put your hands on it and a little imagination.
Traditional ways of decoration
The first thing that comes to mind when looking at the shabby facades kitchen cabinets - it is to paint them or paste over with self-adhesive film. Indeed, these are the simplest and most effective ways.
Attention!
Painting and pasting are only suitable for surfaces without obvious defects in the form of chips, loose veneers, loss of shape, etc.
Before you start decorating, you need to do some preparatory work, without which beautiful kitchen sets simply will not work.
- Take it all off kitchen fronts from the lockers, having previously signed them on the back, so as not to be confused during installation.
- Remove hinges and handles. If there are overhead decorations on the doors, they must also be removed.

Use a screwdriver or screwdriver to remove the screws.
- Wash the surfaces to be decorated thoroughly with warm soapy water and baking soda and dry.
- Go over them with a fine sandpaper, remove the formed dust with a damp cloth, then degrease the surface with a solvent.
- If necessary, seal up chips and cracks with a special wood putty and let it dry.
This instruction must be followed both before painting and before gluing.
Facade painting
It is hardly necessary to describe the technology of painting surfaces - even children can do this. The main thing is to first cover narrow and curly places with paint, and then flat, even surfaces, brushing in one direction.

The spray gun will make your work easier
Council. It is even better to cover the facades with automotive spray paint. She will lie smoother, and she has more choice of shades and effects. For example, you can take a paint with a metallic or pearl effect.
You can use a layer of applied paint as a background and continue decorating.
- Paint the panels or the central part of the facade in a different color, protecting the areas around them with masking tape.
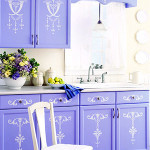
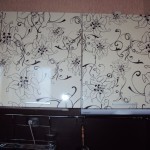
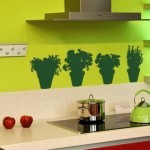
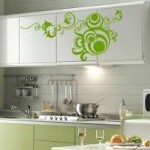
- Use masking tape to create a graphic pattern or ornament on the doors, and then paint them again with a different color. Remove the tape after drying. The following photo shows an example of such a decor.

First paint coat - white
- Stencil your kitchen cabinetry.
Self-adhesive gluing
The choice of self-adhesive vinyl film is very diverse: there are monochromatic options, and films with a pattern or leather, natural stone, wood. The material is glued to a paper base, on which a centimeter grid is applied, which facilitates cutting.
Council. If you have chosen a film with a pattern, pattern, ornaments, when cutting, make sure that it does not move on adjacent facades.
Having peeled off the film from the paper base from one edge, carefully and accurately attach it to the door, aligning the film cut with the edge facade for the kitchen. While gradually removing the paper, glue the film, smoothing it from the middle to the edges with a spatula or palm.

Working with self-adhesive
If air bubbles form, they need to be pierced with a needle and pressed against the surface. If something does not work out, and the film is glued unevenly, immediately remove it until the glue has set, and stick another piece. It will be easier to work if you first wipe the surface with a damp cloth.
Council. The most difficult thing is to carefully glue the ends. Instead, they can be pre-painted in a suitable or contrasting color.

You can also support the color of the handles and ends with vinyl stickers.
The effect of novelty will be enhanced if you screw new handles to the renovated facades instead of the old ones.
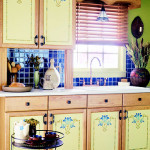
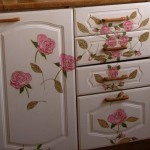
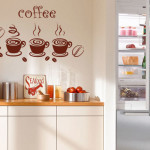
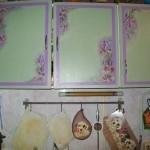
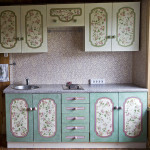
Decoupage
If you can find the same paint or film in the kitchen of someone you know, then with the help of decoupage you get exclusive and very interesting kitchen sets. It is not difficult to master this method, because we all were engaged in application in childhood.
You need to prepare kitchen facades for finishing in the same way as for painting. You can also paint them before decorating if you need a background of a certain color.
Prepare the following materials and tools for work:
- Decoupage cards. Instead, they often use ordinary three-layer napkins with a picture (top layer), pictures from magazines or images printed on a color printer;
- PVA glue;
- Scissors;
- Clear acrylic varnish;
- Brush.
The decor of the kitchen set begins with cutting out pictures and choosing their position on the doors. Then they need to be glued with PVA glue and allowed to dry.
Some difficulties may arise when gluing napkins. They should be coated with glue directly from above, laying in place. To avoid damaging thin paper, work with a soft brush or fingers, dipping them in glue and smoothing the picture to avoid creases.

Decoupage with napkins
When the glue dries, you can paint on small details, outline the contours, and then the entire surface will need to be varnished in two or three layers.
In the video, you can get acquainted with this process in more detail.
Conclusion
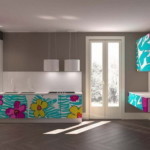
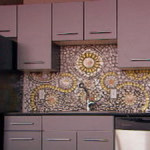
There are many more ways to give old kitchen furniture a second life. For example, you can stick tiles or mosaics on the doors, cut out the central part and insert glass, rattan, bamboo linen, wooden slats, etc. The price of any such alteration in comparison with the result will seem to you simply funny.
Gallery