Content
- 1 Structural advantages
-
2 Bar counters for home: types and materials
- 2.1 Types of bar counters
- 2.2 Materials for making
- 3 DIY bar counter in 8 steps
- 4 Bar lighting
- 5 Finally
The bar counter is not only a stylish, but also a functional element of the kitchen space that can become a real highlight in the interior. To create such a structure on your own, it is not enough just to follow the step-by-step instructions, you need to study the types of racks and materials. We will consider all these points in more detail in our article.

The bar counter, in addition to being decorative, can perform several functions
Structural advantages
Bar counters are not only a decorative element, but also a useful part of the kitchen space. Such constructions can perform several functions at once. Let's consider them in more detail.
- Space divider. The design can serve as a zoning tool in small apartments, visually separating the eating area from the recreation area.

In a studio kitchen, the counter can act as a space divider
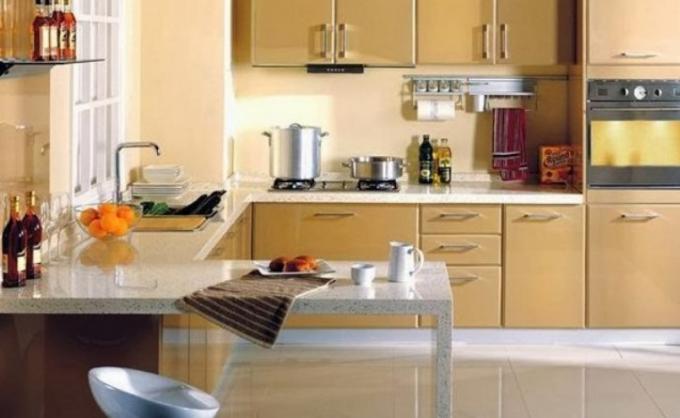
- Breakfast area. Ideal for a quick breakfast or even for drinking alcoholic drinks. If friends or acquaintances often come to visit you, then it will be very convenient for your whole company to sit behind bar counter in the kitchenwhile sipping some cocktail.

Compact design can replace a large dining table
- Decor element. The design contributes to the creation of a light, relaxed atmosphere (bar counter, soft light from above from a lamp specially installed for this purpose, calm music will help create a romantic atmosphere in room).

Stylish stand is able to decorate any interior
If you have small children at home, then in the kitchen you will also need an ordinary dining table, since it will be inconvenient for children to sit on high chairs near the bar in the kitchen. The only exceptions are two-level counters, which include a dining table.
Bar counters for home: types and materials
When talking about a bar, words like cocktail, beer, good mood and pleasant company immediately come to mind. But this element of the interior has long ceased to be exclusively the prerogative of bars. Nowadays, it can be found in many home kitchens.

Bar designs differ not only in shape, but also in the materials from which they are made
Home craftsmen, thinking about how to assemble a bar counter for the kitchen, look through various photos on the Internet on this topic, come to the conclusion that this question is not so difficult. The main thing in such cases is to determine the size, as well as the location of this structure.
Given the abundance of various design and placement options, the question of which one should be preferred is quite expected. When answering, it must be borne in mind that this product should organically fit into the interior, without blocking the passage and leaving room for a convenient location of all household members.

The structure can be located in the center of the kitchen, on the border between the dining area and the sitting area, as well as in the corner by the window
Types of bar counters
When creating a bar counter with your own hands, you can implement the following types of structures:
- Stationary. It can be done both with standard sizes and in mini format (if the room is small). The maximum height of the table top in this case does not exceed 1.2 m from the floor. High bar stools with footrests, armrests and backs are ideal for such furniture.

High chairs with footrests are the best solution for stationary structures
- Two-tier. In this case, the bar countertop should be adjacent to the dining table. This option is best used for zoning space in a kitchen combined with a living room. The higher part of the structure will be located in the living room, while the lower one will be located in the kitchen.

Two-tier models act simultaneously as a work surface and a table
- Combined. Will fit well into the decor of a small kitchen. In this case, the height of the work surface is approximately 90 cm. It is perfect to complement chairs with standard dimensions.
Compact combo rack - the best solution for a small kitchen
Materials for making
In this section, we'll go over the most suitable materials that you can use as a basis for creating your own bar counter.
- Laminated chipboard. Good because it is presented on the market in a wide range of colors and imitations of various expensive materials. A sufficiently durable coating that can last you more than one year.

Laminated chipboard is a practical and fairly durable material
- Plastic. The price for it is lower than for laminated counterparts, and the processing process will not cause any problems. It is also available in a wide range of colors so you can easily find the perfect shade. The main disadvantage of plastic is its low strength and fragility.

Plastic is one of the most budgetary, but also short-lived materials
- Wood. If you use natural wood in the process, the result will surpass all expectations. But you can't work with it without proper carpentry skills. And the cost of solid wood can hit your pocket hard.

The texture of natural wood will fit perfectly into the classic interior
- Drywall. Its main advantage is the ability to create a structure with any shape. It is easy to work with him even without special skills. In addition, drywall is easy to paint, which allows you to change its color and update the decor if necessary.

It is easy to work with drywall, in addition, you can create structures of any shape from it
- Brick. The bar counter in the kitchen with your own hands, made of brick, looks very advantageous in almost any interior. The decorative qualities of this material can hardly be overestimated, but you will also have to pay a lot for such a finish.

Brick base looks stylish, but also costs a lot
DIY bar counter in 8 steps
We examined the materials and types of structures, it's time to talk about how to make a bar counter in the kitchen.

A kitchen with a bar counter with your own hands looks unique and very home-like
To complete the work, we need the following materials:
- wooden blocks 50x100 mm in size;
- edged boards 25x100 mm in size;
- plywood sheets;
- fiberboard sheets;
- nails and screws;
- decorative skirting boards;
- wood stain and varnish for wood.
When all the tools and materials are ready, it's time to go directly to the carpentry work.
Illustration |
Instructions for action |
 |
Step 1. Wireframe creation. From the purchased bars, we cut out the details of our frame and fasten them together with 80 mm nails. We pay special attention to the fact that all joints are even, and the bars fit snugly against each other - this is the key to the strength of our structure. |
 |
Step 2. Installing the guides. Having fixed the bars, we proceed to the installation of the boards, which are guides to which we will attach the rest of the elements. The boards must be of the same height. They should be placed strictly vertically so that the whole structure is ultimately flat. For this, during installation, we use the building level. |
 |
Step 3. Flooring creation. We nail the plywood sheets to the base of the structure. They will condense it. At the same stage, it is worth considering the connection of communications (if required). |
 |
Step 4. Fixing the lower tabletop. We make a lower tabletop from fiberboard sheets and fasten it to the frame with self-tapping screws. We make partitions from plywood sheets inside our structure, forming several sections in it. |
 |
Step 5. Installation of shelves. Using the same plywood and self-tapping screws, install the required number of shelves for storing small accessories. |
 |
Step 6. Structure cladding. We close the unsightly frame and the lower tabletop with even sheets of plywood. |
 |
Step 7. Installation of decorative skirting boards. At the joints, we fix decorative skirting boards with clapboard nails (nails with a small head). We also attach them at the corners to give our product a more beautiful and aesthetic look, as in the photo. |
 |
Step 8. Surface decoration. In order to decorate the result of our work and protect it from the harmful effects of the environment, we will cover our product with stain. After it is completely dry, apply several layers of varnish on top (at least two). The drying time for each layer is approximately two hours, that is, each subsequent layer is applied two hours after the previous one. |
You can find out more details on how the bar counter in the kitchen with your own hands is performed from the proposed video.

As a result, you can end up with a very stylish design that is difficult to distinguish from a purchased one.
Bar lighting
Work directly with the product itself is finished. But this is not all that we have to do. If we want the product of our labor not to dissolve in the interior of the kitchen, we need to place an appropriate emphasis on it.
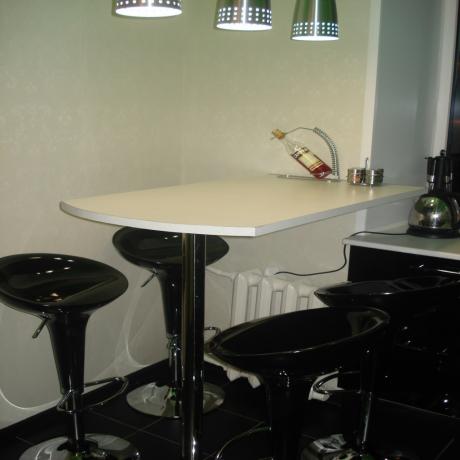
How? With backlight. Collecting bar counters for the kitchen with your own hands, you can also do the lighting yourself. This is best done with halogen lamps. To do this, you will need to prepare a small beam and secure it over the rack.

Long pendant lights add originality to the rack
If this is not possible, then it is quite possible to limit yourself to lighting lamps suspended directly from the ceiling. Examples of such lamps can be seen in any billiard room. It is better to use dimmers instead of conventional switches.
They will help, if necessary, to dim the light, thereby creating a relaxed and romantic atmosphere.
Finally
Now you know about the existing types of bar counters, the materials that are used to make them. You also learned how to assemble a bar counter with your own hands. Put this knowledge into practice and you will have an excellent decorative and functional element of the kitchen space.