Content
-
1 We cut in a new sink
- 1.1 Markup
- 1.2 Cut out the bore hole
- 1.3 Mount
- 1.4 Checking the result
- 2 Outcome
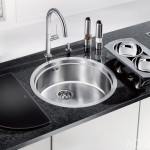
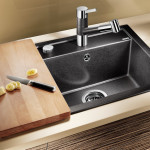
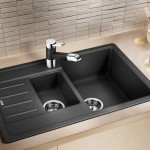
As practice has shown, inset sinks for the kitchen have become something more? than just a sink. The rich assortment of shapes and colors simply boggles the imagination - thanks to this, housewives have an excellent opportunity to create unique interiors in their kitchens! The cheapest models are made of stainless steel - everyone can afford this budget option.

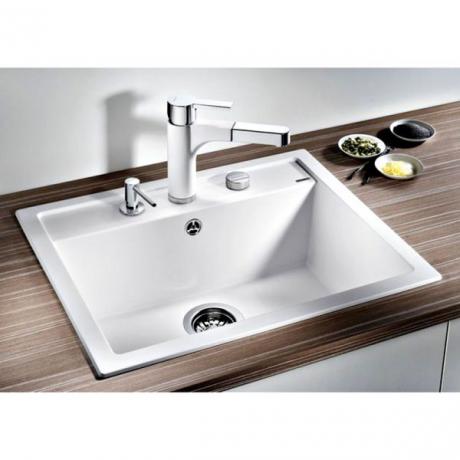
Ceramic recessed sink
So, we will insert the sink into a worktop made of chipboard, covered with plastic on top - this is the most accessible and common type. If your countertop is made of another material (for example, artificial stone), then you should carefully read the product passport, in which the manufacturer is obliged to indicate recommendations for working with material.
We cut in a new sink

The jigsaw is a very useful tool in our business
Performing all types of work with your own hands, you will need the following materials:
- Ruler, tape measure, pencil, Phillips screwdriver, construction knife and corner;
- It is advisable to have a jigsaw (in the absence of it, you can use an ordinary hand tool);
- Drill with a 10 mm drill (for metal);
- Do not forget about self-tapping screws (take 4 × 30 as an example);
- Colorless silicone sealant (for greasing cracks and joints).
Markup
If you remember the saying - measure seven times, cut once, then you probably will not be difficult to do this procedure. In order to mortise sink for the kitchen (it doesn't matter whether it is small or large) ideally sat on the countertop, it is necessary to correctly perform the markup.
Let's start with the axis of symmetry, that is, from the place where the sink will be installed. In most cases, the axis is drawn in the center of the tabletop. If your kitchen countertop is large, there are other options to consider.
Attention! The distance from the front edge should not be less than 50 mm, and the back - not less than 25 mm. Unfortunately, these figures cannot be called absolute - they can change depending on the ratio of the sizes of the sink and countertop, the features of the cut, etc.
Now let's get down to business. You are required to draw two perpendicular lines, the center of intersection of which will be the center of your sink in the future. The location does not matter - the sink can be positioned from the bottom, top, left, right, it all depends on your imagination.
Next, put the sink on the countertop with the bowl up and align it according to the prepared markings (the intersection of the axes will be visible through the drain hole - this way you can find the center faster). After you have decided on the location, take a simple pencil and outline the inner contour of the shell around the entire perimeter. Voila! The markup is ready.

Turn the sink over and circle it
Also, pay attention to the set of the sink. Well-known manufacturers offer their customers sinks, complete with several metal or plastic mountings. Metal fittings for a flush-mounted kitchen sink are a more reliable and high-quality option, so choose it whenever possible. They are attached quite simply: by clicking on the sink. Which sinks are best suited for the kitchen, you can read here.
After we have checked, outlined and marked all the necessary contours, we move on to the most important thing - we draw the line of the future section. Taking into account the fasteners, the already marked contour must be expanded by 3-5 mm.
Remember! The sink should fit freely into the resulting hole. Permissible deviation from the marking is no more than 3 mm on each side.
Cut out the bore hole
- In one (if the sink is round) or in several (if the sink is rectangular) we make holes using in advance prepared drill in such a way that the hole is almost flush with the future cut line, but does not touch his.

Using a drill, we make auxiliary holes for the jigsaw
Attention! You need to drill only from the front side of the countertop surface and nothing else.
As a result, we got a wonderful start hole, in which the jigsaw file can easily fit. After you have done this, take a jigsaw in your hands and cut the mounting hole for the sink strictly along the cut line. Now all that remains is to insert the sink into the cutout and check the correctness of the result obtained.

We cut a cutout with a jigsaw
Important! The sink should freely enter the resulting hole (if not, then we trim the edges with the same jigsaw).
- Now, after completing all the work on preparing the working hole in the tabletop, take out the unnecessary (sawn part) and clean the cut from dust. Do not forget to carefully coat it with a special plumbing sealant (for this, a rubber spatula is used, in the absence of which you can simply do this work with your finger). These precautions will help protect the countertop from getting wet and swelling.
Advice! If there are chips on the plastic of the countertop, coat them with sealant as well. But do not get too carried away - the layer will be thick or thin - it does not matter at all.
- The next step can be called gluing a seal made of polyethylene foam (as a rule, it should come with the sink in the kit). It should be glued to the sink rim around the entire perimeter of the product. In the event that, after gluing the sealant, its edges remained sticking out (or rise above the boot), then they must be carefully cut with a knife. Otherwise, the mounts simply will not completely press the sink to the countertop, and water drops will drip into the "insides" of your headset.

Sealant application
Now let's consider gluing the seal in more detail:
- To begin with, we take a sealant and degrease it with a cloth soaked in gasoline or solvent;
- Next, we apply the sealant to the sealant in one continuous strip (do not make it wide, as the glue will climb outward during compression).
- We glue it by itself.
In general, it is often possible to meet people who carry out the installation of mortise sinks without using a seal. In this case, you will have to purchase more sealant, since you have to fill all the space between the countertop and the sink. This method of isolation from moisture is not very popular due to the high consumption of funds for glue (the price of the sealant is quite high).
Mount

Fixing the sink to the countertop
So we got to the most interesting thing - the sink mount. In general, mortise kitchen sinks first need to be aligned on the countertop, according to the markings done in advance. Then, it is necessary to take several fasteners and at an equal distance from each other fix them to the sink (not forget to constantly monitor its position, since when installing the mounts, it can easily move off designated place).
Advice! In order for the sharp edges of the sink to more reliably attach to the edge of the tabletop, they are sharpened with a file before installation (if you too lazy to do such work, then after tightening, knock on them with a hammer so that they go deeper into the base of the tabletop).
Checking the result

Perfectly installed recessed sink
Externally, the sink should be screwed tightly to the countertop along the pre-marked lines. An indirect confirmation that the sink is firmly attached to the countertop is the squeezed sealant. You just have to wipe the countertop clean from excess glue and let the sealant harden for a day.
That's basically all - the work is done and you just have to wait a little. The next day after installation, experts recommend turning on the water to the full and sprinkling a little around the edges of the sink - this way you can determine whether your sink will leak or not. After all, even a small gap can lead to disaster - the countertop will simply swell and crinkle your sink, and sprayed water will constantly drain into the cabinet when washing dishes.

Visual instructions for installing a flush sink
Outcome
As you probably already understood, the installation of a flush sink is quite simple, but it has its own characteristic difficulties. If you still have questions, you can also get an answer from us! Our photo and video instructions will answer all your questions and help clarify some aspects of this case (read also how to install a sink in the kitchen).
Success in all your construction and repair endeavors!
Gallery