Content
-
1 The first stage is preparation
- 1.1 Tools and materials
- 1.2 Room preparation
-
2 Second stage - assembly
- 2.1 Markup
- 2.2 Assembly
- 3 Conclusion
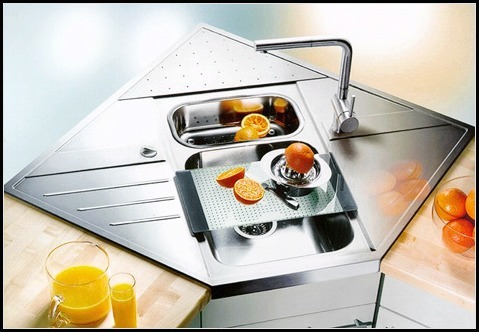
What's the most important thing in the kitchen? That's right, the sink! Without it, the kitchen is unlikely to be such a significant place. Obviously, the sink should not just hang in the air, but should be ergonomically integrated into the interior of the room. It is necessary to make it comfortable and easy next to it, no unnecessary elements, details, objects. How to do this, now we will consider.

Do you think this cabinet was assembled by craftsmen - we hasten to dispel doubts, the assembly was carried out by non-professional persons
The first stage is preparation
It would seem that the kitchen cabinet under the sink should consist of moisture-resistant materials, because it is there that the highest humidity is, however, this is not so. It is enough to use chipboard and there will be no problems. The main thing is to treat all open ends or parts in contact with the pipes with silicone sealant.
Let's not get ahead of ourselves, let's look at everything that we need to build a high-quality cabinet.
Tools and materials
- Chipboard in size. It is best to order a finished cut with framed ends from a furniture organization so as not to glue the melamine edge with your own hands. Yes, such a service will be a little more expensive, but in this process, it is important not to save money, but the effort that will go to you to prepare the parts.
- Facade. It can be ordered at any major hardware store using standard dimensions. Or use the services of private organizations that are ready to fulfill all your wishes.
- Table top. There is no need for it if the cabinet under the sink in the kitchen will be with an overhead sink. Nice little savings.
- Components. You will definitely need 4-6 adjustable legs, 2-4 door hinges (depending on the size of the cabinet), 1-2 handles, a sink with a siphon and, in fact, a mixer.
- Hardware: screws 4x16 mm, euro screws 50 mm.
As for the tool:
- Drill with drill set: 5mm, 6mm and 8mm.
- Screwdriver with various attachments.
- Electric jigsaw.
- Roulette.
- Building level.
Note! As we said before, be sure to stock up on silicone, which will help protect the material from swelling. It will also be required to install a sink with a kitchen cabinet.
Find out also the main features of the corner of the kitchen corner.
Room preparation
Before assembling the kitchen furniture, the sink cabinet must acquire a storage space, preferably in a dry room. In the meantime, we proceed to the following work:
- Replace the old piping with a new one, in particular the water tap. Replacing it is mandatory for several reasons, but the most important one is connecting a new mixer. Better to update all communication to avoid misunderstandings. It is not advisable to install an old mixer that has been in service for more than 5 years.
- Prepare the premises for the assembly process. If you have a flush-mounted kitchen sink with a cabinet, then it is better to get a plastic wrap to cover the furniture from dust that will appear during jigsaw operation.
- If you have sockets near the sink, you should insulate them, or move to another place, which will be more reasonable.
- A corner cabinet for a kitchen sink requires a thorough leveling of the walls so that there are no gaps between the cabinet and the wall. It is best to lay out ceramic tiles - cheap and practical, in this way it is easy to maintain the required plane.

This is how a corner cabinet should look like without a tabletop and a sink
Second stage - assembly
Now let's get down to the layout and direct assembly of our locker. The instructions are pretty simple, everything should be clear. If you have any questions on any points, the answers to them can be found at the end of the article in the video.
Read also how to choose wall-mounted shelves for your kitchen.
Markup
- Bottom. The sides are not placed on the bottom, but are screwed from the ends, therefore holes are drilled from the side edges with a 6 mm drill. The indent from the edge can be arbitrary. Also, remember to mark up for attaching the adjustable feet. The installation of the legs is shown in the photo below.

The center of the leg, in this case, is 5x5 cm, which is quite enough if a removable base is attached
- Side walls. We drill in the lower part, with an indent of 8 mm, holes for the bottom, we use a drill for this 8 mm. In the upper part, on the back side, holes are drilled for the stiffener, the indent is not violated - 8 mm from the edge.

It is better to drill on something hard, pressing the part tightly - this way there will be fewer chips
- Stiffening rib. Side drilling with 6 mm drill.
- Facades. They require a 35 mm cutter. The distance from the edge is 5 mm. Also, a 5 mm drill should make holes for the handles.
Note! If the cabinet for the kitchen sink has a different fastening, for example, without the use of adjustable legs, then the sidewall is drilled as follows. The distance from the bottom end is at least 60 mm, this distance is necessary for the vertical base.
Assembly
This is perhaps the simplest process one could think of.
- Initially, the legs are screwed to the bottom of the bedside table.
- Then the side walls are fixed with Euro screws.
- A stiffener is installed.
- The facades are hinged.
- The tabletop is fixed using plastic or metal corners.
- The cutout for the sink is marked according to the template and cut out with a jigsaw.

The template should have been attached to the sink, the packaging usually has a dotted line
Note! This procedure is not necessary for a consignment car wash. It is much easier to install by attaching plastic clips to the sidewalls.
You can now put the cabinet back in place. The curbstone with a sink for the kitchen should press tightly against the walls so that it does not stagger during operation. The final touch is connecting the mixer to the pipeline.
Advice! Use fum tape to avoid leakage.

The most effective way to prevent leakage, you can also fill everything with sealant
Conclusion
If you needed one module, then a stainless steel overhead sink for a kitchen with a cabinet is best suited. This model will perfectly fit into the interior, plus everything, this option is considered the most practical. Typically sinks have a large drainage sleeve, which will save space. And the price of an invoice sink is quite acceptable.
Also find out about the preferred colors of kitchen sets.