Content
- 1 Varieties of sinks by type of installation
-
2 Installation of a sink
- 2.1 Installation of a flush sink
- 2.2 Installation of an overhead sink
- 3 Finally
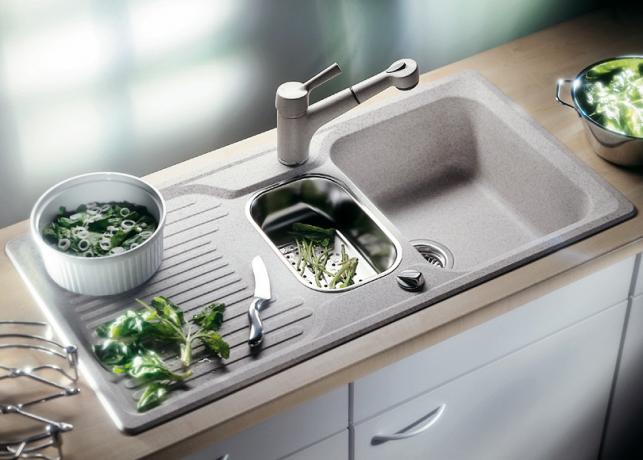
Installing a sink in the kitchen would seem to be such a simple task. But this is only at first glance, until the installation of a kitchen sink with your own hands begins. Then a lot of important questions and nuances immediately pop up. We will talk about them in our article, as always in detail and in pictures.

A well-placed kitchen sink
Varieties of sinks by type of installation
Today, there are four types of kitchen sinks, which differ in the installation method and operating conditions:
- Overhead. This type is considered the easiest to install and, moreover, inexpensive. In this case, the sink is placed on a separate cabinet and serves as a table top. The disadvantages include a small thickness and gaps between the sink and the cabinet, which is not very aesthetically pleasing and convenient.

Overhead sink
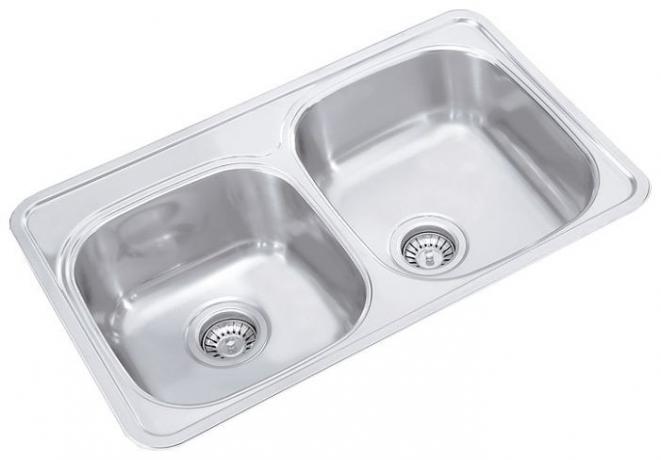
- Mortise. They got this name for a reason - they are mounted in a hole pre-cut in the tabletop. Thus, the sink is built-in, which means it is more beautiful and convenient.

Sink embedded in the countertop
- Under-table. They are most suitable for installation in glass, stone, granite and hardwood countertops. The edge of the undercounter sink is usually installed below the level of the work surface - this is the location allows you to achieve excellent sealing, avoid moisture penetration under the sink and, as a result, swelling countertops. True, the price for this type of sink is quite high.

Multifunctional undercounter washbasin
Advice! If your kitchen set is assembled from separate cabinets, then a regular overhead sink is ideal for it. But if you cover the floor modules with a single tabletop, then it would be more rational to purchase a built-in model.
Find out also about the most suitable kitchen sink sizes.
Installation of a sink
In this article, we will look at how to install an overhead sink in the kitchen or a mortise (that is, installation of the most common kitchen sinks).
But before that, read a few simple rules that are best followed:
- Perhaps the most important rule is that the sink cannot be mounted next to the stove, so that splashing water does not accidentally extinguish the fire;
- The sink should be close to the work area where food is prepared (cleaning, cutting);
- A well-installed sink should divide the working area into two parts: one for dirty work, and the other for serving ready-made meals.
Installation of a flush sink
Mortise sinks are made of a wide variety of materials, and their sizes and shapes in this case are not limited by anything and depend only on the preferences of the buyer. If the tabletop of your headset is made of wood or chipboard, then it is quite possible to independently install a kitchen inset sink. If the countertop is made of stone, most likely, you will have to seek help from specialists, since they have all the necessary equipment. We will consider an affordable do-it-yourself installation option.
For this we need:
- Electric jigsaw;
- Electric drill;
- Drills for wood;
- Pliers;
- Set of screwdrivers;
- Ruler, square, pencil;
- Masking tape;
- Silicone sealant.
In theory, every modern sink, along with fasteners, comes with cardboard templates that greatly facilitate the installation process. But if such a template is still missing, then the sink itself can be used instead.
Next, step-by-step instructions will help us:
- Installation of a flush kitchen sink begins with cutting a hole in the countertop for it. To do this, you need to place the sink template in the chosen place on the countertop, align it at your discretion and temporarily secure it with masking tape.

Cut out the template
Important! When choosing a place under the sink on the countertop, do not forget that it should not come into contact with the internal elements of the cabinets (power struts and sidewalls).
Having decided on the place and fixing the template, we outline its outline with a pencil. Then, departing from the first contour 1.5 cm, we apply the second (working) contour, along which we then have to cut a hole.
Find out also about the benefits of artificial stone kitchen sinks.

We apply to the countertop
The hole is cut with a jigsaw, but in order for it to smoothly cut the tabletop, it is necessary pre-drill with an electric drill in it the so-called initial hole for a jigsaw blades. A 10-12 mm drill will come in handy here.

We glue masking tape along the contour so as not to damage the rest of the tabletop, and cut the opening with a jigsaw
And only now we turn to cutting the hole itself with a jigsaw, while trying to adhere to the applied contour as accurately as possible, take our time, we do everything smoothly and accurately.

This is our hole.
So, the opening for the sink is cut out. It remains only to clean it of sawdust and carefully clean the saw cut with sandpaper.
- At this stage of work, we process the edges of the countertop inside the cut-out hole with silicone sealant - this way we protect it from moisture. Let the sealant harden well.

Apply sealant to the edges of the countertop
- We try on the sink in the hole made, check if its sides fit snugly against the countertop. At the same stage, we check the installation of the hoses and the mixer, because after you install the sink, it will not be so easy to install the communications.
- How to fix the sink? To do this, put double-sided tape on the front side of the tabletop, along the edge of the cut (it should come with the sink). If there is no tape, apply the sealant again. Then we insert the sink into the hole, pressing it tightly along the edges so that all voids are filled with silicone sealant. Next, we pull the sink from below using the fasteners. This must be done sequentially: first of all, the angles are attracted diagonally, but not very strongly. Then the fasteners in the middle are also tightened. We carefully cut off the excess adhesive tape or sealant after it has completely solidified.

Apply sealant

The final touch of the sink fixture
- How to connect a sink in the kitchen? First of all, we connect the hoses for supplying cold and hot water to the water supply system. In this case, a rubber gasket is placed between the valve and the nut to ensure a good seal.

Connecting the cold and hot water supply hoses
After fixing the hoses to the water supply, the sink in the kitchen is connected to the sewer in the following sequence:
- The siphon outlet is inserted and fixed into the sink;
Attention! For the kitchen, it is recommended to use S-shaped siphons, since the bottle clogs quickly.
- A pipe (corrugated or rigid with an angle) is screwed to the siphon;

We fasten the pipe
- This pipe is then inserted into the sewer outlet;
Very important! If the diameter of the sewer outlet differs greatly from the diameter of the pipe coming from the siphon, then you need to purchase a special adapter - “sealing collar”.
- The installation of a sink in the kitchen is completed by checking all connections for leaks.

The inset sink is ready!
Installation of an overhead sink
Overhead sink
Installing an overhead sink in the kitchen does not take much time, since you just need to put the sink on the cabinet, connect a siphon to it and install a mixer. Most often, this type of sink is sold complete with a kitchen cabinet that does not have a countertop. How to assemble a sink in the kitchen in this case?
Here are two easy ways:
- Fixing with sealant. The end parts of the cabinet must be treated with silicone sealant, then put the sink itself on them and press down hard. Thus, the sink will perfectly fix after the sealant has completely dried, which, moreover, will protect the end of the cabinet from moisture penetration.
- How to install a kitchen sink using special brackets? To do this, we screw in self-tapping screws from the inner side of the cabinet walls and attach fasteners to them. We tighten the screws a little, put the sink and shift the mounting angle along the screw so that the self-tapping screw is in the recess of the corner, and the sink is firmly pressed against the cabinet. Finally, do not forget to fully tighten the screws.
And how to transfer the sink in the kitchen (in particular, how to transfer it to the window)? Read about this in our next articles, no less interesting and detailed!
Finally
Observing all these simple rules, you can easily cope with the self-installation of the kitchen sink. A well-assembled sink will serve you for a long time and preserve the beautiful look of the countertop. As a visual instruction for installing sinks, there are photo and video materials on our website.
Read also about the advantages of porcelain stoneware kitchen sinks.