Content
- 1 Where to start
-
2 Erection of a headset
- 2.1 The first stage is the construction of the frame
- 2.2 Second stage - finishing the kitchen
- 3 Add reality
- 4 Conclusion
Store toys are mundane and uninteresting. Of course, a new bright object will distract your child's attention for a few days, but then this thing will become "old" and will be put aside in the farthest corner.
The same cannot be said about a homemade toy that will be a little less attractive, but at the same time will act like a magnet on the child. We want to tell you about one such subject - a children's kitchen corner.
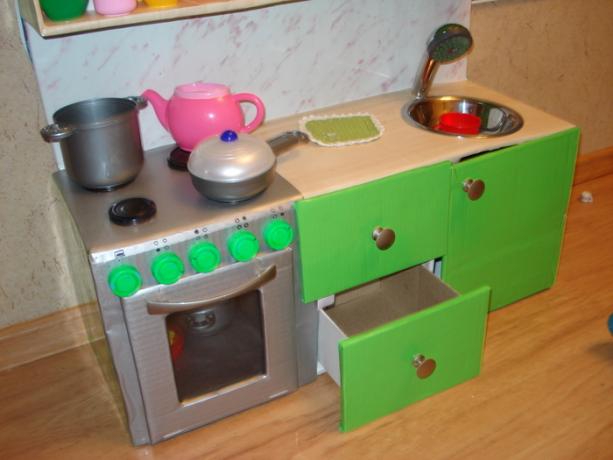
It really takes a little to make a child happy, the main thing is desire and fantasy.
Where to start
What can be taken as the basis for a future kitchen? Of course, if there is a possibility to use any wood materials, that would be great.
However, not many people know how to handle wood. Therefore, the easiest way to use cardboard is, it is quite durable and easy to use.
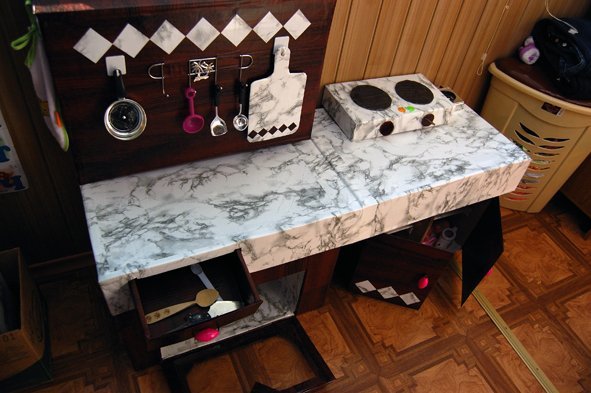
It will look interesting for a children's kitchen corner made of chipboard
And yet, let's list what you need to work:
- Cardboard boxes - suitable for old household appliances. You can buy such products, the price in special stores is quite reasonable.
- Scotch tape or any adhesive tape. It is best to use transparent tape.
- Self-adhesive foil - it will take several rolls to glue all the parts of the children's kitchen.
- Markers or markers.
- Plastic bottles - you can replace them with small lids from under small jars.
- Old and unnecessary CDs.
- Aluminium foil.
- Plastic cup in gray or silver color.
- Scissors and a sharp knife (clerical).
As you can see, all materials can be handled by hand, so no difficulties should arise during the working process.
Note! It is best if you do this with your child, as this process allows you to instill in him the seriousness of the event. Once you have a kitchen corner, you will definitely be the first to receive the “dishes” prepared with love.
Read also the article on Japanese kitchen knives.
Erection of a headset
No matter how loud it sounds, but it is exactly so - this process cannot be called otherwise, because you are going to make a kitchen for your baby. To achieve success and a positive result, you need to do everything in stages.
The first stage is the construction of the frame
First of all, consider the option when a children's kitchen is being built from cardboard boxes:
- Place the box, for example, from under the refrigerator, on the floor so that the front of the future headset is in front of you.
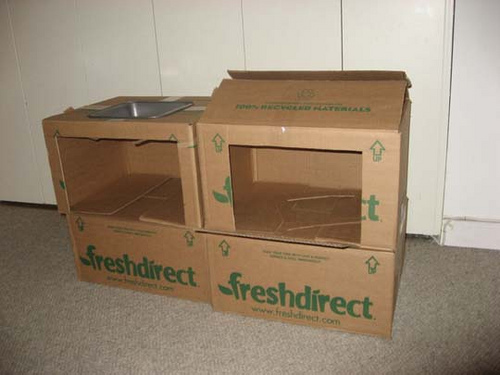
If there is no large box, then take 2-3 medium ones and glue them together
- Take a knife in your hands and cut a square in the right (or left, as you like) part - you get an oven.
Note! Do not make a hole too large, preferably no more than 1/3 of the front surface of the box.
- Now on the left side the cabinet door for the sink is cut out. You can completely cut off the cardboard, or make an incision on only three sides so that the door is one with the headset.
- Above, in the wash cabinet, a round hole is cut out, the diameter of which is slightly smaller than our cup. It is she who will serve as a sink.
- On the side where we have the oven, above the gaping hole, it is necessary to make several cross-shaped cuts. Three or four is enough, here will be located the adjustment of the burners and the temperature in the oven. Look at the photo how you can do this.
- Now we need a self-adhesive colored film that acts as a finishing material. It is quite easy to glue it, in those places where there are holes in our kitchen, you need to repeat them on film. The cutouts must be exactly in line with the hole.
- Now let's use the markers and paint the kitchen. In those places where the switches on the burner will be located, it is necessary to draw numbers from 0 to 3 so that the child can navigate.
Read also an article on kitchen design options.
Second stage - finishing the kitchen
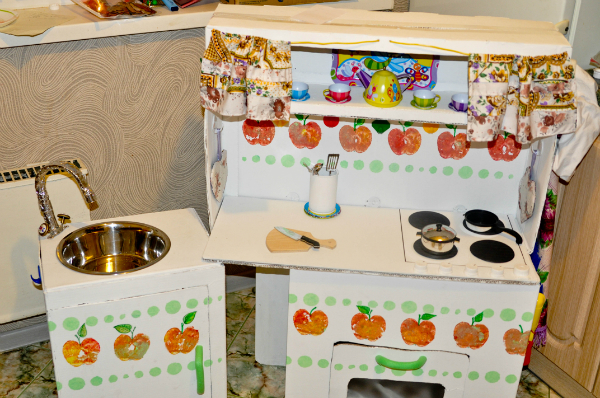
There is no limit to perfection, as there is no limit to your imagination
- We use CDs - we attach them above the oven, thereby simulating hobs. It will be enough to fix two pieces.
- We cut out the oven door from the remnants of cardboard, a little more than the hole itself. To prevent it from falling and opening on its own, we glue a textile fastener (Velcro).
- We cut off the plastic bottles, leave a small part of the neck with the lid and push them into the prepared holes for the switches.
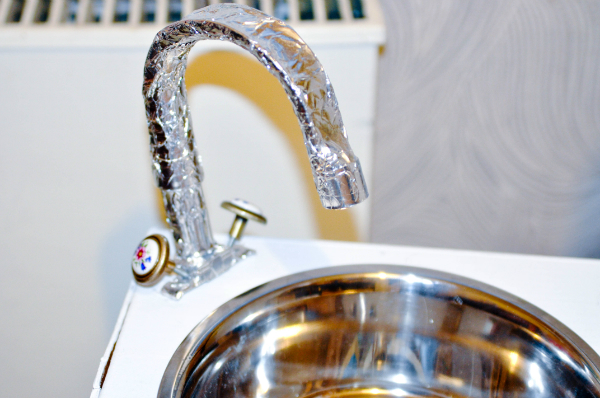
The mixer can be neatly made of aluminum foil in several layers
Is this enough for you? If yes, you can start cooking with your child, but if you want something more, the following instructions will help you modernize your cardboard kitchen.
Add reality
How to make a children's kitchen from boxes look even more like a real one?
Easy, it doesn't even require any skills, just additional investments.
- Visit a lighting store and buy several meters of LED strips there. Make sure they are already soldered and connected to the power supply.
- Place one tape in the oven by sticking it around the perimeter. Fasten the switch to the front panel.
- Place another tape on the hob. But since the light is too bright, it is advisable to cover the tape with tinted film. It can be fixed with self-adhesive tape.

You can also highlight the burners in another way, this will require plastic circles with small holes
Thus, the children's kitchenette becomes not only a toy, but also a multifunctional object with which your child will develop. It has been proven that children who play with such kitchens since childhood, in most cases, love to cook in adulthood, and at the same time it is very good.
Conclusion
Creating a kitchen out of boxes is a creative process, it should not cause you any negativity or any difficulties. If something doesn't work out, postpone or do it differently. In any case, you do this for your child, and you can experiment.
A video is attached to help the homemade ones, with a step-by-step description of the workflow.
Assembly of kitchen furniture - see here.
