Content
-
1 Wall decoupage
- 1.1 Work stages
- 2 Decoupage of various kitchen utensils
-
3 Jars for bulk products
- 3.1 We need
- 3.2 Work stages
-
4 Decoupage watches
- 4.1 We need
- 4.2 Work stages
- 5 For newbies
-
6 Decoupage of an old kitchen board
- 6.1 We need
- 6.2 Work stages
- 7 Conclusion
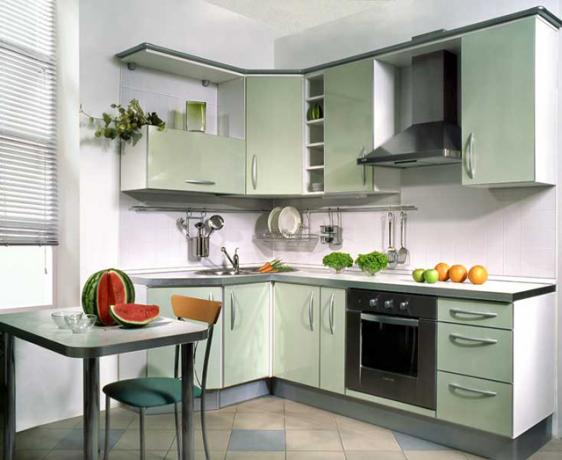
In order to make your kitchen more comfortable, more sophisticated, it is not necessary to spend fabulous money. The price does not always determine the quality and, moreover, sophistication. But, as we have already said, there is a way out of any situation. We suggest that you carry out such a decoupage yourself.
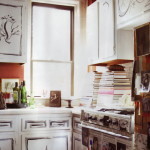
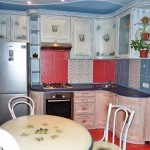
Wall decoupage

Decoupage of the kitchen wall
In order to make decoupage of the walls in the kitchen, we just need:
- PVA glue diluted with water;
- Patterned napkins;
- Varnish for wall covering.
Work stages
- We apply the diluted glue to the napkins and glue them to the wall.
- Cover with varnish and let dry.
If the work is done correctly, then such decoupage of the old kitchen will significantly improve the appearance of the room (see. also wall design in the kitchen).

Wall decoupage option
Each hostess in the kitchen has not only cupboards, but also shelves. And, of course, if we decided to update the wall, why not give it a new look too? In a similar way, you can carry out decoupage of the kitchen shelf.
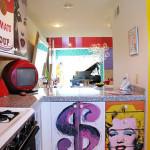
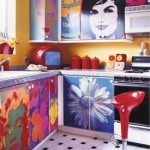
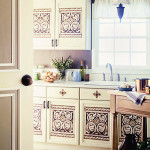
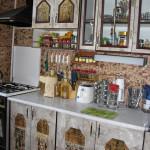
Decoupage of various kitchen utensils
Every kitchen has items like bulk food jars, cutting boards, clocks, shelves, etc. Most of them are standard, monotonous. Our task is to bring our works to the maximum exclusivity at the lowest cost. Let's consider several options for transforming them with our own hands.
Jars for bulk products
For these purposes, ordinary jars of vitamins are quite suitable for us.
We need
- Jars of vitamins;
- Nail polish remover;
- Sandpaper;
- White acrylic paint;
- Soft brush;
- Napkins;
- Decoupage glue;
- Hydroplane;
- Acrylic lacquer.
Work stages
Since this work is painstaking, step-by-step instructions for creating a blend will be very useful to you.
- Remove the label. Remaining glue can be removed with nail polish remover.

Removing the glue
- The paint adheres poorly to the plastic surface and must be plastered before starting work. For this we need sandpaper.
- Before you start painting, you need to prime the product. One primer of artistically acrylic paint is enough.

Apply paint
- When the soil is dry, cover the jar with white acrylic. Since the napkin needs to be glued only on a white base.
- Cut out the desired pattern from the napkin and separate the top layer.

Photo of already cut berries from a napkin
- We paste over our jar with the selected fragments. Gently apply decoupage glue with a soft brush from the center to the edges of the picture. We are waiting for it to dry.

We glue the jar
- With the help of a glassy transparent contour, our berries can be made more voluminous. And put a point in the center with a glider - so that the decoupage of cans for the kitchen becomes brighter and richer.

Add volume
- When everything is dry, we cover the jars with acrylic varnish. Better to apply at least 10 coats.
- For decoration, you can tie a beautiful bright ribbon.

Decoupage kitchen utensils ready
Decoupage watches
Decoupage of watches in the kitchen can look very original. A cheap Chinese frying pan is perfect for these purposes (see. also what kind of dishes should be in the kitchen). Cooking in it is scary, but with our decoupage - just right.
We need
- Masking tape;
- White acrylic paint;
- Drill or nail;
- Napkins;
- Lace;
- Clock hands;
- Rhinestones;
- Acrylic lacquer.
- We wrap the handle and edges with masking tape.
- Paint over the background with white paint.
- We make a hole strictly in the center. Chinese dishes have such quality that a hole can be made with a carnation. I did it with a drill.
- Choosing the right napkin. We glue it on the back of our frying pan.
Work stages

Pasted a napkin
- We cover with acrylic varnish.
- Remove the masking tape and glue it with a string around the edges. To shade the clock to the kitchen, I took a green lace.

Lace edging
- You can also use Chinese hands for the clock - cheap and cheerful.
- Figures. It is worth picking up something bright here. I took the rhinestones to make them more noticeable.
All. Our watch is ready.

Decoupage for kitchen hours
For newbies
Most of the beginners are quite often simply afraid to ruin the product or show their imagination. Therefore, we propose to watch the video "School of decoupage", which will be able to explain some incomprehensible moments, perhaps, something will prompt or clarify the ambiguity. And you will understand that all this is not at all difficult - "the eyes are afraid, but the hands are doing."
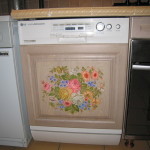
Decoupage of an old kitchen board
Every housewife has an old kitchen board, which is a pity to throw away, and her appearance is unpresentable. But we, as always, have a solution! Let's try to update it - let's decoupage the kitchen board.
We need
- Wooden kitchen board (blank can be purchased);
- Degreasing alcohol;
- Thin and flat brush;
- PVA glue;
- Artistic varnish;
- Napkins;
- White and brown acrylic paint;
- File;
- Scissors;
- Sponge.

Materials
Work stages
- We treat the old board with alcohol for degreasing.
- Using a sponge, apply white paint with patting movements. We start from the sides and gradually move to the center.
Advice!
It is better not to touch the working surface - suddenly you will use it for its intended purpose.

Cover with paint
- In order for the paint to dry well, you should wait at least 12 hours, and best of all - a day.
- Cut out the drawing from the napkin and separate the top layer. Trying on our board.

We apply a napkin
- Place the napkin face down on the file. Add some water to make the drawing slightly wet.
- Apply the drawing exactly to the board, remove the bubbles with a brush and remove the file.

Decoupage in the kitchen - remove the file
- Apply glue with water (1: 1) from the center to the edges with a brush. Then wait until dry or blow dry.
- So that the board does not have a pale appearance, we decorate the sides and edges of the board with brown paint using a sponge.

Decorating
- We fix it with varnish. It is best to apply 2-4 coats.

Apply varnish
That's all - our board is ready.

Decoupage boards
Conclusion
The types of decoupage are so varied and large, and they can be applied to anything (mirror, glass, vase, stands, etc.) that it is simply not realistic to describe and talk about everything in one article. You can decoupage a panel for the kitchen, stool, and update yourself kitchen interior design, but the most important thing in any business is not to be afraid to show imagination. After all, it is your rich imagination that makes things so unique and original.