Content
-
1 Dimensions and shapes
- 1.1 Open type
- 1.2 Built-in hoods
- 2 Correct location
-
3 Installation of equipment
- 3.1 Open type hood installation
- 3.2 Installation of a built-in type hood
- 4 Selection and installation of a chimney
- 5 conclusions
In our time, it is even difficult to imagine that a modern housewife put up with combustion products and kitchen fumes of cooked food. On the contrary, the cooker hood has become an integral part of any kitchen, and the purity of the air throughout the apartment depends on its technical features.

Photo of open type kitchen exhaust equipment
Today there are a lot of models of ventilation equipment on sale, which not only differ in size, but also in technical parameters.
And since most buyers do not know the criteria for their choice, in this article we will give exhaustive answers regarding:
- what sizes of kitchen hoods are right for your kitchen;
- at what height they should be fixed above the slab;
- how to properly position the kitchen exhaust hood.
Dimensions and shapes
It is customary to distinguish between exhaust equipment by the type of attachment:
- open type;
- built-in.
The first category provides that all elements of the equipment are constantly in sight, and the second implies the hidden location of its parts.
At the same time, the shape of the hood itself depends on the location of the hob or stove:
- the wall-mounted version implies its adherence to the wall on one or two sides (wall or corner);
- a slab located at a distance from the walls allows for a suspended version (island).

The most popular kitchen hood schemes
Open type
This type of equipment, in addition to the main function, often performs the role of a decorative element. Accordingly, the price includes not only the technical stuffing, but also the work of the designer, so such products are much more expensive.

Open type equipment can take any shape
For reference: They are also not tied in size to any parameters, except for the outlet. Since they are most often connected to an existing ventilation duct in the kitchen.
Most often, this type is found in:
- modern cottages;
- country houses;
- kitchen studios;
- apartments with a large area.
In short, this type is intended for rooms where there is no need to save space for storing kitchen utensils and food supplies. Moreover, it is vitally important for them the space that they occupy.
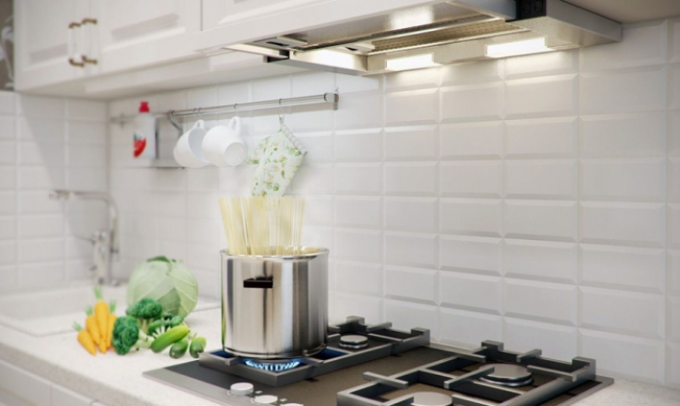
Built-in hoods
Unfortunately, not all kitchen owners can boast of large premises, but on the contrary, they are often forced to save space by compactly placing furniture and household appliances.
Therefore, the sizes of built-in type kitchen hoods are more common.
Their advantages are that:
- they are located exclusively above a gas stove or hob;
- their size allows you to take up a small space;
- 80% of their volume is hidden inside the furniture.

Built-in equipment
Regardless of the model and type, the hoods successfully cope with the assigned tasks, provided that:
- A device of the correct power is selected for the kitchen;
- Installation of kitchen hoods is carried out in accordance with the requirements of SNiP;
- The way of laying the exhaust duct contains a minimum of bends and turns.
For reference: it is in the built-in models that only the main function is realized - the removal of combustion products and smells of cooked food. Whereas in open type hoods, the design function is often key.
Correct location
No matter how powerful and productive it is cooker hood, without proper installation, she will not be able to carry out her direct duties.

The installation of cooker hoods must comply with accepted standards
According to the current SNiP:
- It should be located above the surface of the gas stove at least 65 cm;
- If an electric stove is used in the kitchen, then the hood can be placed at least 47 cm.
Tip: the most comfortable position for any type of hob is the 65-75 cm range. Firstly, at such a height, its work will be as efficient as possible, and secondly, it will be convenient and comfortable to use it.

The hostess's opinion must also be taken into account.
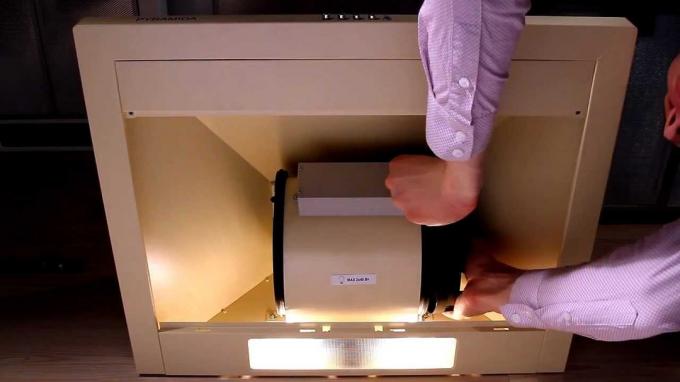
Installation of equipment
The hood installation must meet several specific requirements:
- It must be rigidly fixed (on the wall, to the ceiling or to a wall cabinet);
- During the operation of the built-in fan, it should not vibrate;
- The hood must be connected to a grounded electrical outlet;
- Its height should be adjusted taking into account the growth of the hostess, without violating the requirements of SNiP.

Installation may require an assistant
Caution: when laying the electrical cable to the attachment point, do not forget that we are talking about an area with a high temperature. Therefore, the cable must be reliably protected.
Open type hood installation
Getting started with our own installation:
- We measure the installation height on the wall, for which we arm ourselves with a simple pencil and tape measure;
- We put marks on the wall on the left and right and connect them with a line using a ruler;
- We apply the hood of the hood, aligning its edge with the drawn line;
- We mark the attachment points through the holes;
- Using a puncher, we drill holes in the wall;
- We insert into them the "new settler" sets;
- We screw in the hooks from the kit or screws;
- We hang the hood, achieving a snug fit to the wall.

The process of attaching to assembly hooks
Installation of a built-in type hood
This type does not present any particular difficulties during installation, provided that the kitchen furniture in your house appears simultaneously with ventilation technology.
In other words, wall cabinet for kitchen should be originally designed for:
- Hood installation (its dimensions are designed taking into account the recommended height);
- Internal lining of the ventilation pipe or duct.

Holes in the wall cabinet
If the furniture is old, then you need to cut the holes for the box yourself. And all the installation work is reduced to screwing the hood to the bottom of the box and connecting it to the chimney.
Selection and installation of a chimney
Another important parameter of the kitchen is the selection of a connection that will connect the hood to the ventilation duct.
Depending on the type of premises, the initial data may vary:
- There is a stationary ventilation duct in residential apartments of high-rise buildings;
- In private households and dachas, homeowners should be engaged in arranging the ventilation duct.

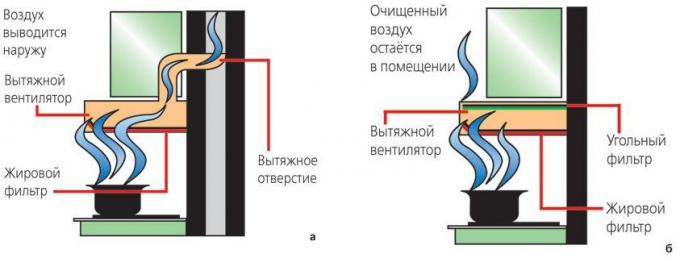
Vapor and food odor removal options
For reference: there are kitchen hoods, which are filtration devices. The air passed through the built-in filters is returned to the room.
A kitchen hood test has shown that they are less popular as they often require replacement of filter elements.
The most correct option for apartments is the installation of kitchen hoods to the standard ventilation duct.
And for this you can use 2 types of connections:
- Corrugated aluminum foil pipe;
- Plastic boxes.

Low-cost solution for connecting equipment to house ventilation
Tip: The price advantages of corrugation are also its biggest drawbacks - its appearance will not decorate the room. Therefore, such a connection can be recommended only for old kitchens.

Plastic box during installation
Plastic boxes, although they are more expensive, allow:
- Create a sealed connection;
- Do not spoil the appearance;
- The assembly instructions are very simple - all parts are easy to connect.
conclusions
We hope this article will help you determine the type of ventilation for your home. And graphic and video materials will make it possible to correctly carry out installation and connection (see also the article on installing the hood in the kitchen according to the rules).