Content
- 1 Hood types
- 2 Tools for work
-
3 Options for installing the hood in the kitchen
- 3.1 Installing a hood in a cabinet
- 3.2 Installing a hood under a cabinet
- 3.3 Mounting the hood on the wall
- 4 Installing the duct
- 5 Features of the working moment
- 6 Conclusion
When purchasing a hood in a store, you probably wondered about the question, and who will install it and how. There are, in fact, few options: either call the wizard, who will ask you for the installation of half the cost of the device, or on your own. We suggest you do it yourself, our article is just about how to install the hood in the kitchen with your own hands.

The hood should not stand out against the background of the kitchen: if you resort to this household appliance, then select it to match the furniture
Hood types
However, we will not start with how to hold a drill in our hands, but we will talk about all kinds of device options that modern stores offer:
- Flat models - represent a suspended structure that is installed above the slab. Almost all models have a recirculation mode and special filters that collect fat. But this is if you do not have a ventilation hole, or you simply do not want to stretch the corrugation. The main body material is stainless steel.
Note! The hood for a flat model kitchen is installed directly on the wall, so it is advisable to stock up with reliable dowel-nails. Fastening to the plasterboard wall of the device is undesirable, or a wooden beam should be laid in advance on the other side of the gypsum board.
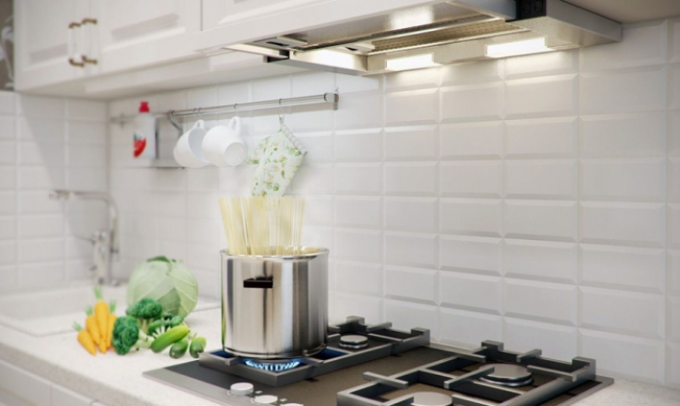
- Embedded hoods are designed for small kitchens, where any space goes for the future. The device is mounted in a cabinet and can be operated without an air duct, with a grease filter. Most models have a pull-out panel that increases the air intake area. The cost of the filter fluctuates around 500-700 rubles, it is necessary to change it 1-2 times a year.
Note! Built-in appliances are considered the most compact, while the cost does not differ much from previous models.
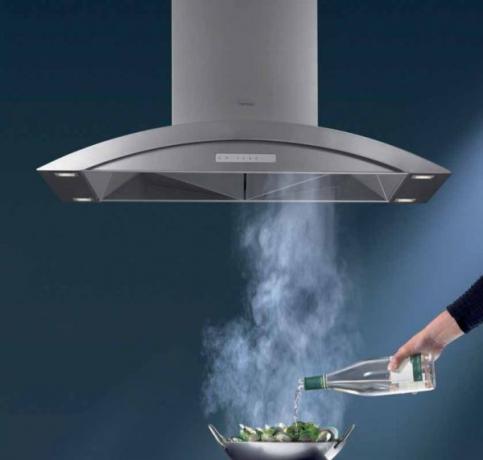
- Dome hoods are so named because of their shape. They are the most expensive, but also the most relevant for modern and stylish spaces. The framing can be glass, all-metal or wood. The price of dome models is high for the material of the body and for the suction power.

The wood frame can be of any color, you can also choose the material: oak, ash or birch
It should be remembered that the recirculation mode is not present on all models, so when purchasing equipment, do not forget to make sure what you are buying.
If you do not have a ventilation duct, then without this mode the hood loses all value for you. Will you pull the air duct out into the street?

The view of the corrugated pipe stretching through all the cabinets is depressing
Grease filters should be replaced as they become dirty. The average operating time of the filter is six months.
But you can extend it for a few more months by rinsing it yourself. It is best, of course, to soak in the dishwasher, but if it is not there, then hold it under running warm water for 3-5 minutes.
Important! It takes 1-2 days for the filters to dry completely.
Tools for work
- Hammer drill or drill. Which is better - you decide, but if there are concrete walls, then, of course, a device with a bump function will be more effective.
- Screwdriver. Suitable for both wooden walls and sibit structures.
- Roulette.
- Building level.
- A hammer.
If something is missing, then an auxiliary tool can be rented from a hardware store.
Read also an article about a kitchen set for Khrushchev - making the right choice.
Options for installing the hood in the kitchen
There are various ways to install a cooker hood. They all differ from each other, so we will consider each of them separately.
Installing a hood in a cabinet
- To do this, you must order a separate cabinet for the electrical appliance. The main feature of such a cabinet is the absence of a bottom; the hood will be attached to the middle shelf.
- The distance to this shelf is measured according to the height of the device; on average, this size is 13-15 cm. It is worth looking at the model and manufacturer's firm.
- Also, if a connection to a ventilation duct is provided, it is necessary to cut openings for the duct in both the shelf and the roof of the cabinet. The hole diameter is equal to the corrugation diameter. Most often, on built-in models, the diameter is 10-12 cm.
- There are 4 holes on the plane that is fixed to the shelf. You can screw in self-tapping screws, or drill through holes in the shelf. It all depends on what kind of fasteners are included with your hood.
- The next step is to mark out the wall cabinet. If you use "ears" that are not adjustable - you need to measure the height with millimeter precision. Universal mounts, which are awnings clinging to a metal strip on the wall, then, in this case, an error of - / + 5 mm is permissible.
Installing the hood in the kitchen in this way is easy and aesthetically pleasing: you hide all unnecessary parts behind the cabinet door, and you can avoid pulling the corrugated pipe. If, of course, your hood can operate in recirculation mode.
Note! Route the outlet directly into the cabinet to avoid unnecessary sagging wires that spoil the aesthetics of your kitchen.
Installing a hood under a cabinet
Another way of attaching the hood, only now the device is not built into the furniture, but is attached to the bottom of the cabinet.

This type of hood is suitable for those kitchens where plentiful cooking is rare, mostly something is cooked on one burner.
- If you will be laying the air duct, you should make round holes in advance with a diameter equal to that specified in the hood instructions.
- The cabinet is fixed in the same way as in the previous section.
- The hood panel must be hidden with something. For this, a similar material is used from which the facades are made. It is installed as a false panel: either on double-sided tape or on special glue.
Note! This option is suitable for minimized hoods that look easy in the interior. It should not be forgotten that it is the installation height of the cooker hood that affects the air intake efficiency.
Mounting the hood on the wall
This method is the simplest and most reliable.
- The first step is to measure the distance that will be located between the stove and the hood. Remember that the minimum height is 55 cm, the maximum is about 80 cm. Otherwise, there is a possibility of loss of suction efficiency.
- Place a hood against the drawn line and trace 4 marks through the back of the device.
- Drill holes with an 8 mm drill for the dowels with a minimum length of 50 mm.
- Tighten the two upper self-tapping screws so that you can hang the hood on them.

The process of hanging a kitchen hood on self-tapping screws
- If the device hangs securely, then directly, through the metal holes in the back panel, screw the screws into the lower two dowels.
A kitchen hood installation scheme is usually provided with each product, but if you did not find it included with your hood, do not be discouraged. There is all the information on every model on the Internet.

Diagram of a wall-mounted flat hood, with a detailed description of all sizes
Below are a few photos showing different ways of attaching kitchen hoods.

Flat wall hood - the duct is hidden in a special ledge on the ceiling made of plasterboard

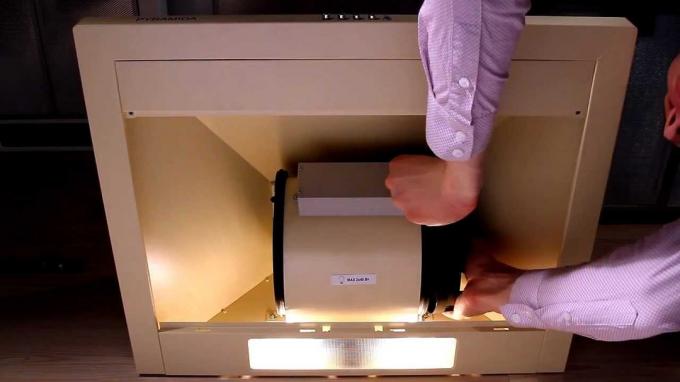
Concealed built-in hood, from which only the pull-out panel can be seen
Installing the duct
This process may seem much more complicated to you than installing the hood.
It is worth buying for him:
- Corrugated pipe of the required diameter and length. Usually, pipes are sold in length to piece products: 1 m, 1.5 m and 3 m.

Corrugation fixed to the mortise hood
- Long clamps - 2 pieces.
- Ventilation outlet. It is mounted on the wall, therefore it is selected not only according to the diameter of the corrugated pipe, but also according to the size of the ventilation hole.
If the duct is made of plastic, then you should buy:
- Hood attachment with the required diameter. At the other end of the nozzle, the product is rectangular.

The photo shows how the 12cm diameter has been transformed into a flat rectangular "tube" that requires much less ceiling space.
- Rectangular plastic pipe. Fit to size.
Advice! Take with a margin, it is easier to cut off the excess than to put on a small segment.
- L-shaped transition.
- Ventilation wall outlet of rectangular shape.
If you are installing a kitchen hood with your own hands, then you should purchase silicone sealant and masking tape. These materials will come in handy for a more reliable fixation and elimination of leaking joints.
What furniture is suitable for the kitchen in Khrushchev - see here.
Features of the working moment
If you think that the above information is enough to install the hood on your own, then you are a little mistaken here.
This section contains the most necessary and important points of the workflow that may arise under various circumstances.
- The air duct must not be narrowed arbitrarily, without the necessary reasons. This can damage the corrugated pipe, which is made of foil. Sharp bends are also dangerous for such a fragile product. In general, it is worth adhering to the following rule: the larger the diameter of the duct, the more efficiently the air is drawn.
Note! If the corrugated pipe nevertheless suffered during installation, you can try to glue it, for this, ordinary scotch tape is suitable. But, alas, it is impossible to guarantee the effectiveness of such elimination, since the tightness of the air duct will still be violated.
- The capacity of the hood decreases due to the use of the recirculation mode: since air is forced through the filter, and this is an additional load. Therefore, if you purchased a model with a capacity of 200 cubic meters / h, then do not demand more from the device. You should not call the store where you purchased the device and demand to replace the device.
Advice! If you decide to use filters, it is better to consider more powerful options. This will not so much affect the cost as the air in the kitchen will be cleaner and fresher.
- When installing the hood, you should be guided by the height of the hostess who will cook the food. If its height does not exceed 160 cm, then the distance between the stove and the device can be reduced to 60 cm.
- There should not be any wires above the stove, this is both from an aesthetic point of view and according to fire safety rules. It is best to bring the outlet to the level of the hood so that the wire is not visible and the risk of fire is reduced. If this is not possible, then pull the extension cord behind the cabinets and fix it to the eaves.
- Whoever tells you what, the hood always works with noise. The quietest appliances that operate in recirculation mode. Or a plastic duct is used.
- Correct installation of cooker hoods is carried out according to the attached instructions. Follow the recommendations given by the manufacturer.
- Installation of a kitchen hood in a private house on a wall made of sibit can be carried out without using dowel-nails. Take a long screw and screw it into the wall.
Important! If you unscrew it at least once, you will have to outweigh the hood. Sibit easily crumbles when re-screwing the self-tapping screw and may weaken in the future.
We hope that all the tips during installation will help you to do without excesses, to avoid misunderstandings.
Conclusion
I would like to say that all the information presented in this article is a guide to action.
It is suitable not only for people who have never held a drill in their hands, but also for builders who are faced with the installation of hoods for the first time. Everything, as they say, happens for the first time.
For saturation, we suggest you watch a video: installing a cooker hood in the kitchen professionally.
In it, you can familiarize yourself with all stages of the process visually, pay attention to important points and find an answer to your question.
See also the article "Italian style kitchen - features of finishing, furniture and decor".