Content
- 1 How to decide on the choice
-
2 Ceiling painting
- 2.1 Ceiling painting technology
-
3 Foam ceiling
- 3.1 Finishing with foam tiles
- 4 All ingenious is simple
-
5 Kitchen ceiling made of plastic panels
- 5.1 Installation of plastic panels
- 6 Conclusion
If it becomes necessary to renovate the kitchen, then you should seriously think about what building material will be used for decoration. Due to the wide range of finishing materials offered, you may have a question about how to make a ceiling in the kitchen, taking into account all its specifics.
Indeed, because of the constantly updated materials for finishing the ceiling, it can be very difficult to make a choice even for an experienced master, and so more to the lover and enthusiast who decided to make the ceiling in the kitchen with his own hands with the noble goal of gaining experience and saving money funds.
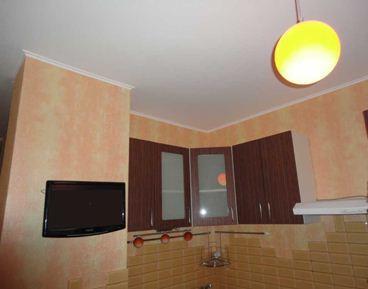
Photo - painted ceiling in the kitchen
How to decide on the choice
Those who do not have certain building skills, if they want to make a ceiling in the kitchen with their own hands, are recommended to opt for such types of finishes as:
- Painting the ceiling in the kitchen is the most a simple but very effective way.
- Widely practiced foam tiles.
- Plastic lining.
All of the above materials, with the right choice and following the instructions, are quite suitable for the kitchen and will serve their life in good faith..
Ceiling painting
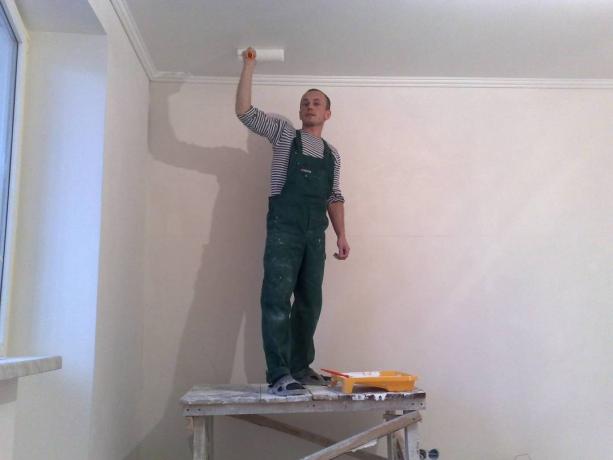
In the photo - how to paint the ceiling in the kitchen with your own hands.
Do-it-yourself painted ceiling in the kitchen remains the most affordable and traditional method.
There are three reasons for its popularity.
- Modern emulsions allow the ceiling to "breathe" and, therefore, absorb high humidity well without forming drops.
- Thanks to additives, the paint is easy to clean and is resistant to fading.
- In case of severe pollution, it is easy to renew it with a minimum expenditure of time, effort and money.
When starting to paint, it is necessary to scrupulously treat the preparation of the surface. If the base is flat and smooth, then the ceiling can be immediately primed. It is more difficult if there are irregularities, pits and cracks. In this case, they must also first be impregnated with a primer and, after drying, leveled with a thin layer of putty using spatulas.
The dried layer of putty should be wiped off with a fine-grained emery mesh until smooth. The entire surface is primed again and painted after complete drying.
Ceiling painting technology
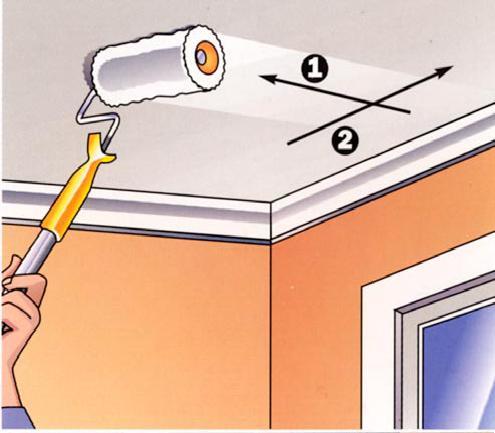
In the photo - the technology of painting the ceiling
Paint the corners - start painting by painting the corners using a medium-sized brush. To avoid touching the walls during the painting process and to prevent drips, molar tape is glued around the entire perimeter of the wall, which is easily removed after work performed.
The corners must be painted over such a distance that the main area can be easily passed with a roller. The main color is applied in strips of a not too thick layer with a capture on the previous strip of 3-5 cm.
To achieve an even saturated color, apply two layers of paint perpendicularly and one layer parallel to the window. Each layer is applied after the previous one has dried.
It is better to work with closed windows so that the paint can dry evenly. This is important in order to achieve a solid color scheme without shades.
Foam ceiling
Due to its affordable prices, this type of finish has remained popular for over 20 years. It has a number of pluses, but also minuses. However, with proper installation, it is able to honestly serve the time allotted to it.
Having considered how you can make a ceiling in the kitchen using foam plates, many are inclined towards this option.
There are two types of tiles:
- Suture;
- Seamless.
Also, foam tiles can be square and rectangular, both with a variety of ornaments and patterns, and with a completely smooth surface.
Important. If a tile with a small pattern in the form of chaotically located dashes and feathers is chosen for the ceiling, it is necessary strictly observe the direction of the pattern of each tile to be glued so that the result does not appear as a "checkerboard" effect.
That is, in natural light, due to the different direction of the pattern on the tiles, one square will be darker or lighter than the other.
Finishing with foam tiles
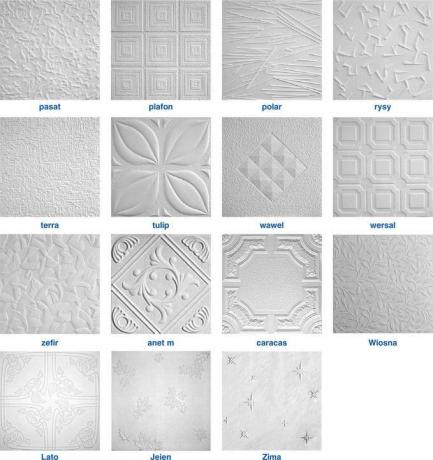
Photo of foam panels for the ceiling
If the instructions for working with tiles are strictly followed, then the work will be done quickly, without much effort, requiring a professional approach.
Tile advantages:
- easily and reliably hides defects on the ceiling;
- despite its small thickness, the material has good thermal insulation functions;
- in case of mechanical damage to the tile, it can be easily replaced with another one without violating the integrity of the ceiling;
- easy to clean with mild detergents or paint.
Important. Do not paint polystyrene with paints containing flammable and corrosive substances, which will inevitably lead to corrosion of the tiles.
Do not be silent about the inherent shortcomings of this type of finishing the kitchen ceiling:
- foam ceilings are afraid of direct sunlight and quickly turn yellow from this;
- do not have fire-fighting properties and can melt even from a close location of lighting devices;
- due to grease and burning they become stained, which is almost impossible to remove
- the biggest flaw is that if the base of the ceiling has large differences and irregularities, then the fully finished foam ceiling will frankly give out all the errors.
All ingenious is simple
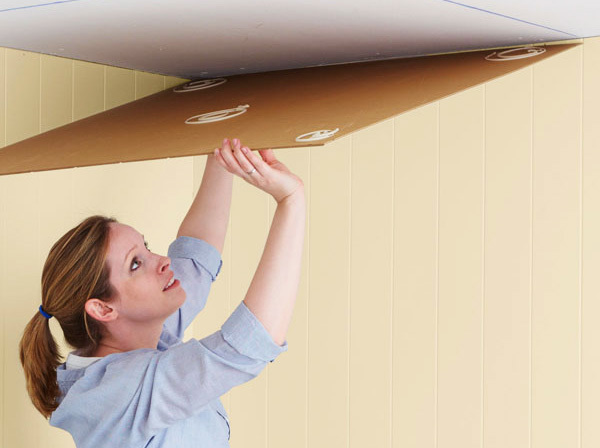
Photo of tile gluing technology
Installation of tiles does not require special surface preparation. It fits well on concrete, wood and plaster substrates. The main thing is that the surface is not dusty and greasy.
You can arrange the tiles in three ways:
- Butt to butt - when all seams are at the same level, both longitudinal and transverse.
- Runaway. There are two options 1: 2 and 1: 3. Each is beautiful in its own way, but 1: 3 is applicable to large volumes.
- Diagonally - when the guiding tiles adjacent to the wall are cut into gussets.
To make the ceiling symmetrical, markings are made from the center of the kitchen before starting work. To do this, you need a ruler, square and pencil.
Perpendiculars are drawn from the center to the walls.
- From the center, measure a value equal to the size of the tile +1 mm per seam and draw the ceiling into squares.
- Next, glue is applied to the edges and middle of the tile and pressed against the ceiling. Any excess glue that has come out is removed with a damp cloth.
- When the main canvas is ready, the foam skirting boards are glued.
- Seams can be filled with mastic or sealants if desired.
Attention!
It is known that the corners in the house, especially in the old one, are not always straight, and the walls are uneven.
Therefore, it is necessary that the lines going through the center be perpendicular.
At the same time, it is desirable that they be perpendicular to as many walls as possible.
Well, at least one, at least.
Kitchen ceiling made of plastic panels
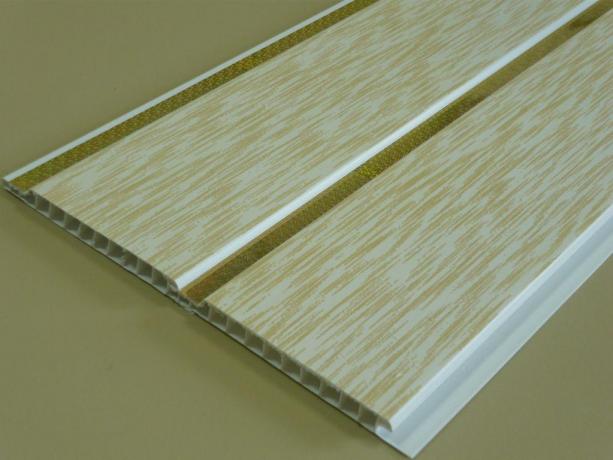
Photo of plastic panels for the ceiling
If you are satisfied with the price, and the choice fell on plastic panels, then it is worth noting that the ceilings in the kitchen of this type are very practical and easy to clean. Having a smooth structure, they are easily washed from any kind of contamination.
Tip - when choosing plastic for the kitchen, avoid monochromatic light tones, as over time, light tones turn yellow, which can greatly affect the aesthetic appearance of the kitchen.
Both wood and metal profiles can be used to assemble the frame and lathing.
- The markings for fastening are applied with a signal (painting) cord. They serve as guide strips for assembling the battens. In the places designated for the luminaires, the profile frame must be additionally reinforced.
- Along the entire perimeter, using a level, supporting profiles are set and attached, to which the plinth strip is attached. As a result, longitudinal strips should be obtained, the distance between spans should not be more than 30 cm.
Installation of plastic panels
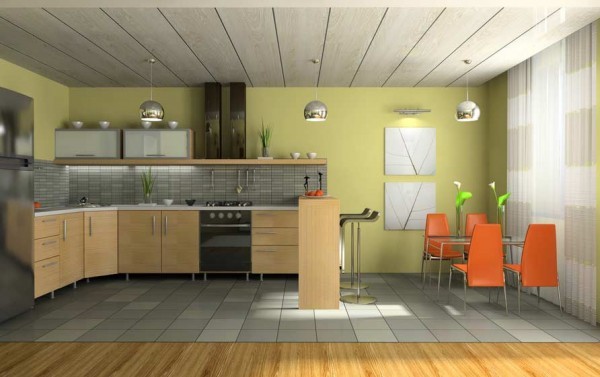
Photo of a ceiling made of plastic panels
- The required sections of the panels are carefully measured and sawn off.
- The first sheet is inserted into the fixed plinth with one side, and fixed with the other. If the profile is metal, screws are used, if it is wooden, it is shot with staples.
- The second and subsequent sheets are collected in the grooves of the previous sheet on one side, the other is similarly attached, as described above.
- The last sheet can cause some trouble, since there is nothing to fix it, but must be carefully inserted into the baseboard.
This is the most difficult process, and with the wrong or hasty action, both the sheet and the baseboard can be damaged. A spatula can be used to help, but very carefully. Sharp objects such as a knife should not be used.
Conclusion
Described kitchen ceiling repair methods are the simplest, cheapest and most affordable. If you need to make repairs quickly and inexpensively, these are the most suitable options that give an excellent aesthetic effect. In the video presented in this article, you will find additional information on this topic.
Gallery

