Content
- 1 Types of arches - 6 options
- 2 Popular materials
-
3 Create an arch in the kitchen in 7 steps
- 3.1 Collection of materials and tools
- 3.2 Description of work
- 4 Finally
- 5 Gallery
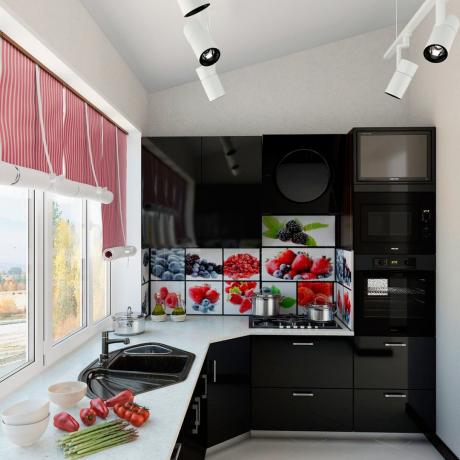
An open opening in the kitchen instead of a door is a great option for visually expanding the space. An arch in the kitchen is considered the best way to ennoble the appearance of a door frame. Today we will consider the most popular forms of such structures, tell you what materials to use for their decoration, and tell you how to make them yourself.

Arches in the kitchen can visually make the space more airy
Types of arches - 6 options
Arches in the interior of the kitchen have long been rooted as a stylish and practical decor element. A wide range of designs and an attractive appearance can fit into any interior. First, let's look at the main types of arched openings.

This design is one of the most sophisticated space zoning options.
- Option 1. Classical. This arch into the kitchen is perhaps the most popular. Such designs have the usual regular semicircle shape. A plasterboard arch in the kitchen is used in the passage between the hallway and the kitchen (option in the Khrushchev) or in the opening between the kitchen and the living room.

The classic design is the most popular
- Option 2. Portal. The most simple and convenient design with a strict and laconic look. Formed at the site of a demolished door with a widening passage. It is very popular for decorating small apartments in Khrushchevs.

The portal looks like a doorway.
- Option 3. Modern (English). It is a cross between the classic version and the portal. Looks like a segment of a circle, creating an angle between the arc of the arch and the wall. Often complemented by exquisite columns on the sides.

On the sides, the English frame is framed by concave corners
- Option 4. Semi-ellipse. All the same arc, but as if slightly flattened on top. Ideal for framing both wide and small openings.

The semi-ellipse looks like a slightly flattened arch on top
- Option 5. Trapezoid. Another option that is often found in kitchens combined with a living room. The shape of the arch for the kitchen is fully consistent with its name.

Trapezoidal design - albeit not the most popular, but very stylish option
- Option 6. Eastern. In the interior, such an arch for the kitchen is not so common, but this in no way diminishes its merits. The domed design is the best option for oriental decor.

Oriental style would not be complete without such an arch
Popular materials
The materials with which you can decorate the arches in the kitchen are as varied as their shapes. The choice of coverage should be based on the style of the interior that is present in the apartment. We invite you to familiarize yourself with the best materials for finishing such structures.

There are a lot of options for covering the structure - choose according to your taste and family budget
- Drywall. One of the most popular materials for finishing various surfaces. The price for it is affordable, and drywall is unpretentious in processing with your own hands.

Drywall is easy to process and allows you to create a structure with any shape
- Wood. Excellent decorative qualities of wood are what you need when creating an arch design in the kitchen. It can act both as an arched structure and as a finishing material. But it is worth considering that the cost of wood is quite high, and besides, it is subject to mechanical stress.

The tree looks very elegant, but it is afraid of mechanical damage
- Decorative rock. He is able to give designs an inspiring, downright antique look. Well suited for both classic and rustic interiors. Its main disadvantages include a fairly high cost and high weight.

Masonry, as in the photo, will complement the classic or country interior
- Plastic. Modern material that allows you to realize even the most daring ideas. A variety of colors and textures allows you to create any design of a doorway with your own hands. Plastic is best used when creating modern or pop art decor.

A wide range of colors and textures - a distinctive feature of plastic
Any of these materials will be the answer to the question of how to decorate an arch in the kitchen. Which one will stop is up to you. But we would still recommend making a choice based on the available interior and finances.

It is necessary to choose the material for the arch based on the existing interior style
Create an arch in the kitchen in 7 steps
If repair work is carried out in a Khrushchev or a similar house, then the doorway should be increased in height and, preferably, in width. If, of course, there is such an opportunity.

In the process of repair work, you can significantly expand the doorway
Panel houses of a later building may also require changing the size of the opening, but this will be somewhat more difficult, since cutting reinforced concrete structures is not an easy task.
Most often, kitchen arches are made of drywall. This material is easy to install, easy to work with, and in general it has established itself as a reliable and fairly practical building material. In this section, we will explain in detail how to create such a structure.

It is easiest to make an arch from drywall - it is very unpretentious in processing
Collection of materials and tools
First of all, you need to measure the dimensions of the opening and, according to them, choose the amount of material.
In order for the drywall arch to the kitchen to be not only beautiful, but also reliable, you will need to collect the necessary tools. You will need:
- electric percussion drill or hammer drill, jigsaw;
- pencil, construction knife;
- plastic dowels 6 mm, dowel-nails 45 × 6 mm;
- self-tapping screws for drywall and metal;
- hammer, scissors for metal;
- protective glasses and gloves;
- construction level, a set of drills and drills for a hammer drill;
- needle and paint roller;
- putty, tape measure, ruler, screwdriver, pliers.
In addition, you will need drywall sheets and metal profiles.

The design of the arch in the kitchen will depend on your taste and financial capabilities.
Description of work
In this section, we will tell you in detail how to make an arch in the kitchen with your own hands.
Illustration |
Instructions for action |
 |
Step 1. Create a template. On a sheet of drywall (gypsum plasterboard), draw the circle of the future arch. To do this is simple: fasten a self-tapping screw at the end of the drywall, tie a rope with a pencil to it. You will get a kind of compass, which is easy to outline a circle. |
 |
Step 2. Cut plasterboard. Cut the drywall sheet along the outline. This is best done with a jigsaw; in extreme cases, a hacksaw or a plasterboard saw is suitable. |
 |
Step 3. Install profiles. Cut 4 metal profiles to match the width of the drywall and attach them to the wall. Install two additional profiles on both sides of the opening. |
 |
Step 4. Secure the drywall. Install the first sheets of drywall on the profiles using a screwdriver and self-tapping screws. Fasten them in 10-15 cm increments. Sink the caps of the self-tapping screws in the material so that they are flush with the GCR sheet. |
 |
Step 5. Build a bent profile. In order for the drywall arches in the kitchen to be durable, it is necessary to use bent guides. Cut a metal profile to match the size of the arc. To bend it, make cuts on the surface of the lateral edges of the profile every 10-12 cm. The more cuts, the more the metal can be bent. |
 |
Step 6. Install the profile. When the profile has acquired the shape of a regular arc, fix its lower ends in the opening. When you make sure it is securely installed, attach it to the main rails. |
 |
Step 7. Connect the elements. Screw the arch profiles onto the plasterboard arch body. Screw the self-tapping screws every 10 or 15 centimeters. |
In the end, you just have to cut the end part of the arch from the gypsum board and attach it to the structure. Then you can decorate the arch as you wish. You can find more detailed instructions in the video.
Finally
We examined what arches are in the kitchen and talked about the most popular materials for their decoration. You also learned how to create a plasterboard arch yourself, so now you can easily decorate your kitchen.
Redevelopment of the kitchen - see here.