Content
-
1 Where to start
- 1.1 Choice of tiles for countertops
- 1.2 Types of surfaces
-
2 The working process
- 2.1 We make a base for tiles
- 2.2 We fix the base
- 2.3 Tile mortar
- 2.4 Apply mortar to plywood
- 2.5 Putting the tiles
- 3 How to refine the end of a tile countertop
- 4 Grouting
- 5 Conclusion
There are many options for making kitchen countertops, mostly plastic or acrylic products. But what do you think if the countertop for the kitchen unit is made of tiles? It is quite possible to do it yourself, for this you just need to follow all the recommendations specified in this article.

Obviously, this countertop option wins in many respects: appearance, practicality and durability.
Where to start
The first thing you ask yourself is where to start the entire workflow. And this is correct, because everything must be divided into several stages and performed in the specified sequence. And the first section with which we will introduce you will be the choice of finishing materials.

It is possible to do this, only the cost of curved tiles may scare you
Choice of tiles for countertops
To limit (save time) the widest range of materials, it should be said right away that a kitchen countertop made of tiles should only be made of porcelain stoneware.
Here's what it has to do with:
- Porcelain stoneware for the kitchen the strength is not inferior to natural stones. That is, by laying such tiles on the countertop, you will avoid the appearance of cracks and chips, even in contact with heavy pots and pans. It can only be broken with a hammer, but this is far from a kitchen tool.
- High wear resistance. No matter how much you rub it, the surface will remain intact. Manufacturers give a 10-15 year warranty. Tell me, what other material can be used so much?
- Very low water absorption compared to tiles and ceramic tiles. The indicator fluctuates around 0.05%, which makes it possible to use porcelain stoneware even in rooms with a humidity of 95%.
- Resistant to fats, oils, various acidic and alkaline reagents. Therefore, you can safely use household detergents without harming the surface.
Types of surfaces
However, you still have to choose, just not the composition of the material, but its surface, since there are several options:
- Embossed (textured) surface - its disadvantage is that dirt accumulates very quickly in the pores, which is not so easy to clean. On the other hand, the kitchen creates a unique design that is difficult to recreate with smooth materials.
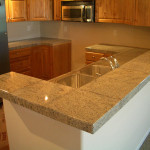
- Polished (semi-polished) - easy to clean, pleasant to the touch. But, as we said earlier, the charm is lost.
Advice! Choose whatever you like. Because if the wavy texture suits you, it's okay - once a week you can clean it with a brush.
There is porcelain stoneware in the form of a mosaic, but we do not recommend it to those who are laying tiles for the first time.
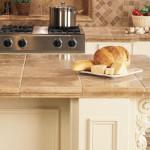
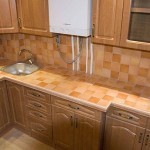
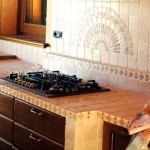
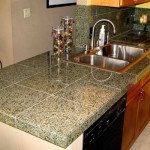
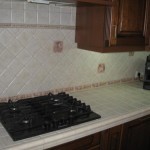
A harmonious combination of an apron and a worktop will benefit the kitchen. This option will embellish the room.
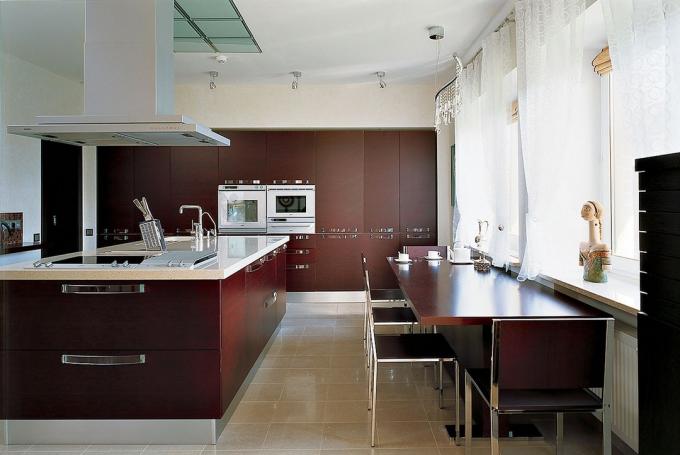
For lovers of large sizes, there are tiles with dimensions of 60x60 cm, so if you want to simplify the installation workflow, this option is for you. Look at the photo how it looks.

The tiles are very bulky and are therefore rarely used as decoration materials for countertops.
The working process
We make a base for tiles
If you already have a kitchen set, you should make some changes to its design:
- The first step is to add several legs to each cabinet. Distribute them around the perimeter, they are useless in the center of the product. Still, the porcelain stoneware countertop is very heavy.
- Fix the pedestals together in a secure way so that they form a single whole. This is necessary to maintain a uniform horizontal level.
Read also the article Kitchen tables with ceramic tiles - stylish, practical, convenient.
The next step is to prepare the tools and materials for the foundation:
- Purchase FSF or FB plywood. The standard size of sheets of material is 1500x1500x20 mm. Accordingly, if your kitchen is three meters long, then you will need two sheets.
Note! Plywood will be laid in two layers: a two-layer base with dimensions of 1500x600x40 mm will come out of one sheet.
- Also stock up on moisture-proof impregnations for wood. Check with the sellers in the store, in each city the manufacturers may differ.
- Of the tools you will need: a jigsaw, a hacksaw, a hammer and a screwdriver.
- Initially, the plywood is cut in such a way that it hangs over the kitchen unit. The standard size of the plastic table top is 60 cm. Do not forget about an overlap of 1 cm on the front side and 2 cm at the edges.
- Then we process the material with moisture-protective agents. This is only at first glance, a kitchen countertop made of tiles, the base is wooden. Therefore, in order to prevent the appearance of irregularities and deformation, everything should be thoroughly missed.
We fix the base
Note! Process the ends two to three times, the horizontal surface at least two times. And not only on the cut-off side, but also in those places where there will be a cutout for the sink. If there is a built-in hob, then be sure to process there too.
- We expose the kitchen set by level. Some craftsmen attach the pedestals to the wall through the back walls, but we consider this an unnecessary procedure.
- The first layer of plywood is attached to the pedestals with stainless screws. The hats must be recessed. The optimum screw length is 38 mm.
- After that, wood glue is applied to the surface. Moisture resistant PVA or wood glue will do.
Advice! Smear it with a brush in a zigzag motion. This will make it easier for the material to adhere to the surface.
- The second layer of plywood is laid and attracted with self-tapping screws in 15-20 cm steps. All caps must also be recessed. The length of the self-tapping screws is 30 mm.

The most important thing is to tighten the screws around the perimeter, the middle is not so important, there the material will be securely fixed with glue
Important! The place of drilling and fastening of the self-tapping screw should be treated with moisture-proof impregnation.
Tile mortar
- Tile adhesive sold in stores.
- A mortar of cement and dry graded sand is also sold in stores.
- A cement-sand mortar that can be made at home. For higher adhesion, we recommend adding glue to the solution (PVA is suitable).
Note! The process of preparing the solution is not the cleanest stage, there will be a lot of traces of cement dust, and the sand can wake up. Therefore, it is advisable to cover the floor with foil, and put on work gloves on your hands. A mask on the face will also be useful.
Apply mortar to plywood
- The finished solution is laid out on the base using a trowel. It should be applied evenly over the entire plywood area.
- To level the solution and at the same time maintain the level, beacons should be installed. It is better to use a large spatula, from 30 cm.

Movements should be strictly "left-right", no circular and diagonal
- After the solution is completely dry, it is necessary to remove the beacons and process the ends of the cement-sand cushion. Pour the solution into the places where the beacons were installed.
- We level everything into a single plane and leave it for 2-3 days.
Note! The tile adhesive dries in about 12 hours.
Putting the tiles
If you are holding porcelain tiles in your hands for the first time, then, of course, there can be no question of any professional types of installation, consider the simplest one: seam to seam. We will take a product measuring 10x10 cm as a basis for the tile.

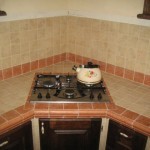
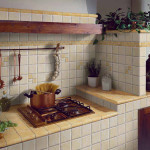
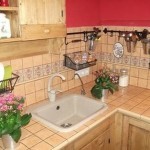
In this case, the tiles were laid using mixed methods: diagonally and in the traditional way
- Initially, you need to mark the surface. We deduce the middle in width (you should get 30.5 cm) and in length (based on 3 meters and a tolerance, 151 cm is obtained).
- We draw a line and get perpendicular lines.
- We prepare the glue solution, as the instructions on the package say. On your own, for the best effect, you can add a primer in a ratio of 1 to 3 parts water.
- We start laying the tiles from the corner that is considered the most prominent: with a notched trowel, the glue is spread over the surface of the cement-sand cushion.
- Since we lay without a visible seam, pay attention to the horizontal lines that run along and across.
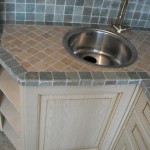
- The sink cutout is laid out with a discrepancy of 2-3 mm from the current size. The main thing is that the sink then lies only on the tile, without irregularities.
Note! Porcelain stoneware can be easily cut with a lever tile cutter. We do not recommend using diamond discs.

With such a device, you can cut tiles to size without dust and dirt
After the tabletop is completely tiled, you should take care of the end, which is still a two-layer plywood, cement mortar and tiles.
How to refine the end of a tile countertop
There are several options:
- On a horizontal surface, tiles are laid out so that its edge overhangs the thickness of porcelain stoneware. After that, the remaining products are cut into strips and glued from the end.

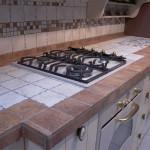
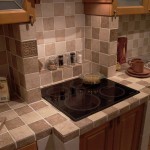
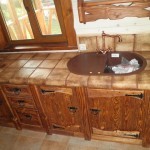
This is how the method of framing the end of a kitchen countertop with a canopy looks like
- Or, conversely, the end tile starts up with an overlap.
- A more difficult option is to cut the tiles at a 45 degree angle. It cannot be repeated at home without a special tool and skill.
Grouting
No matter how hard you try, you will still have a thin line at the junction of the tiles, so purchase grout in advance. It is better to buy materials based on epoxy resin: they have increased resistance to all reagents, fats, oils and temperature extremes.
You can buy them at any hardware store, it is better to navigate by cost. The price of quality products will be slightly higher, but they will last longer.
Most often, products are sold in the form of two components that are mixed together in a separate container and are immediately ready for application.
Grouting tips:
- Use a small rubber spatula to thoroughly coat the seam without damaging the tile.
- To simplify the process of cleaning the surface of porcelain stoneware from grouting, you can use masking tape. It glues easily and does not leave streaks: glue it along the entire length of the line that you are going to process.
- It is better to remove dried grout in a day.
Conclusion
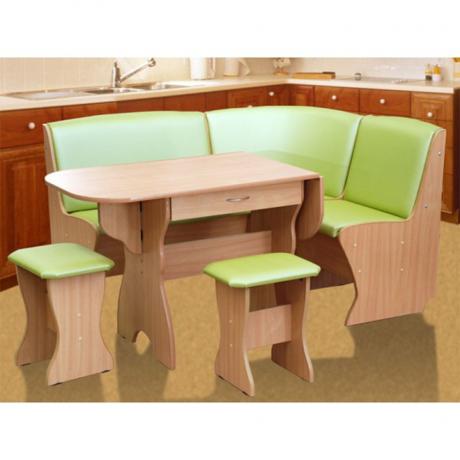
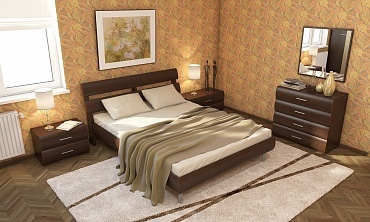
Got a tile but still haven't bought a kitchen set? Take a look at Stolplit, one of the leading Russian furniture manufacturers. There you will surely find something interesting and suitable for your interior.
Article Tile for the kitchen - selection options and methods of use will also be useful to you.

Or you can build the pedestals with your own hands, for this you will need to purchase a few more sheets of plywood
As for the installation process, we advise you to watch the video: do-it-yourself kitchen tile countertops. In it you will find a detailed instruction on the steps that we described in the article and you will be able to get acquainted with the workflow visually.
Gallery