Content
- 1 What you need to know
- 2 What can be used to make a sink table
-
3 Tile countertop
- 3.1 Materials at hand
- 3.2 The working process
-
4 Table with sink
- 4.1 Installing the countertop
- 5 Conclusion
Any kitchen starts with a sink cabinet, it is it that serves as the beginning for creating projects, developing imagination and assembling furniture. However, in order for the whole process to proceed without disturbances, it is necessary to make this curbstone correctly. Everything should be taken into account, from the dimensions of the room to the materials and components used in the manufacture of furniture.

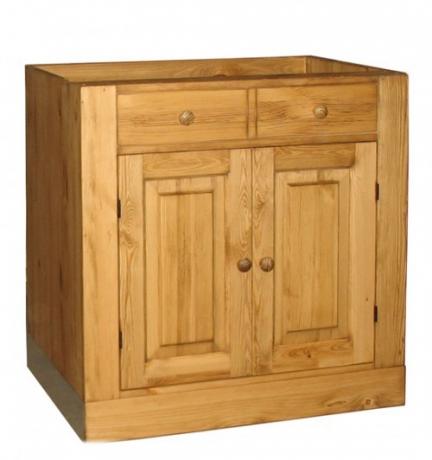
Homemade kitchen cabinet - all that remains is to hang the doors and cannot be distinguished from a purchased headset
What you need to know
Before starting the work process, you need to understand some of the features associated with wash cabinets:
- The location of the cabinet should be as convenient as possible, it is not necessary that it will be installed in a dark corner, the main thing is free space.
- Table for flush kitchen sink should be covered as much as possible, this is important for many reasons. Firstly, the more light, the easier it is for the eyes, and secondly, the maximum illumination of the working surface allows you to follow everything at once.
- The materials used for the construction of this structure, it is better to purchase moisture resistant, or carefully treat all the end elements with a sealant. After all, it is moisture that is the main enemy in the kitchen.
- The dimensions of the table should be calculated so that there is enough space for both the sink and the work surface.
These guidelines should be remembered as they will help you achieve the best results.
What can be used to make a sink table
There are quite a few options from which a table with a sink for the kitchen can be erected, most of them are suitable just for us, home craftsmen. We will consider the most original one.
Tile countertop
This method may seem unusual, but it has several advantages:
- The ability to build with your own hands what you want. There are no frames and restrictions, only your imagination and possibilities. You can combine colors.
- Reliability that surpasses all other countertop options. Such a table will stand for more than one year before you find the first chips and damage on it.
- The tile is resistant to all effects of chemicals (household chemicals), high humidity and ultraviolet rays. Even mechanical damage is not so terrible for the surface.
- Kitchen corner tables for a tile sink differ from other types of countertops - there are no joints. This allows the structure to be perceived as a single piece.

Even the sink is optional, it can be laid out from tiles
Note! The disadvantages include the bulkiness, which, alas, cannot be removed anywhere. For small kitchens, this option is unlikely to be optimal.
Materials at hand
To build a ceramic tile table, we need the following tool:
- Tile cutter - either manual or electric.
- Hacksaw or jigsaw.
- Screwdriver.
- Putty knife.
- Building level.
- Roulette.
From materials:
- Cement-sand mixture.
- Ceramic tile.
- Plywood.

Plywood can be replaced with 2-3 sheets of chipboard, this material is a little cheaper, but its reliability is much lower
- Primer.
- Initially, sheets of plywood are sawn off so as to cover the entire set in two layers.
- Then, with the help of a screwdriver, the plywood is screwed to the pedestals and twisted together.
- Now a cutout for the sink is made with a jigsaw.
The working process
Note! Do not forget that the corner kitchen table under the sink can be of two types. The first one is pentagonal, this option is bulky, relevant only for large rooms. The second is the standard one, when two cabinets are joined, thereby forming an angle of 90 degrees.

Pentagonal cabinet - impractical solution, too much space is left empty
- The next step is to cut the tiles. To make it easier to navigate, lay out the material on a plywood tabletop, so it will be clear how and where it is trimmed.
- Using a primer solution, it is necessary to cover the entire surface of the plywood, carefully processing the joints.
- The cement is applied to a dry countertop, the tiles are laid out from the corner.
Advice! In order not to disturb the horizontal level, use the pre-installed beacons, which will serve as the upper mark when laying the mortar.
The process is quite laborious, but in the end you will get a high-quality countertop that is not afraid - neither moisture nor time.

Thus, you can decorate the hob.
Table with sink
If you only need a worktop without a cabinet, what to do in this case? Now we will tell you in detail.
Let's start with the materials that will be required for the job.
- The table top is plastic. It is desirable if its thickness is 32 mm, and it will be impregnated with a special moisture-resistant composition. The surface must be plastic, wooden materials wear out quickly in the kitchen.
- Steel pipe with a diameter of 50 mm. You can buy finished products, but the price for them will be slightly higher. Therefore, it is better to purchase a 3-meter pipe and 2 sets of fasteners (3-4, if the table is more than one and a half meters long).
- Stainless steel sink.
- Metal corners.
- Wooden bars.
- Silicone sealant.
- Self-tapping screws 4x16 mm, 5x70 mm.
- Dowel.
As for the tool:
- Drill.
- Screwdriver.
- Hacksaw for metal.
- Electric jigsaw.
- A hammer.
- Building level.
- Initially drill the block in several places (3 holes are enough for one meter).
- Then draw a horizontal line along the level and attach the bar to it.
- Mark the holes for drilling with a pencil or marker.
- Pick up a drill and 8 mm drill. Drill holes to a depth equal to the size of the dowel.
Installing the countertop
Note! Tables under kitchen sink (both large and small) require careful fastening, because they will carry a large load. This is not only a place for washing dishes, but also a work surface.
- Drive the dowels into the wall with a hammer.
- Reapply the block and screw the screws into the holes. Check that it is securely fastened.
- Cut the steel pipe to size (height from floor to top of the bar).
- On the back of the tabletop, mark the pipe fittings. For example, step back 5-6 cm from the edge, attach the fixing ring and screw in the screws.
- Insert the pipe pieces into the fittings and secure with the special bolt.
- On the opposite side of the steel leg, secure the second piece of the mount.
- Flip the countertop over and place it on the block.
- Drill holes in the floor with a drill where the lower leg mounts are located. Use a 6 mm drill.
Note! If the floor is wooden, then self-tapping screws can be screwed in without drilling.
- Drive the dowel into the resulting holes and screw the screws into them.
- Screw the metal corners to the bar on the wall.
- Pull the countertop through them.

3-4 corners are enough to securely fix the tabletop
On a note! You will need to do the same if you need a kitchen corner table under the sink. The only difference is that the countertops should be pulled together. To do this, use either metal plates that are screwed on the back of the product. Or straighten the metal corner yourself with a hammer.
- Cut out the sink template and outline it on the countertop.
- Drill 3-4 places (preferably in the corners) with a drill.
- Insert the jigsaw file into the resulting marks and carefully cut out the tabletop.
- Treat the ends with silicone sealant, let it dry for 30-40 minutes.

Silicone can be white and transparent, they have no differences in stickiness
- Attach the sink and secure it with the special fasteners.

Mounts are usually sold with a sink
Now all that remains is to connect the mixer and the sink with the kitchen table is ready!
Conclusion
If you follow all our recommendations and follow the sequence, then the workflow will not seem so difficult to you. The main thing is concentration and attitude, and even a corner kitchen sink table will be easy for you (read also about the advantages of enameled kitchen sinks).
However, we nevertheless decided to help you further understand the essence of the issue and provided a video. Only that which was perceived visually can be considered useful information. Good luck with the repair!