Content
-
1 Let's evaluate our capabilities
- 1.1 We will paint the facades, replace the fittings
- 1.2 Observing the sequence, we get the result
- 1.3 Self-adhesive film is also in fashion
- 1.4 What will we postpone
- 1.5 Sticking self-adhesive film
- 1.6 Change old to new
- 1.7 Finally
- 2 Gallery
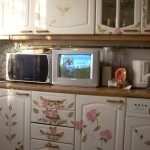
Imagine, you go into the kitchen, and there are cabinets painted in the time of the king of peas, plain, boring, with numerous chips, and some are also skewed. And you see this picture every day, at least twice a day. Breakfast in the morning and dinner in the evening, so year after year.
Reducing the positive perception of the room in which you eat also reduces the positive perception of all the dishes you eat. Proven. So we will stock up on materials, tools and start bringing our kitchen to highly aesthetic criteria.

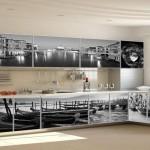
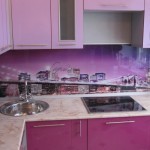
A city in the kitchen is an unusual solution.
Let's evaluate our capabilities
Is it possible to repair kitchen facades? What can we do and what not with our own hands? These are the main criteria when approaching the solution of the problem of renovating facades in the kitchen. And, of course, what will it cost us? What is the price of all these innovations?
In our material, you will learn how, with minimal cost, you can carry out various manipulations for painting, repairing, replacing and decorating facades of your kitchen.

Doors without chips and peeling of material - paint.
We will paint the facades, replace the fittings
This is the easiest and perhaps the least expensive way to revitalize our kitchen furniture. Yes, the cost is cheap. We will start repairing kitchen facades with painting.
Note!
Only facades without chips, delamination, cracks and other well-visible defects are subject to this type of renovation.
Otherwise, you will not get the expected result, and in some cases the opposite effect is possible.
So, for painting we need:
- Paint that is suitable specifically for the material from which your kitchen is made;
- Solvent for removing grease, possible stains of old paint, etc .;
- Sandpaper;
- New furniture fittings of the required color and functional load;
- Screwdrivers, screwdriver;
- Spray gun, brushes, roller.
Observing the sequence, we get the result
Indeed, painting is the simplest procedure familiar from childhood.
-
Removing cabinet doors with a screwdriver or screwdriver. Sometimes, in the process of dismantling, difficulties arise with screws and old fittings.
They really do not want to leave their nests and grooves. In such cases, it is possible to use machine oil, spot heating of the screw with a soldering iron, followed by extraction when it gets cold, as well as a special silicone composition WD-40.
Before painting, we remove all the fittings. - Preparing the surface for painting. We wash the panels with warm water. If there are traces of fat on them, we remove them with a solvent. Then let the surface dry.
- We clean the planes sandpaper. After that, all dust is removed from the surface and treated with a solvent.
- Let's start painting. And, of course, painting starts from hard-to-reach places with a brush. Then you can start and paint even surfaces with a spray gun.
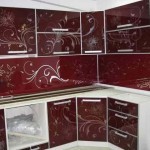
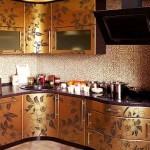
- We apply several layers of paint. Do-it-yourself kitchen facade decor involves applying several layers of paint. In addition, contrasting paint and stencils are needed to create images that bring the whole interior to life. At least as in the next photo.

Bright colors in the kitchen interior
Council. The best paint for adding decorative elements is automotive paint in aerosol cans.
The color spectrum is wide, the possibilities for the selection of shades are limited only by your imagination.
When using the layering technique, the facades of your kitchen will not be inferior to expensive foreign cars in shades and beauty.
-
We fill the drawing. When the main color dries, a drawing is printed on stencils, and it can be both monochromatic and colored.
The application of various decorative elements is also allowed. Decorating kitchen facades with your own hands, the topic is extensive and multifaceted.
It is easier to write what is not used for decoration, and also what tricks you will not be able to do.
Advice!
Try it, try whatever you like. Experiment with shapes, colors, inserts - you will see an amazing result of your work.
- We fix furniture fittings and enjoy the updated view.
Self-adhesive film is also in fashion
Wherever we do not use plastic. In the kitchen, he has long been occupying his rightful place. Cutting boards, special spoons, knife handles and other kitchen utensils. Plastic is everywhere now, and vinyl that goes to kitchen fronts can mimic anything.
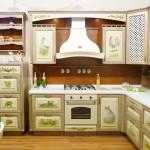
Moreover, each element is able to show its individual character, or, to make a single picture as in the next photo.

There are no words. I liked it very much.
What will we postpone
And we will put off to reproduce such beauty:
- Self-adhesive film, and the film is of excellent quality.
Note!
It is better not to save on this point. Do not listen to the stories of sellers that it has been hanging somewhere for several years.
Of the clearly negative qualities of cheap products, a short service life and a mediocre appearance.
And one more thing: when you come to the store, have the dimensions of the surface to be coated. To calculate the required film.
- Again, the solvent.
- Replaceable knife and sharp scissors.
- Measuring instruments: meter, ruler, tape measure, pencil.
- Tailor's measuring tape.
- Dense film material.
Sticking self-adhesive film
Note!
Before pasting, draw up a plan for placing the facade panels, and mark the facades themselves. This is done so that when assembling in the final, there are no inappropriate facades for specific lockers and cells.
The issue of replacing fittings is the subject of an individual solution. If the hardware is new, fits well into the headset and, even taking into account new "clothes", then it can be left. Otherwise, spare no money, replace it.
Next, we follow the same steps as when painting:
- They removed the fittings;
- Have washed the surface;
- Degreased;
- Prepared for pasting with foil.
So, the colors are selected, the surfaces are prepared, with glue.

Large drawings are popular.
Note!
Here it is necessary to remember the saying: measure seven times and cut once. The fact is that if there is a main pattern in the film, then it should be located symmetrically.
Its deviations are allowed if in this way a single ensemble is created with its own laws of spatial construction.
But, as a rule, the technique of its implementation is much more complicated and requires special skills. Therefore, the method we offer you is simple observance of the texture. The main thing is that the drawing is not interrupted.
The film is cut according to the size of the product, the inner surface has a sizing grid, which greatly facilitates cutting to size. Measured, cut, separated the film from the paper base. Then, as evenly as possible, we apply the film to the product and expel the air from under the film.
This is done from the center to the edges with whatever is convenient for you. As when gluing wallpaper. Conveniently with a rag, do it with a rag, conveniently with a roller or a plastic spatula - do not mind, do it with them.

Large drawing on the facades.
Note!
No matter how hard you try, more or less air may accumulate between the film and the surface of the facade.
Therefore, this situation requires correction. For small bubbles, a needle is enough, for large ones you need a knife with replaceable blades. Bubbles are punctured and smoothed out.
Note!
If some element is skewed, the film itself has a visible defect, then this situation requires immediate correction.
The film is re-glued or replaced. Otherwise, the adhesive layer hardens very quickly, and further removal of the film will be associated with certain difficulties.
Repairing the facade of the kitchen with the use of self-adhesive film is so good that you are offered ready-made solutions, and in large quantities. And in conclusion, the kitchen facades are installed in their places, as we remember, according to the scheme drawn up earlier.
Change old to new
No, this is not a promotion in another supermarket. Unfortunately, this is a possible reality. And it's all the fault of the material, which turned out to be not very successful, or else the rules for operating the product were violated.
All this led to a complete loss of presentation and the need do it yourself renovation of kitchen facades. The solution to this problem is possible in two dimensions. The first decision to make kitchen facades with your own hands.
For this we need:
- Material, preferably MDF or wood;
- Cutting machine;
- CNC milling machine for the production of various recesses and complex patterns on the facade;
- Thermal vacuum press for sticking a special film on the product.
Do you have this equipment? If so, then you are the owner of the workshop. Otherwise, I have to upset you, the facade for the kitchen with your own hands can greatly disappoint you. The second solution is to order the material in the workshop according to your size.
This conclusion is more reasonable and has several advantages:
- You will be made what you need;
- You can save on the manufacturing process by installing fittings and painting yourself;
- You are free to choose the material.
Now in the workshops you can make a kitchen facade of any size, with any grooves and decorated elements, to top it all off, the detail is tightened with a high-quality special film. What is left for you? And you just have to install the kitchen facade with your own hands.
And here you need the usual set of home tools:
- Drill, with drills for wood;
- Screwdriver, screwdrivers;
- Loops awnings, handles.
We drew a place for the hinges, coordinated the structural elements, hung the kitchen facade with our own hands. And then the second and third and fourth. They installed the handles and that's it. Let's enjoy our work.
Finally
By changing a few familiar interior details, you can get a completely different solution that can bring new fresh colors into your life. Don't put off your life in the back drawers of tables and dressers. And this video will help you make the final decision.
