Content
- 1 Kitchen set according to the instructions
- 2 Instrument preparation
- 3 Room preparation
-
4 Furniture assembly
- 4.1 Installation of floor pedestals
- 4.2 Assembly of wall cabinets
- 5 Furniture care
- 6 Conclusion
You can talk a lot about where to buy a kitchen set, but everything will come down to only one main point - who will assemble it? Yes, there are special teams that will charge you half the cost of your headset. You can search for cheaper, but you shouldn't count on good quality.
Let's consider the third option - self-assembly.

Assembling furniture is actually easy, the main thing is to follow the instructions
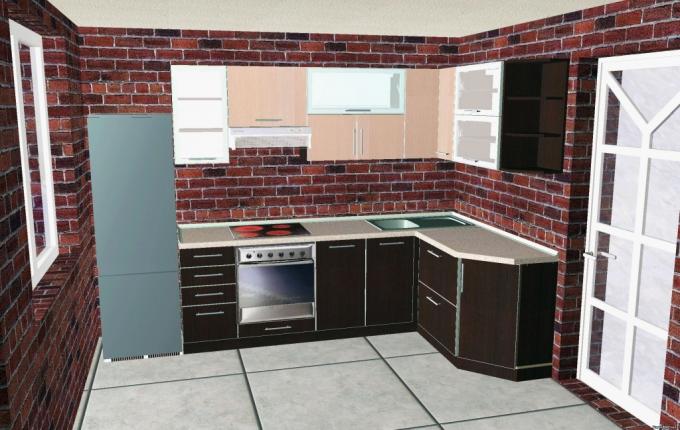
Kitchen set according to the instructions
We will not argue for a long time on the topic of what furniture should be, what materials are used - you should all already be aware of this. After all, now the question is just above the assembly process.
And yet, it is worth clarifying some of the nuances.
- The design and dimensions of your space must match. Check yourself several times for accuracy: width, length, and height.

A homemade project should look something like this
- Materials for furniture can be different, but you should give preference to the most popular ones, such as: chipboard, MDF, plastic and acrylic.
Note!
Why isn't natural wood on this list? Because its price is several times higher than for other materials.
- Saving on accessories is the same as buying Chinese things - the probability that they will last a long time is zero.
- If you are looking for a reliable and durable headset, then an acrylic table top is your choice. Severely limited budget? Stop your choice on a plastic product.
We will not talk about interior design, we just have to remind you that when purchasing a headset, you should count on 5-6 years of its operation. Therefore, the appearance and combination of furniture with the room is far from the last aspect worth paying attention to.

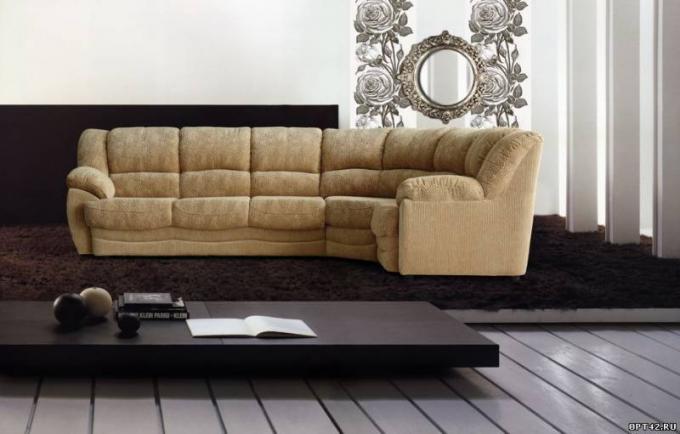
Agree, such an interior pleases and is unlikely to quickly become outdated
Instrument preparation
Moving on to the next section, we will list all the necessary tools:
- A screwdriver is required for screwing in euro screws and self-tapping screws. According to experts, you can do without it, but you will have to use a manual screwdriver, with it the work will be less efficient.
- A drill is needed to drill holes for handles and self-tapping screws. If you have a universal drill that fits your drill, you can do without a hammer drill.
- A jigsaw may be needed in cases where you have purchased a kitchen set with a solid countertop for kitchen.

The sink cutout is made according to the template
Note!
When buying furniture, in some organizations, you can order in advance a cutout for the sink. So you save yourself from unnecessary fiddling with the countertop, but you will have to pay extra.
- A hammer or mallet.
- Building level, preferably large (two meters) and small (half meters). If possible, use a laser device, after all, its readings are more accurate.
- Roulette.
- Stationery or construction knife.
And now, before moving on to the section on how to properly assemble kitchen furniture on your own, let's look at the preliminary work.
Room preparation
When installing the headset on old concrete walls, no questions should arise, but if you are doing repairs while assembling furniture, you will have to pay attention to the following:
- For plasterboard walls, special butterfly dowels are used.
- If you are planning a tile apron, then it is advisable to lay it out before the furniture is installed.
- Take care of the sockets in advance, try to take into account all the household appliances that will be placed in the kitchen.
- If the floor and walls need to be finished before assembling the headset, then the ceiling can be mounted after installing the furniture.
Note! It is obligatory to level the floor in cases where: laminate or tile is laid, floor stands without adjustable legs.
Furniture assembly
Let's divide this process into two stages:
Installation of floor pedestals
This instruction will help everyone who has just seen how furniture is assembled before to do it on their own:
- Lay out all the details from one pedestal in front of you. It is advisable to start from the corner where the sink is usually located.
- The first step is to screw all the Euro screws into the existing holes. You should have a cabinet without a back wall and legs.
- Then fix the adjustable legs with self-tapping screws.
Note!
On pedestals, where there are drawers under the lower part, legs are not placed.
- If there are boxes in the cabinet, then they should be installed according to the attached instructions.
Important!
If you suddenly look for markings on the Internet, please note that roller guides are different from full-out guides.
- You should also outline the awnings for the hinges, if there are doors. The fronts are hung last in order to preserve them during the installation of the headset (see. also kitchen set for Khrushchev).
- In the screeds (upper strips), pre-drill 3-4 holes for fixing the table top.
Assembly of wall cabinets
Do-it-yourself furniture installation can take a lot of time if you are using a power tool for the first time.
However, it is worth appreciating that even if the installation of a kitchen unit takes you a week or two, then you saved money on this, and considerable money that would have to be given to the assemblers.
- Start in a similar order from the corner cabinet.
- Pay attention to what kind of fasteners you have in the kit with the cabinets: adjustable awnings or "ears". Their difference is that the canopies are mounted on a metal bar and can be adjusted (+/- 10 mm), and the galvanized "ears" must be hung at the level.

Canopies are adjusted with a screwdriver or screwdriver
Note!
In case of incorrect mounting, the holes will have to be re-drilled.
- The back wall can either be inserted into the groove or nailed onto the nails.
- In the closet under type of cut-in kitchen hood it is necessary to prepare all cutouts in advance according to the duct diameter.
It is better to purchase a plastic air duct itself, so there is less risk that it will be damaged during installation.

If your sink does not have a tap hole, you can make it with an ordinary metal drill.
Furniture care
The last section in this article will be a few recommendations for the care of kitchen furniture:
- For chipboard and plastic, you can use almost any detergent, but for painted MDF you will have to abandon chemistry. The only product that is suitable for all surfaces is polish. But it's more for shine than for cleanliness.
- It is advisable to grind acrylic countertops every 2-3 years, otherwise they lose their shine. And during this time, many small joints can form on them.
- All untreated ends and parts must be covered with silicone sealant. This reduces the risk of moisture entering the material. This is especially necessary for a plastic countertop, where the cutout for the sink. The photo shows how best to apply the sealant.

The tape is necessary so that the sealant does not get out of the sink
Conclusion
We considered detailed options for assembling kitchen cabinets, touched upon the points of service. We hope that this is enough so that you can safely assemble the headset yourself. A video with a detailed description of all stages is also attached to the article.