Content
-
1 Making kitchen furniture on your own
- 1.1 We create a project
- 1.2 Materials and tools
- 1.3 Blanks
- 1.4 Sawing chipboard
- 1.5 Build and install
- 1.6 Finally, a few tips for installation
- 2 Summarize

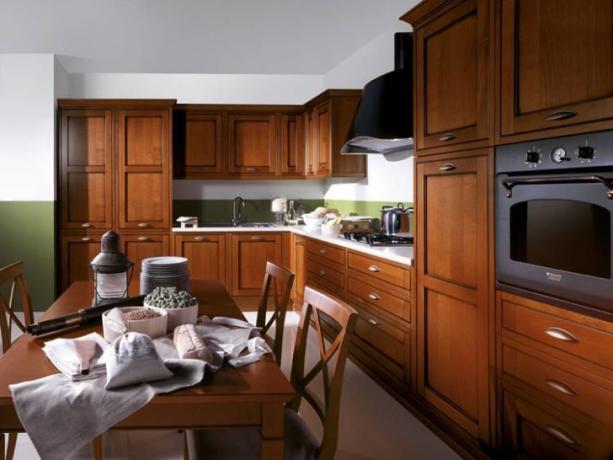
Functional and attractive hand-built headset
Modern kitchen sets look very impressive. High-quality materials used in their assembly will undoubtedly delight anyone who buys such furniture, but there is one significant "BUT" - the sky-high price scares off most buyers.
Making kitchen furniture on your own

Assembling the kitchen set yourself, you can think over all the cabinets exactly the way you need it
If the owner of an apartment (house, cottage) has a mastery streak and a little creative thought, then he is quite under the power to make kitchen furniture with your own hands, while spending several times less amount than in store. In addition to the price, non-standard sizes of the kitchen can influence the choice in favor of home-made kitchen furniture - often Russians are faced with such a problem as footage. It is very difficult to find suitable furniture for 6 m², which strictly corresponds to all forms and characteristics of the premises (do not forget about the wishes of the owners).
We create a project

First of all, we carry out all the necessary measurements of the kitchen space
Like any design, a do-it-yourself kitchen starts with the project, which we will compose now. Armed with a ruler, pencil and paper, we first draw a detailed floor plan (in our case, the kitchen). Don't forget to kitchen furniture drawings indicate the location of communications: wiring, water supply, gas. When you have successfully figured out the kitchen plan, we proceed to choosing the shape of the headset: linear, L-shaped, U-shaped.
Next, select and place 5 main kitchen zones on the plan:
- Storage space for dishes and all kitchen utensils;
- Washing area;
- Hob;
- Desktop;
- A place to store food.
Note! The sink, dishwasher and washing machine should be located as close to the water pipes as possible.
As for the gas stove, according to the technology, it can be installed no further than 2 meters from the gas pipe. Refrigerator - as far away from the hob as possible. Of course, in real life it is difficult to achieve the ideal, but it is still worth striving.

Zone layout example
So, now we got to the most important thing - we place the future furniture on the drawing. In the project, you need to consider the following points:
- The height of all horizontal (working) surfaces, and all dimensions must be adjusted to the height of the hostess. Consider the fact that her working hand is right or left;
- Dimensions of built-in equipment (if any);
- Material, texture and color of the frame, facade, countertops, etc .;
- The quality and quantity of fittings (this includes roller or ball guides, door handles and latches, glass, mirrors, etc.);
- Lighting (again, if it will be built into future furniture).

An example of a plan with dimensions and placement
Attention! You don't have to invent your own wonder of the world. You can simply browse the shops and choose the most suitable "layout" for yourself. That way you will at least have an idea of what you are doing.
If the projected kitchen furniture for a small kitchen with your own hands simply does not pop up in your imagination and your hand refuses to draw something on paper - that's okay! You can turn to the Internet, which will always come to the rescue.
Here are some of the programs that can help you figure out the trick of engineering and draw up a 3D drawing:
- K3-Furniture;
- Woody;
- KitchenDraw;
- Basis-Constructor-Furniture Maker;
- PRO-100.
Even the weakest program on the list is a graphical 3D editor, with which you can create a pretty decent model-schematic for further work.

3D model of the headset created in Woody software
Materials and tools
In most cases, many owners choose kitchen furniture with their own hands from chipboard. But in order to design a more competent and reliable (in technical terms) design, you will need to combine the following materials:
- Laminated MDF sheets 16 mm thick - used for walls;
- Laminated fiberboard sheets 5 mm thick - used to create the walls of the boxes;
- Plastic corners, washing, mesh, drying and other attributes;
- Fittings - handles, hinges, guides, cabinet legs, special furniture edge, euro screws, tie ...
- Facade - if you are not a carver and do not know how to make prints on furniture, then the easiest way is to order it separately, taking the dimensions of the frame of your structure as a basis.

LDWP

MDF

Finished facades
Assembling and installing kitchen furniture yourself Is a real challenge. If you listen to the masters, they recommend that you first buy the facades, and already use them to make the furniture structure. If you make the doors yourself, then it will immediately catch your eye - in apartments, with an incomplete set of furniture makers, you can make only a handicraft of low quality (unfortunately).
Now check out the complete set of tools you need to get started:
- Drill;
- Screwdriver;
- Hammer and nails (including furniture nails);
- Roulette;
- Pliers;
- Building level;
- Square;
- Pencil;
- Iron;
- Electric jigsaw;
- Sandpaper;
- Construction knife.
Blanks

Compact miniature kitchen project
To cut the material, you need a precision tool and a strong hand. Many companies engaged in the sale of building and finishing materials provide such a service as cutting to your size. That is, go to the engineer and the manager, agree on the payment and specify all the dimensions, and as a result, you will receive finished parts (even with the necessary holes) within 2-3 days.
This will be much easier, faster and cheaper - as a result, you will get perfectly flat and fitted parts of the future kitchen.
Sawing chipboard
As mentioned earlier, LDWP can be cut with your own hands. You need to buy a lot of them, and if you do not have a jigsaw, then it is better to immediately give them for cutting along with LMDF. Screeds will be made of LDVP - on average, a small set requires about 250-300 pieces, so it is better to think about this issue right away.
Build and install

Useful for self-assembly diagram
All the parts are in stock, the fittings are waiting in the wings and the tool is ready - you can safely start assembling. Assembling kitchen furniture with your own hands is a responsible business and requires a phased approach.
So the instruction:
- Step one - you need to cut off the sawn parts. This is done with a hot iron. If you notice any roughness or small chips on the edges, gently rub them with sandpaper. The cooled edge can be carefully cut with a knife;
- The next stage is marking. Here it is necessary, strictly adhering to the dimensions (without deviating by any 1 mm), to leave marks on the details of future holes, fastening points for guides and hangers;
- Do not forget to mark the details of each module - this will make it much easier for you to assemble the structure. If you confuse something, then later it will be much more difficult to understand which part is attached to where (applies to especially small parts);
- Cabinets should be assembled according to the box principle (see. photo below). Vertical surfaces are attached to horizontal surfaces. If you managed to assemble one cabinet, immediately fill it with shelves and drawers. This will not only give it stability, but also save your kitchen from unnecessary small details;
")
Assembly diagram of kitchen cabinets (upper)
- Roller (ball) guides should be fixed strictly at the level. If they are fastened obliquely, problems may arise with the further use of the headset.
Advice! It is better to do the assembly together - one holds the parts, and the second fixes them. Moreover, in four eyes it is better to see where what has moved out and what has fallen where.
Finally, a few tips for installation

Another masterpiece created by a home craftsman
So, let's consider a few recommendations regarding installation:
- All repair work (at the time of assembly and installation) must have already been completed;
- The furniture set is mounted exclusively to dry walls (not completely dry plaster can simply fall off along with the cabinet);
- If your kitchen has a corner structure, then the installation must necessarily start with it;
- First, the lower row of furniture is mounted, then the upper one - and nothing else.
Summarize
It turns out that making furniture for the kitchen with your own hands is not so difficult. You just need to be patient and have a small amount of money. If you still have questions, there are some clarifications, or you simply do not understand the essence of the work - the video in this article will help you.
It is not worth spending a lot of money if you have "golden hands". Feel free to show your skill and don't be lazy. This will allow you not only to save money, but also to create something extraordinary and "your own", and high-quality and beautiful "your" is very much appreciated (read also article "Inexpensive kitchen furniture: economy class interiors").