Content
-
1 Special requirements for mixers
- 1.1 What a quality mixer should be made of
- 1.2 Equipment
-
2 Installation procedure
- 2.1 Preparatory work
- 2.2 Dismantling the old mixer
- 2.3 Installation of a new crane
- 2.4 Connecting a new mixer
To maintain the health of all family members, clean drinking water is essential. To obtain it, you most often have to filter tap water. In order to combine the production of drinking water and the use of water from the mains, combined kitchen faucets have been developed. They eliminate the need to install an additional tap for drinking water.
These mixers are equipped with two levers. One of them is connected to the water supply, and the other to the filter installed under the sink in the kitchen. Because of this, these devices are often referred to as “filter mixers” or “two-in-one mixers”.

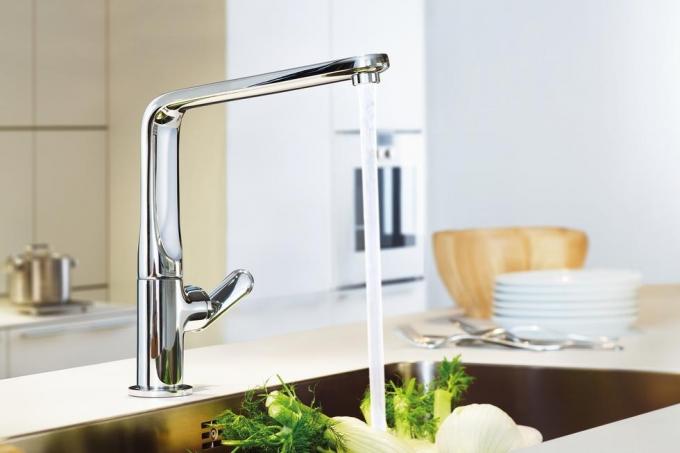
Combined mixer
Another characteristic feature is the presence of two separate streams. That is, unfiltered water inside the mixer flows through one channel and is poured out through one hole. The filtered water, in turn, flows through a different channel and out through a different opening. This excludes contact of clean water with untreated water and, thus, preserves the pleasant taste of drinking water.
Special requirements for mixers
The combination faucet for the kitchen is as important an item as kitchen sink. The convenience of working in the kitchen as a whole largely depends on the convenience of using it.
If the tap makes extraneous sounds:
- whistle;
- hum;
- leak;
- if the valve starts to jam, it will be very inconvenient to use it.
Since it is used on average about a hundred times a day, the main requirement for the components is durability. And the higher it is, the more expensive the mixer itself is, as a rule. The second requirement is the ergonomics of the design, or, more simply, the comfortable shape of the details of this product..
Models with convenient shapes can be found among samples with any type design for the kitchen - from the classic style to hi-tech. Moreover, they can be executed in various colors for any customer's taste.
Advice!
When choosing a combination faucet for the kitchen, you should give preference to chrome-plated products, since such a surface prevents the accumulation of harmful microorganisms on it.
What a quality mixer should be made of
Quality plumbing can be made from a variety of materials. But the most popular among them are brass, as well as stainless steel (see. also stainless steel kitchen sink). The best option is brass with the addition of zinc. These cranes are the most durable and wear resistant. But their price, of course, will be higher than for products from other alloys.
Equipment
Together with the combination mixers, the set, as a rule, is supplied with the hoses necessary for connecting to the water supply and filtration system. In addition to them, fasteners and special adapters can also go. But they are not present in all models, therefore, it is quite possible that they will have to be purchased separately.

The combination tap has three water hoses
Installation procedure
You can install a combined crane with your own hands.
In this case, you need to perform the following types of work:
- Preparatory work;
- Dismantling the old mixer;
- Installation of a new crane;
- Connecting a new mixer.
Preparatory work
The first step is to shut off the cold and hot water. To do this, close the corresponding taps on the risers. Next, open the valves on the mixer and let the water drain.
Dismantling the old mixer
Then, as our instructions indicate, you need to dismantle the old crane.
- First, we unscrew the flexible hoses from the supply pipes (hot and cold water).

We unscrew the flexible hoses
To do this, use an adjustable wrench or a 14 or 13 wrench (depending on the model).
- Then, using a Phillips screwdriver, we unscrew the fastening screws located at the bottom of the mixer (under the sink lid). For more convenient work, you will have to illuminate yourself with a flashlight.
- Older models have one large nut instead of screws. You can simply unscrew it by hand. Then you need to remove the mounting plate. Then we take out the old tap together with the hoses through the top of the sink.

We take out the old tap
Installation of a new crane
- Before fixing the new crane, you need to clean its seat.
- Next, take three flexible hoses and screw them to the mixer. If the hoses are not included with the mixer, you will have to buy them.

Here we will screw three hoses
Advice!
Before purchasing hoses, we recommend that you measure the required length for each hose.
And measure with a small margin so that the hose is not stretched.
This will allow you to avoid unnecessary expenses when buying an unnecessarily long and unnecessary hassle when buying a hose that is too short.
- Then we put a gasket on the sink hole and pass the tap hoses through this hole.
- From the bottom of the sink, put on the second gasket on the mixer, and on top of it a fastening washer, which we then tighten with screws.
Connecting a new mixer
- Screw the two flexible hoses for hot and cold water to the corresponding pipes. Beforehand, a tee adapter must be screwed onto the cold water pipe. It will allow you to connect both a flexible hose for supplying water to the mixer and a hose for supplying water to the filter.
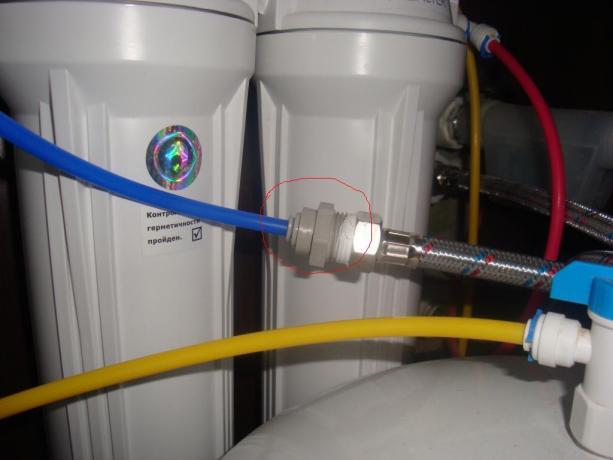
- The third hose (for filtered water) is connected to the filter outlet using a special adapter (see. Photo).

In the center - a special adapter
- After that, we open the taps on the risers, we resume the water supply. Opening the mixer valves one by one, we check its operation.
As you can see, it is not so difficult to install the combination mixer yourself. If something is not clear, we recommend watching the video on the installation of cranes posted on our portal. Well, if there were no questions and you succeeded, then congratulations on the successful installation.
The installed device will faithfully serve you for a long time. And this is given the fact that he practically does not require personal care. The only kind of maintenance it needs is occasionally wiping its surface to remove limescale and cleanse it from dirt.