Content
-
1 Mixer selection
- 1.1 Mixer types
- 2 Preparation before installing the mixer
- 3 Step by step mixer installation
We are so accustomed to the benefits of civilization that we can hardly imagine modern cuisine without water. What if the mixer suddenly breaks down, or needs to be changed during the repair?
In order not to turn this unpleasant problem into a catastrophe of a "universal" scale, we have written step-by-step instructions on how to install a faucet in the kitchen. It will help you to correctly and reliably replace or install a new mixer.

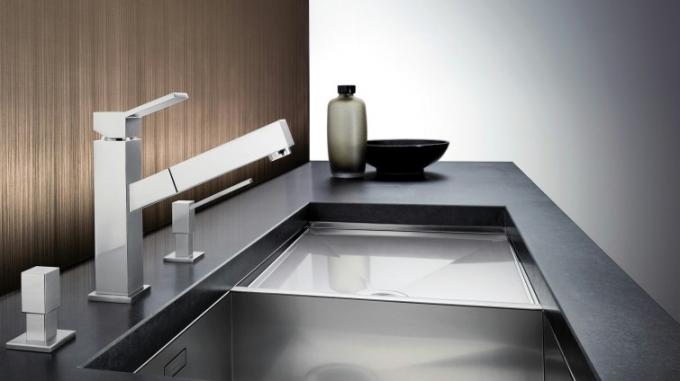
Perfectly matched and installed mixer
By adhering to the simple rules written in this article, you will save on two things: waiting time for a specialist and money that will have to be paid to the master for his work. Of course, there are kitchens with such a twisted layout that it is simply impossible to get to the tap - here you will have to spend money.
Mixer selection
How to start the installation? The first step is to purchase a suitable kitchen faucet device.
Here you need to consider the following nuances:
- The faucet should fit both pipes, sinks, sinks, and meet your aesthetic wishes.
- It should be durable and easy to use: optimal height, spout and wort.
- Material. A high-quality mixer can only be found among metal models (most often it is brass, but maybe an alloy). Undoubtedly, there are also ceramic and plastic taps, but the material itself speaks only of the decorativeness of such products, and not of its strength.

Ceramics - effective, but not practical
Read also the article on kitchen faucet with shower.
Mixer types
Knowing the basic requirements for kitchen faucets, let's look at their varieties. I must say that each of them has its own characteristics.
And if you are knowledgeable in this regard, you can choose the best mixer for your needs.
- Valve installation of a water supply kitchen tap. The good old designs we are so used to. Valve mixers are the tap gander itself and branches with valves to adjust the water temperature. Today there are single-valve and two-valve mixers. The former are practically not used today, since they are not particularly convenient. But the two-valve models are very convenient and practical.

Valve mixer model
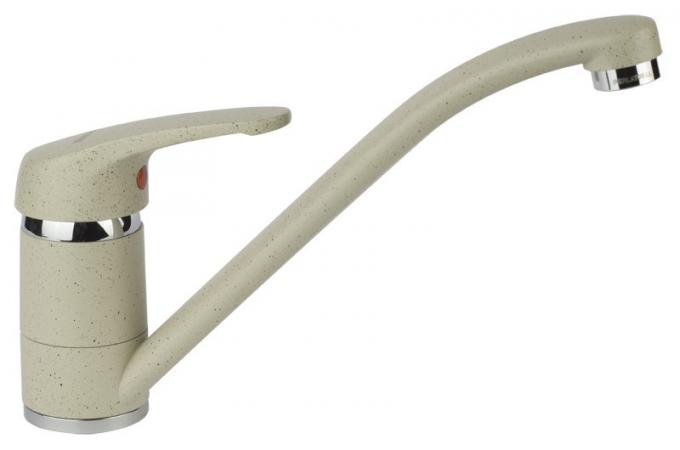
- Ball mixers. They consist of one lever and a ball module, which allows the lever to move to the sides, up, let in water and mix it. Ball structures are more accurate and comfortable in operation, since you do not have to tightly tighten the valves - you just need to lower the lever with a slight push and the water supply will stop.

Ball model
Note! This type of kitchen faucet has one drawback. The ball module installed in the mixer is very sensitive to hard water and the salts it contains.
Therefore, over time, the lever will turn with an unpleasant squeaky sound. The durability of such a mixer can be ensured by a high-quality filter for water purification.
- Automatic mixers. A real miracle of technology! Water delivery starts when you bring your hands to the gander or when you press a button. The water temperature is also controlled by hand, as in the photo below.

Automatic or contactless mixer

Principle of operation
Another plus of this device is that if the pressure in the pipes drops, the mixer will adjust it by itself and you will definitely not get a sharp stream of hot or cold water.
But nevertheless, automatic models do not differ in particular practicality - if the pressure in the pipes drops very strongly or if one of the types of water (cold or hot) is missing, the automatic mixer will stop working absolutely. Well, the price for such models is not always affordable for ordinary citizens.
Preparation before installing the mixer

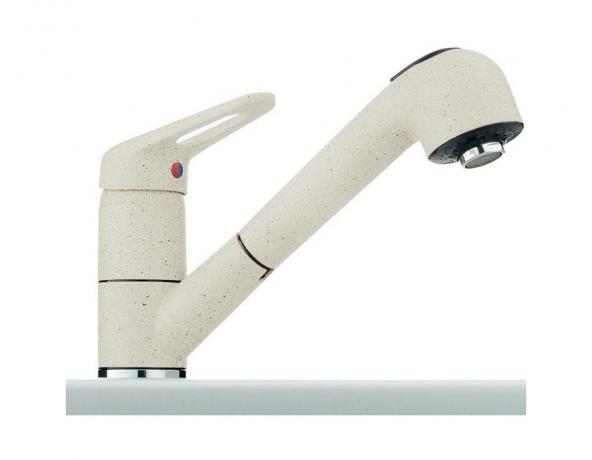
An interesting version of the mixer with a "shower" water supply mode - it is very convenient to wash fruits and vegetables
Preparatory steps are very important, so that later you do not have to spend doubly (for example, on new kitchen furniture, flooring or to call the same master).
Therefore, here are some helpful guidelines:
- All surfaces that could be accidentally damaged by tools, mixer fixings and unexpected water flow should be covered with cardboard or plastic.
- This is followed by the preparation of all the necessary tools and materials:
- Several adjustable wrenches of different sizes;
- Pliers;
- Two drain hoses;
- Two special studs (represent a kind of rod with an external thread, and has a connection - a threaded hole and a nut);
- Plate with round spacers with a hole in the middle (required for clamping) - 4 pieces;
- The same thick rubber plates for sealing - 4 pieces;
- Support plate (preferably made of metal for more secure attachment).

Some accessories
Important! Drain hoses should be selected wisely. Measure the required length before purchasing. Otherwise, you may purchase hoses that are too short or too long.
Short - will not reach the desired attachment point. And the long ones will bend under the sink, which is fraught with their rapid wear and tear and unexpected unpleasant "surprises".
- We shut off the water without fail. It is important not to forget to do this! Otherwise, you can burn yourself if hot water rushes when removing the old mixer. Better not to risk it.
- The sink should be moved as far as possible in order to expand the space for more convenient operation.
- Then it would be good to check the new mixer for serviceability. To do this, with our own hands, we test the tightness of the lower fastening (it is she who holds the entire structure). You also need to check the crane: to do this, turn it to the maximum permissible angle - it should not be too tight or, conversely, dangle. If there is such a thing, it is a defect in the product.
Well, if the mixer fits tightly enough, and the mount does not scroll, then you can continue the installation.
See also the article “How to install the kitchen combination faucet”.
Step by step mixer installation

Everything you need is there - proceed to installation
The whole difficulty of installing a kitchen faucet lies in the care and sequence of actions.
If everything is debugged and rechecked several times - be sure that the mixer will last a long time.
- First of all, it is necessary to screw the supply hose onto the mixer (preferably from the side of the short sleeve - a threaded metal rod).
- Then, remove the bronze nuts from the studs on the mixer and completely tighten the studs.
- We pass the hoses screwed onto the mixer through the hole in the sink.
- We mount the structure on the sink.
- We put on a rubber gasket.
- Pressing the metal plate, screw the bronze nuts onto the studs.
- Now tighten the nuts with a suitable wrench. The nuts must be tight, but not over-tightened! Otherwise, this will lead to unpleasant consequences - a breakdown of the nut, deformation of the plate, or even a breakdown of the tap when water is supplied.
- The next step in the installation is to connect the hoses to the water supply. This is not difficult to do, but it is important not to confuse. To do this, there is a simple rule: turn the mixer so that the tap is facing directly at you. Then it will be easy to determine where the water supply is (meaning cold / hot).
- The hoses are attached to the pipes with a union nut. While securing this whole thing, don't drag the connection!
- Checking all connections. There are 4 of them in total: 2 to the mixer from the sink side; 2 to common pipes. The mixer itself must be securely attached to the sink. The crane, as mentioned above, should not dangle or be too tight.
- And only after a thorough check can the water supply be turned on.
Now we can congratulate you on installing your kitchen faucet yourself! If you still have any questions on the topic of the article, we recommend watching the video on our website, which will certainly give detailed answers to them.
Read also the article “How to fix a kitchen faucet in an affordable way”.